🧢 Beautiful ✨ Detailed πŸ’ Adorable

Charming Budgerigar Parakeet Amigurumi Pattern

Charming Budgerigar Parakeet Amigurumi Pattern
4.9β˜…Rating
5-7 HoursTime Needed
2.2KMade This
βœ‚οΈ

Advanced Level

Designed for experienced crocheters, these patterns involve intricate designs and complex techniques to challenge and inspire.

⏱️

Weekend Treat

Takes 5-7 hours, making it an enjoyable project to finish over a couple of days.

πŸ₯

Charming Critter

Delightful animal designs with sweet details that capture the essence of your favorite woodland and farmyard friends.

About This Charming Budgerigar Parakeet Amigurumi Pattern

Charming Budgerigar Parakeet Amigurumi Pattern crochet pattern - detailed view

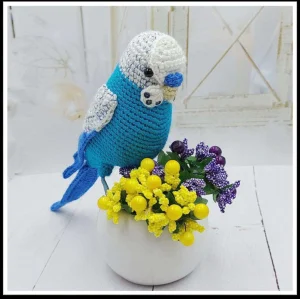
This realistic little bird makes a breathtaking gift for bird lovers or a stunning addition to your home decor. It looks incredibly lifelike perched on a decorative branch or nestled among potted plants.

Why You'll Love This Charming Budgerigar Parakeet Amigurumi Pattern

I absolutely adore how alive this little bird feels once you assemble all the parts. Inserting the wire frame gives the feet a realistic grip, and the clever way the feathers layer together on the wings is incredibly satisfying to crochet. It's a wonderful challenge that feels more like sculpting with yarn than just basic stitching.

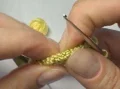
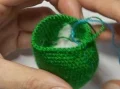
Charming Budgerigar Parakeet Amigurumi Pattern step 1 Charming Budgerigar Parakeet Amigurumi Pattern step 2 Charming Budgerigar Parakeet Amigurumi Pattern step 3 Charming Budgerigar Parakeet Amigurumi Pattern step 4

Switch Things Up

When I first sat down to design a realistic parakeet, I knew I wanted to capture that bright, curious look they get when they're looking at you. The secret to making this amigurumi look so lifelike is all in the details of the face and the layered wings. If you want to customize your bird, try looking up photos of real budgies! They come in such a breathtaking variety of colorsβ€”from bright sky blues and pastel violets to rich lutino yellows.

For a fun twist, you can use fine-tip fabric markers or fabric paint to gently shade the feather tips on the wings. It adds a wonderful depth that makes the crochet fabric look incredibly soft and realistic. Just apply the color with a dry brush technique, starting with a very small amount of pigment and building it up slowly. Take your time with the wirework on the feet as well; a nicely balanced wire frame means your finished little friend can perch happily on a real decorative branch in your home!

Common Mistakes & How to Fix Them

βœ— When winding the yarn around the wire for the legs, winding too loosely will cause the fibers to slip and expose the bare wire underneath over time.βœ— Skipping the loop offset instructions on the body will cause the color transitions and shaping lines to drift sideways instead of staying centered.βœ— If you do not leave a long enough yarn tail on the head-body piece, you won't have enough length to securely sew and attach the tail feathers.βœ— Attaching the cheeks too high or too far back will distort the facial features, making the bird look less like a budgie and more like a generic cartoon.

Charming Budgerigar Parakeet Amigurumi Pattern

Bring a splash of cheerful color into your home with this wonderfully detailed budgie. This project uses clever wirework and layered textures to capture the unmistakable, cheeky personality of a real parakeet. You'll love watching this little bird take shape right in your hands as you combine vibrant yarn shades with realistic shaping.

Advanced 5-7 Hours

Materials Needed for Charming Budgerigar Parakeet Amigurumi Pattern

β€” Main Fabric

  • 01
    Approximately 6g of YarnArt Etamin in light blue or bright green for the main body color
  • 02
    Approximately 3g of YarnArt Etamin in white or yellow for the face and forehead highlights
  • 03
    Small amounts of YarnArt Etamin in grey, beige, and dark blue for the beak, cere, and wing details
  • 04
    Fine sewing thread in navy blue or olive green to match your chosen color palette

β€” Tools Required

  • 01
    Steel crochet hook size 1.25 mm
  • 02
    Thin craft wire (0.5 mm for feathers and 1.0 mm for the leg frame)
  • 03
    Textile adhesive bandage or medical tape to wrap the wire ends
  • 04
    Two 5 mm black half-round beads for the eyes
  • 05
    High-quality fiberfill stuffing
  • 06
    Tapestry needle, wire cutters, and round-nose pliers
  • 07
    Clear craft glue (PVA and strong clear glue)
  • 08
    Six 2 mm black sequins or beads for the cheek spots

Progress Tracker

0% Complete

β€” 1. Legs :

Info :

Prepare the wire armature first. Cut four pieces of 1.0 mm wire to 8 cm lengths. Wrap the tips tightly with yarn to form the toes, securing with PVA glue. Bundle the wires together and wrap the main leg section to a length of 3 cm. Apply a small piece of adhesive bandage 2 cm up from the toes as a stopper.

Round 1 :

6 sc in MC, close the ring but do not pull it completely tight (6)

Round 2 :

6 sc (6)

Round 3 :

6 sc (6)

Round 4 :

(inc, 2 sc) * 2 (8)

Info :

Insert the prepared wire leg frame through the center of the magic circle. Do not tighten the circle yet. Repeat all steps to create a second matching leg.

β€” 2. Head and Body :

Info :

Start working with the white or yellow yarn, adding a strand of thin matching sewing thread to reinforce the fabric.

Round 1 :

ch 5, starting in second chain from hook: 3 sc, inc, turn to work along opposite side of chain: 3 sc (8)

Round 2 :

(inc, 2 sc, inc) * 2 (12)

Round 3 :

(sc, inc) * 6 (18)

Round 4 :

(2 sc, inc) * 6 (24)

Round 5 :

(3 sc, inc) * 6 (30)

Round 6 :

30 sc (30)

Round 7 :

30 sc (30)

Round 8 :

30 sc (30)

Round 9 :

(inc, 14 sc) * 2, then work 1 LO to keep the marker centered (32)

Round 10 :

32 sc (32)

Colour Change :

Switch to your main body color (blue or green yarn).

Round 11 :

inc, 31 sc (33)

Round 12 :

inc, 32 sc (34)

Round 13 :

(inc, 16 sc) * 2, then work 1 LO to adjust alignment (36)

Round 14 :

(inc, 17 sc) * 2 (38)

Round 15 :

inc, 18 sc, inc, 17 sc, inc (41)

Round 16 :

(inc, 19 sc) * 2, inc (44)

Round 17 :

44 sc (44)

Round 18 :

inc, 42 sc, inc, then work 1 LO (46)

Round 19 :

46 sc (46)

Round 20 :

46 sc (46)

Round 21 :

46 sc (46)

Round 22 :

inc, 44 sc, inc (48)

Round 23 :

48 sc, then work 1 LO (48)

Round 24 :

48 sc, then work 1 LO (48)

Round 25 :

48 sc, then work 1 LO (48)

Round 26 :

48 sc, then work 1 LO (48)

Round 27 :

48 sc, then work 1 LO (48)

Round 28 :

dec, 46 sc (47)

Round 29 :

dec, 45 sc (46)

Round 30 :

dec, 44 sc (45)

Round 31 :

dec, 41 sc, dec (43)

Round 32 :

3 sc, dec, 33 sc, dec, 3 sc (41)

Round 33 :

7 sc, dec, 23 sc, dec, 7 sc (39)

Info :

Begin stuffing the upper body firmly with fiberfill.

Round 34 :

dec, sc, join 5 stitches together with the first leg thigh, 2 sc, dec, 15 sc, dec, 2 sc, join 5 stitches together with the second leg thigh, sc, dec (32)

Info :

Adjust the leg wires to your preferred length, wrap the bandage tape around the wire ends inside the body, and firmly pull the magic circles on the legs closed.

Round 35 :

dec, 4 sc along the unworked stitches of the leg, 20 sc along the body, 4 sc along the unworked stitches of the leg, dec (30)

Round 36 :

7 sc, dec, 12 sc, dec, 7 sc (28)

Round 37 :

2 sc, dec, 20 sc, dec, 2 sc (26)

Round 38 :

5 sc, dec, 12 sc, dec, 5 sc (24)

Round 39 :

3 sc, dec, 14 sc, dec, 3 sc (22)

Round 40 :

sc, dec, 16 sc, dec, sc (20)

Round 41 :

sc, dec, sc, dec, 8 sc, dec, sc, dec, sc (16)

Info :

Stuff the lower body firmly, keeping the wire frame centered.

Round 42 :

thru.dec, dec, 8 sc, dec, thru.dec (12)

Round 43 :

thru.dec, dec, 4 sc, dec, thru.dec (8)

Info :

Fasten off, leaving a long yarn tail to attach the tail feathers later. Complete the stuffing process.

β€” 3. Wings :

Info :

Make two wings using your accent color yarn (white or yellow) held with a strand of matching sewing thread.

Row 1 :

ch 6, starting in second chain: inc, 3 sc, 3 sc in the last chain, turn to work on opposite side: 4 sc, sl st, ch 1, turn (12)

Row 2 :

inc, 5 sc, inc, ch 1, turn (9)

Row 3 :

inc, 7 sc, inc, ch 1, turn (11)

Row 4 :

inc, 4 sc, 2 hdc, inc, hdc, 2 dc, inc, dc, turn (14)

Row 5 :

inc, dc, 2 dc, inc, hdc, 2 hdc, 7 sc, 3 sc in the next stitch, 11 sc, 2 sc, 2 sc, continue in the same direction

Row 6 :

inc, dc, 2 dc, inc, hdc, 7 hdc, inc, hdc, 3 hdc, sc, sl st

Info :

Fasten off and leave a long tail for sewing.

β€” 4. Wing Feathers :

Info :

Prepare 18 cm of thin wire wrapped in green or gold yarn. Attach your main body color yarn to the sharp corner of the wing to begin crocheting the feathers directly onto the wing base.

Feather 1 :

ch 3, position the wrapped wire, sc into the bend of the wire, 3 sc, sc in the starting chain space, 2 sc along the wing base, turn

Feather 2 :

skip 2 stitches, 3 sc, ch 3, sc into the wire bend, 6 sc, sc in the starting stitch of this feather, sc along the wing base, turn

Feather 3 :

skip 1 stitch, 7 sc, ch 3, sc into the wire bend, 10 sc, sc in the starting stitch of this feather, 5 sc along the wing base, turn

Feather 4 :

skip 1 stitch, 15 sc, ch 6, sc into the wire bend, 21 sc, sc in the starting stitch of this feather, 3 sc along the wing base, sl st

Info :

Close the work invisibly without skipping any loops. Repeat the steps to add feathers to the second wing.

β€” 5. Tail Feathers :

Info :

Prepare a 32 cm piece of wire wrapped in blue yarn to form the support structure for the tail.

Feather 1 :

ch 25, 23 sc, 3 sc in the last chain, 23 sc along the opposite side of the chain

Feather 2 :

2 sc into the wire bend, then work in FLO: 15 sc, sc over the wire, turn, 15 sc, inc through both loops

Feather 3 :

inc, then work in FLO: 15 sc, sc over the wire, turn, 15 sc, sc, sl st

Info :

Fasten off and weave in the loose ends securely inside the stitches.

β€” 6. Forehead and Cheeks :

Info :

Use white or yellow yarn in a single strand.

Row 1 :

ch 6, starting in second chain: 5 sc, ch 1, turn (5)

Row 2 :

inc, 3 sc, inc, ch 1, turn (7)

Row 3 :

inc, 5 sc, inc, ch 1, turn (9)

Row 4 :

9 sc, ch 1, turn (9)

Row 5 :

9 sc, ch 1, turn (9)

Row 6 :

dec, 5 sc, dec, ch 1, turn (7)

Row 7 :

dec, 3 sc, dec, ch 1, turn (5)

Row 8 :

dec, sc, dec (3)

Info :

Crochet all the way around the edge of the piece with sc, adding increases at the corners to keep it flat. sl st to join, ch 1.

Row 9 :

3 sc, ch 1, turn (3)

Row 10 :

inc, sc, inc, ch 1, turn (5)

Row 11 :

(dc, 5 htr, dc) in the first stitch, 3 sc, (dc, 5 htr, dc) in the last stitch, sl st

Info :

Fasten off, leaving a long tail for sewing.

β€” 7. Cere :

Round 1 :

ch 3, 4 sc in the first chain, 4 sc in the next chain, sl st to join (8)

Info :

Fasten off, leaving a long tail for assembly.

β€” 8. Beak :

Round 1 :

ch 4, work around both sides of the chain: 2 sc, inc, 2 sc (6)

Round 2 :

dec, 4 sc (5)

Round 3 :

dec, 3 sc (4)

Info :

Stuff the beak lightly with leftover yarn scraps, pinch closed, and sew through the front loops to secure.

Assembly Instructions

  • Position the forehead and cheek patch piece on the head, aligning the top edge with the center of the starting chain of the head, and sew down securely.
  • Sew the beak to the faceplate using small, invisible stitches right below the forehead section.
  • Fold the top edge of the cere slightly to mimic nostrils, then sew it directly above the beak.
  • Glue the 5 mm black half-round beads on either side of the head, nestled just under the edges of the forehead piece.
  • Embroider small black spots on the cheeks using beads, sequins, or thread, and add a small stroke of blue thread next to them.
  • Bend the wire base of the tail feathers, insert it into the opening at the bottom of the body, and sew it in place using the yarn tail.
  • Shape the poseable wire feet using pliers to bend the toes realistically, then trim and file any sharp wire ends.

Important Notes

  • πŸ’‘To achieve a smooth, professional finish, make sure to use an invisible decrease method by working only in the front loops.
  • πŸ’‘Ensure your stitches are tight enough that the fiberfill stuffing does not peek through the gaps of your fabric.
  • πŸ’‘When inserting the wire frames, wrap the ends in adhesive bandage tape to prevent them from poking through the yarn.
  • πŸ’‘Take your time shaping the wire toes with pliers to give your budgie a realistic, steady stance.

I hope you have the absolute best time bringing this charming little budgie to life! There is something so magical about seeing those tiny features and layered feathers come together. Don't forget to take your time with the wire detailsβ€”they really give this sweet bird its lifelike personality. Happy crafting, and may your days be filled with cozy stitches! 🧢✨🐦

You ask,

we answer.

FAQs

What is the best way to prevent the wire from poking through the bird's body?

Always wrap the ends of your wire frames securely with several layers of textile adhesive bandage or medical tape before inserting them. This cushions the sharp points so they won't slip through your stitches.

Can I make this project without using the wire frames?

You can, but the legs and tail won't be poseable, and the bird will not be able to stand on its own. If you skip the wire, you will need to starch the feathers heavily to keep them from drooping.

What yarn can I substitute if I can't find YarnArt Etamin?

Any high-quality lace weight yarn or size 10 crochet cotton thread will work beautifully. Just match your hook size to the yarn to keep the stitches dense and tight.

How do I make sure the eyes are placed symmetrically?

Pin the forehead and cheek patch piece to the head first. Use sewing pins to mark the eye positions on both sides, checking the symmetry from the front and top before gluing.