About This Chibi Iron Man Amigurumi Pattern
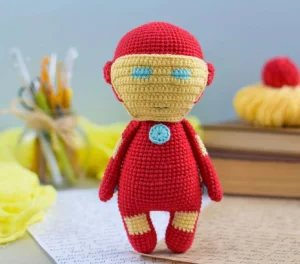
Whether you are making him for a kid's bedroom or your own collection, this little hero looks fantastic on a shelf and makes a truly thoughtful handmade gift for any Marvel fan.
Ideal for those with basic crocheting experience, featuring slightly more advanced stitches and techniques to expand your skills.
Takes 5-7 hours, making it an enjoyable project to finish over a couple of days.
Playful characters full of personality, designed to spark imagination and become cherished playtime favorites.
Whether you are making him for a kid's bedroom or your own collection, this little hero looks fantastic on a shelf and makes a truly thoughtful handmade gift for any Marvel fan.
I love how the helmet actually works like a little hood! It is such a clever way to handle the mask-on and mask-off look without having to make two separate heads. Plus, those tiny light blue lasers on his hands are just the cutest detail that makes him feel so authentic.
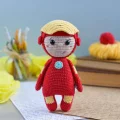
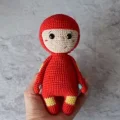
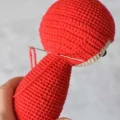
I've always had a soft spot for superheroes, but there is something about making them in this 'chibi' style that makes them so much more approachable and fun to craft. When I first worked on this design, I spent ages trying to figure out the best way to do the helmet. I wanted it to feel like a real part of the suit rather than just a flat piece of fabric, and the removable mask was the perfect solution.
One tip I've learned from making a few of these is to use a slightly larger hook for the helmet if you tend to crochet tightly. Since it has to fit over the head, it needs that tiny bit of extra wiggle room to look right and not distort the head shape. Also, for the eyes, if you are using safety eyes, try to place them exactly where the pattern suggests—it really changes the whole 'vibe' of his face from grumpy to cute.
This project is such a great way to use up those scraps of yellow and light blue you have lying around in your stash. It doesn't take much yarn at all, but it makes such a huge impact on the final look. I really hope this pattern brings a smile to your face and maybe even inspires you to start a whole team of crocheted heroes for your own home!
Bring a little superhero magic to your crochet hook with this adorable armored hero. He is the perfect size for a desk buddy or as a special gift for the comic book lover in your life. You will love seeing his iconic red and gold suit come together stitch by stitch as you create your very own pocket-sized Avenger.
Using the flesh-colored yarn, create a MR and work 6 sc into it (6)
Work 6 inc around the circle (12)
Repeat a sequence of 1 sc followed by 1 inc 6 times (18)
1 sc, 1 inc, then repeat (2 sc, 1 inc) 5 times, finishing with 1 sc (24)
Repeat a sequence of 3 sc followed by 1 inc 6 times (30)
2 sc, 1 inc, then repeat (4 sc, 1 inc) 5 times, finishing with 2 sc (36)
Repeat a sequence of 5 sc followed by 1 inc 6 times (42)
3 sc, 1 inc, then repeat (6 sc, 1 inc) 5 times, finishing with 3 sc (48)
Repeat a sequence of 7 sc followed by 1 inc 6 times (54)
4 sc, 1 inc, then repeat (8 sc, 1 inc) 5 times, finishing with 4 sc (60)
Repeat a sequence of 9 sc followed by 1 inc 6 times (66)
Work 66 sc for these eleven rounds (66)
If you are using eyes with stalks, place them now between Rounds 18 and 19, leaving a gap of 10 sc between them. Stuff the head firmly as you go.
Repeat a sequence of 9 sc followed by 1 dec 6 times (60)
4 sc, 1 dec, then repeat (8 sc, 1 dec) 5 times, finishing with 4 sc (54)
Repeat a sequence of 7 sc followed by 1 dec 6 times (48)
3 sc, 1 dec, then repeat (6 sc, 1 dec) 5 times, finishing with 3 sc (42)
Repeat a sequence of 5 sc followed by 1 dec 6 times (36)
2 sc, 1 dec, then repeat (4 sc, 1 dec) 5 times, finishing with 2 sc (30)
Repeat a sequence of 3 sc followed by 1 dec 6 times (24)
1 sc, 1 dec, then repeat (2 sc, 1 dec) 5 times, finishing with 1 sc (18)
Repeat a sequence of 1 sc followed by 1 dec 6 times (12)
Work 6 dec to close (6)
Fasten off, weave the tail through the last 6 stitches to tighten, and hide the end inside the head.
Starting with red yarn, work 6 sc into a MR (6)
Work 6 inc (12)
Repeat (1 sc, 1 inc) 6 times (18)
Work 18 sc for these five rounds (18)
Switch colors: 1 sc in red, 6 sc in yellow, and 11 sc in red for these four rounds (18)
Cut the red yarn and fasten off, but leave the yellow yarn attached for now.
Repeat the same steps as the Right Leg for the first eight rounds in red (18)
Switch colors: 10 sc in red, 6 sc in yellow, and 2 sc in red for these four rounds (18)
Keep both the red and yellow yarns attached to the left leg as you will continue from here to the body.
From the second leg, ch 6 and join to the first leg. Work 1 sc red, 6 sc yellow, 11 sc red around the first leg. Work 6 sc red across the chain. Work 10 sc red, 6 sc yellow, 2 sc red around the second leg. Work 6 sc red across the other side of the chain (48)
Cut the yellow yarn and fasten off. Stuff the legs and continue with red for the rest of the body.
Repeat (7 sc, 1 inc) 6 times (54)
Work 54 sc for these nine rounds (54)
Repeat (7 sc, 1 dec) 6 times (48)
Work 48 sc for these three rounds (48)
3 sc, 1 dec, then repeat (6 sc, 1 dec) 5 times, finishing with 3 sc (42)
Work 42 sc for these three rounds (42)
Repeat (5 sc, 1 dec) 6 times (36)
Work 36 sc for these three rounds (36)
2 sc, 1 dec, then repeat (4 sc, 1 dec) 5 times, finishing with 2 sc (30)
Work 30 sc for these two rounds (30)
Repeat (3 sc, 1 dec) 6 times (24)
Work 24 sc around (24)
Work an extra 12 sc to shift the start of the round to the back. Leave a long tail for sewing.
Using red yarn, work 5 sc into a MR (5)
Work 5 inc (10)
Work 10 sc for these eleven rounds (10)
Switch colors: 4 sc in yellow, then 6 sc in red for these five rounds (10)
Fasten off the yellow yarn.
Work 10 sc in red for these three rounds (10)
Repeat (3 sc, 1 dec) twice (8)
Press the opening flat and crochet through both layers with 4 sc to close. Leave a tail for sewing.
Follow the same increase pattern as the head rounds 1 to 11 (66)
Work 66 sc for these six rounds (66)
Fasten off. Now you will add the lower shaping by working in rows.
Attach red yarn to the 46th stitch of the last round and work 42 sc, then turn (42)
ch 1, work 42 sc, and turn for these four rows (42)
ch 1, 6 sc, 1 dec, repeat (12 sc, 1 dec) twice, 6 sc, turn (39)
ch 1, repeat (11 sc, 1 dec) 3 times, turn (36)
ch 1, 5 sc, 1 dec, repeat (10 sc, 1 dec) twice, 5 sc, turn (33)
ch 1, repeat (1 dec, 9 sc) 3 times, turn (30)
ch 1, 4 sc, 1 dec, repeat (8 sc, 1 dec) twice, 4 sc, turn (27)
ch 1, repeat (7 sc, 1 dec) 3 times, turn (24)
ch 1, 3 sc, 1 dec, repeat (6 sc, 1 dec) twice, 3 sc, turn (21)
ch 1, repeat (1 dec, 5 sc) 3 times, turn (18)
Fasten off, leaving a long tail for sewing onto the head.
Using red yarn, work 6 sc in MR (6)
Work 6 inc (12)
Work 12 sc for these two rounds (12)
Work 6 dec (6)
Fasten off and tighten the opening. Do not stuff.
Using yellow yarn, ch 12. Starting in the 2nd ch from hook, work 12 sc, turn (12)
ch 1, repeat (3 sc, 1 inc) 3 times, turn (15)
ch 1, work 15 sc, turn (15)
ch 1, 2 sc, 1 inc, repeat (4 sc, 1 inc) twice, 2 sc, turn (18)
ch 1, work 18 sc, turn (18)
ch 1, repeat (1 inc, 5 sc) 3 times, turn (21)
ch 1, work 21 sc, turn (21)
ch 1, 3 sc, 1 inc, repeat (6 sc, 1 inc) twice, 3 sc, turn (24)
ch 1, work 24 sc, turn (24)
ch 1, repeat (7 sc, 1 inc) 3 times, turn (27)
ch 1, 6 sc yellow, 5 sc light blue, 5 sc yellow, 5 sc light blue, 6 sc yellow, turn (27)
Repeat Row 11 exactly for another row of the eyes (27)
ch 1, work 27 sc in yellow, turn (27)
Work 1 row of sc around the entire outer edge of the mask, making an inc in each corner for a smooth finish.
Attach red yarn to the side between rows 5 and 6. ch 15 and sl st into the corner of the mask. Repeat on the other side.
Using light blue yarn, ch 1 and work 8 sc into a MR. sl st to join and fasten off (8)
Using light blue yarn, ch 2 and work 12 hdc into a MR. sl st to join and fasten off (12)
I hope you have a blast making this little armored Avenger! He has been such a huge hit in my house, and I am sure he will be a favorite in yours too. Don't forget to take your time with the assembly—it is where the personality really comes through and makes the character pop. If you run into any snags, just take a breath and count those stitches again. Happy crocheting, and I absolutely cannot wait to see your finished hero guarding your shelf! 🧶 ✨
Using the recommended 2mm hook and sport weight yarn, your finished hero will stand approximately 17 cm (6.7 inches) tall.
Yes! The pattern recommends 10-12mm safety eyes. Just be sure to insert them before you finish and close the head at Round 32.
Try using a 2.25mm or 2.5mm hook specifically for the helmet sections. This will give it just enough stretch to slide on easily.
When changing from red to yellow, pull the new color through the last two loops of the previous stitch. This creates a sharp, clean line.
