About This Cinta Corset Bow Crochet Bag Pattern
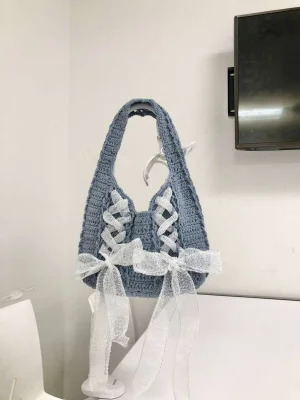
This bag makes a genuinely stunning handmade gift — wrap it up with a coordinating ribbon and whoever receives it will think you spent weeks on it. It photographs beautifully too.
Ideal for those with basic crocheting experience, featuring slightly more advanced stitches and techniques to expand your skills.
Fits nicely into a free afternoon — 2 to 5 hours of focused, enjoyable crocheting.
An elegant detail to elevate any look, combining traditional techniques with contemporary design sensibilities.
This bag makes a genuinely stunning handmade gift — wrap it up with a coordinating ribbon and whoever receives it will think you spent weeks on it. It photographs beautifully too.
I love this one because the stitch pattern feels so satisfying to work — you get into this nice flow of sc rows with those chain loops, then the dc rows, and suddenly you've got this textured fabric with built-in eyelets just waiting for the ribbon. The handle shaping is clever too; the decreases happen gradually so you never feel like you're fighting the yarn. And then at the very end, threading the ribbon through? That's the most fun part. It feels like the whole bag transforms in about five minutes.

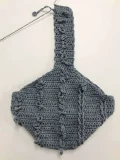
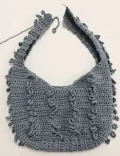
I honestly wasn't sure what to expect when I first looked at this pattern — the photo shows this stunning corset-laced bag with big dreamy bows and I thought, okay, this is going to be complicated. But once I actually sat down with it, the logic is so satisfying. You're essentially building a grid of chain loops into the fabric as you go, and those loops become the eyelets for the ribbon later. It's one of those techniques where the structure and the decoration are the same thing, which I love.
The yarn choice genuinely changes the whole vibe here. The heathered cotton in the sample gives it that dusty blue, slightly vintage look — but I've been sketching out a version in cream cotton with black velvet ribbon that I think would be incredible. You could also go full maximalist and use multiple ribbon colors, or keep it minimal with a single thin satin bow. The bag itself is the canvas.
One thing I'd tell anyone starting this: take your time on Row 1 of the body. That's where you establish the column positions, and every single row after it refers back to those same spots. I used a different colored stitch marker for each chain position the first time through, and it made the rest of the body almost automatic. Also — weave in your ends as you go. I know everyone says that and nobody does it, but with a project this tall, you'll thank yourself later.
The handle shaping is genuinely clever. Those sc3tog and dc3tog decreases taper the strap so gradually that the finished handle looks almost sculpted. It transitions from a wide opening edge down to a neat 9-stitch strap without any awkward steps. If you want a longer strap for a crossbody carry, just keep repeating the Rows 9–10 pair until it measures right against your body.
This bag stopped me in my tracks the first time I saw it — that corset-laced front with the big dreamy bows just has so much personality. You'll be working a modified Jacob's ladder-style stitch that creates those gorgeous vertical columns, and honestly the technique is more fun than it looks once you get the rhythm going. The finished piece sits around 41 cm long and 29 cm wide, making it a proper carry-everything shoulder bag with serious style. Your yarn choice changes everything here — a heathered cotton gives it that soft dusty-blue look you see in the photos, but there's so much room to make it your own.
The bag is built from the bottom up. You'll crochet the base panel first, then pick up stitches along its edges to build the body. Keep your right side facing out throughout — the foundation tail should sit on the left. Ch 3 counts as 1 dc and is included in your stitch count. In all dc rows, begin working from the 2nd st (not into the ch 3 itself).
Ch 15.
Work 1 dc into the 4th ch from your hook, then dc across the remaining 11 ch. Ch 3 and TO. (13 sts including the ch 3)
Dc across all 12 sts, ch 3 and TO. (13 sts including the ch 3)
Dc across all 12 sts, ch 3 and TO. (13 sts)
Dc across all 12 sts, ch 3 and TO. (13 sts)
Dc across all 12 sts, ch 3 and TO. (13 sts)
Dc across all 12 sts, ch 3 and TO. (13 sts)
Dc across all 12 sts, ch 3 and TO. (13 sts)
Dc across all 12 sts, ch 3 and TO. (13 sts)
Dc across all 12 sts, ch 3 and TO. (13 sts)
Dc across all 12 sts, ch 3 and TO. (13 sts)
Dc across all 12 sts, ch 3 and TO. (13 sts)
Dc across all 12 sts, ch 3 and TO. (13 sts)
Dc across all 12 sts, ch 3 and TO. (13 sts)
Dc across all 12 sts, ch 3 and TO. (13 sts)
Dc across all 12 sts, ch 3 and TO. (13 sts)
Dc across all 12 sts, then fasten off. (13 sts) Finished base panel measures approximately 8 cm x 21.5 cm.
Join your yarn to the 2nd st at the top left corner of the base panel, with the right side facing up. The body uses a modified ladder-style stitch: 9 sts form one group (8 sc between the ch loops), with ch 10 worked at every 9th st. There are 10 complete groups across the row, giving 90 sts per body row. Along the long sides of the base where there are no v-stitches, pick up stitches in the available holes — aim for 2 sc per base row to keep spacing even. When working dc on the ch-10 loop in even rows, yarn over, insert the hook back-to-front through the centre of the loop, then complete it as a normal dc.
Insert hook and ch, sc into the same st, sc 4, ch 10, sl st back into the last sc worked (the 5th sc), sc 9, repeat from * to * 8 more times for 9 complete groups total, then ch 10, sl st into the last sc, sc 4, sl st, ch 3 and TO. (90 sts, 10 groups)
Dc 89 across, sl st into the 3rd ch, ch 1 and TO. (90 sts)
Repeat Row 1 — sc 5 to start, ch 10, sl st into last sc, sc 9, repeat 8 more times, ch 10, sl st into last sc, sc 4, sl st, ch 3 and TO. Make sure all chain columns line up directly above those from Row 1. (90 sts)
Dc 89 across, sl st into the 3rd ch, ch 1 and TO. (90 sts)
Repeat Row 1 pattern — sc 5, ch 10, sl st into last sc, sc 9, repeat 8 times, ch 10, sl st into last sc, sc 4, sl st, ch 3 and TO. Verify chain columns are in the same positions. (90 sts)
Dc 89, sl st into the 3rd ch, ch 1 and TO. (90 sts)
Repeat Row 1 pattern — sc 5, ch 10, sl st into last sc, sc 9, repeat 8 times, ch 10, sl st into last sc, sc 4, sl st, ch 3 and TO. (90 sts)
Dc 89, sl st into the 3rd ch, ch 1 and TO. (90 sts)
Repeat Row 1 pattern — sc 5, ch 10, sl st into last sc, sc 9, repeat 8 times, ch 10, sl st into last sc, sc 4, sl st, ch 3 and TO. (90 sts)
Dc 89, sl st into the 3rd ch, ch 1 and TO. (90 sts)
Repeat Row 1 pattern — sc 5, ch 10, sl st into last sc, sc 9, repeat 8 times, ch 10, sl st into last sc, sc 4, sl st, ch 3 and TO. (90 sts)
Dc 89, sl st into the 3rd ch, ch 1 and TO. (90 sts)
Repeat Row 1 pattern — sc 5, ch 10, sl st into last sc, sc 9, repeat 8 times, ch 10, sl st into last sc, sc 4, sl st, ch 3 and TO. (90 sts)
Dc 89, sl st into the 3rd ch, ch 1 and TO. (90 sts)
Repeat Row 1 pattern — sc 5, ch 10, sl st into last sc, sc 9, repeat 8 times, ch 10, sl st into last sc, sc 4, sl st, ch 3 and TO. (90 sts)
Dc 89, sl st into the 3rd ch, ch 1 and TO. (90 sts) — This completes 8 full pairs of Rows 1–2. Add or remove pairs here to adjust the bag height.
This is the final body row and creates the opening edge. Work like Row 1 but skip the chain loops for 4 columns in the centre of the bag (those 4 positions get plain sc instead). Full written instruction: Sc 5, ch 10, sl st into last sc, sc 27, ch 10, sl st into last sc, sc 9, repeat 2 more times for 3 total, sc 18, ch 10, sl st into last sc, sc 9, ch 10, sl st into last sc, sc 4, sl st and fasten off. Finished body measures approximately 18 cm x 29 cm.
With the right side of the finished body facing up, locate the 3rd st from the left that sits in the same column as the chain loops. Flip the work so the wrong side is now facing up before you begin Row 1. The handle is shaped with decreases on both edges (sc3tog and dc3tog) that narrow it from 37 sts down to 9 sts over 8 rows, then continues at 9 sts for the strap length. Make both handles identically.
Insert hook, ch 3, dc 36 across. Ch 1 and TO. (37 sts)
Sc3tog at the beginning, sc 7, ch 10, sl st into last sc, sc 9, repeat 1 more time, ch 10, sl st into last sc, sc 6, sc3tog at end. Ch 3 and TO. (33 sts)
Dc3tog at beginning (using ch 3 plus 2 unfinished dc), dc 27, dc3tog at end. Ch 1 and TO. (29 sts)
Sc3tog, sc 3, ch 10, sl st into last sc, sc 9, repeat 1 more time, ch 10, sl st into last sc, sc 2, sc3tog. Ch 3 and TO. (25 sts)
Dc3tog, dc 19, dc3tog. Ch 1 and TO. (21 sts)
Sc3tog, sc 8, ch 10, sl st into last sc, sc 7, sc3tog. Ch 3 and TO. (17 sts)
Dc3tog, dc 11, dc3tog. Ch 1 and TO. (13 sts)
Sc3tog, sc 4, ch 10, sl st into last sc, sc 3, sc3tog. Ch 3 and TO. (9 sts)
Dc 8. Ch 1 and TO. (9 sts)
Sc 5, ch 10, sl st into last sc, sc 4. Ch 3 and TO. (9 sts)
Rows 11 onward: Continue repeating Rows 9 and 10 until your strap reaches the length you want. The sample handle was extended by repeating the pair 7 more times after the initial Rows 9–10, bringing the strap to Rows 11–24. Adjust freely for a shorter or longer shoulder strap.
Dc 8, ch 3 and TO. (9 sts)
Dc 8 and fasten off. (9 sts) — Complete Row 26, then repeat the entire handle section for the second strap.
Once both handles are finished, coil up all the loose chain loops tidily before joining.
Hold the two handles together with wrong sides facing up. Join them using sc, sl st, or sewing — whichever method feels most secure for your yarn. Make sure to include the final 2 chain stitches from each handle in this join so the seam sits flush.
Do not cut the yarn after joining. Ch 1, then sc evenly along the full edge of one side of the bag opening. Keep your tension consistent so the edge doesn't ripple or pull.
After completing one side, fasten off. Rejoin yarn at the other side of the handle join, ch 1, sc across that edge, and work across to incorporate the chain loops from that side into the edging. Fasten off and weave in all remaining ends.
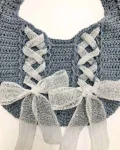
The ribbon is threaded through the vertical chain columns on the front of the bag to create the corset lacing. You can use any ribbon you like — organza, satin, or even a strip of scrap fabric or lace. Width and color are completely up to you; mixing textures looks especially lovely. Lace up the columns and tie into a bow at the bottom. The sample uses two separate ribbon lengths, one for each side, finishing in two large bows.
You've just made something genuinely beautiful — a bag with structure, personality, and that totally irresistible corset detail that people will absolutely ask you about. The Cinta Bag is one of those projects that looks like it took serious skill but comes together so logically once you're inside the rhythm of it. Style it with absolutely everything. 🎀 Swap the ribbon color for a completely different mood — black satin for something edgy, pink organza for something soft, or a printed fabric strip for something totally unique. This one's a keeper. 🧶✨
TO stands for 'turn over' — it just means flip your work to the other side before starting the next row, the same way you would in any flat back-and-forth crochet project.
This is the trickiest part of this pattern. Place a stitch marker in the stitch where you work each ch 10 at the end of every odd row, and check that your markers line up vertically before you start the next odd row. If a column has shifted, it's easier to catch it early than to rip back later.
Yes — the pattern is designed to scale. For a smaller bag, work in multiples of 7 stitches per group instead of 9 (so 6 sc between chains, and ch 10 on the 7th st). For a larger bag, use multiples of 11. When you change the stitch count, also adjust the number of rows in the base panel to keep the proportions balanced.
It matters a lot for structure. The pattern is written for medium weight (size 4) cotton, which gives the bag a firm, defined fabric that holds its shape. If you use a softer or heavier yarn, the bag may droop — you can compensate by going down a hook size or adding a lining.
The sample uses sheer organza ribbon which gives it that floaty, romantic look. Satin ribbon gives a more polished finish. Velvet ribbon leans more dramatic. Even strips of scrap fabric or lace work — just make sure whatever you use is long enough to lace all the way up the columns and still tie into a full bow at the bottom with tails to spare.
Not at all — that's just the length the designer used for the sample. Rows 9 and 10 form the strap section, and you repeat them until the handle is as long as you want it. Hold the work up to your shoulder as you go and stop when it feels right for your body.
