🧶 Beautiful ✨ Detailed 💝 Adorable

Coastal Tulip Shell Amigurumi Pattern

Coastal Tulip Shell Amigurumi Pattern
4.0★Rating
3-5 HoursTime Needed
1.8KMade This
✂️

Intermediate Level

Ideal for those with basic crocheting experience, featuring slightly more advanced stitches and techniques to expand your skills.

⏱️

Quick Craft

Fits nicely into a free afternoon — 2 to 5 hours of focused, enjoyable crocheting.

🏡

Cozy Accent

A warm touch for your space that transforms ordinary corners into inviting nooks filled with handmade charm.

About This Coastal Tulip Shell Amigurumi Pattern

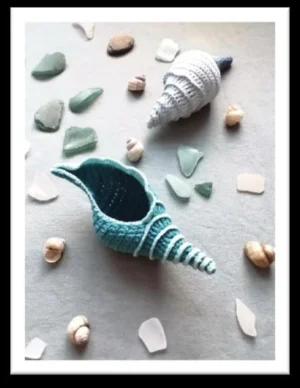
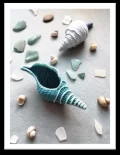
Coastal Tulip Shell Amigurumi Pattern crochet pattern - detailed view

This shell makes a stunning handmade gift for beach lovers or a beautiful accent for a bathroom shelf. It's a wonderful way to play with different yarn weights and textures in a single project.

Why You'll Love This Coastal Tulip Shell Amigurumi Pattern

I honestly adore how this pattern transitions from a simple spiral into a complex-looking shell opening. Working with the thinner thread for the border feels like adding a bit of jewelry to your crochet—it's that final detail that really makes the whole thing shine. Plus, the stiffening step is so satisfying; seeing a soft piece of crochet transform into a solid, realistic shell is like a little bit of maker magic!

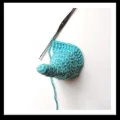
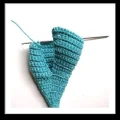
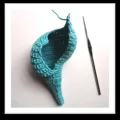
Coastal Tulip Shell Amigurumi Pattern step 1 Coastal Tulip Shell Amigurumi Pattern step 2 Coastal Tulip Shell Amigurumi Pattern step 3 Coastal Tulip Shell Amigurumi Pattern step 4

Switch Things Up

I’ve always been drawn to the ocean, so finding a way to recreate those beautiful, spiraled treasures with just a hook and some yarn was such a joy for me. This tulip shell is one of those projects that feels a bit like magic. You start with these tiny, tight rounds that slowly expand into this elegant, sweeping form.

One thing I’ve learned from making a few of these is that the tension really matters. You want those stitches to be nice and snug so the shell holds its structure even before you get to the glue stage. I actually prefer using a 1.5mm hook even if the yarn suggests something larger—it just gives that crisp, professional look we all love.

When it comes to the shaping, don't be intimidated by the glue! It’s what transforms the crochet into a piece of decor. I like to use a chopstick to really guide the tip into a sharp point while it’s still damp. If you’re feeling adventurous, try adding a few tiny seed beads along the trim before you dip it in the stiffener. It looks like little droplets of sea spray catching the light. It’s those personal touches that make handmade pieces so special, right? I can't wait to see how yours turns out!

Common Mistakes & How to Fix Them

✗ Using a hook that is too large for your yarn will result in loose stitches that won't hold the stiffening mixture effectively.✗ If you forget to work in the back loops only during the first eight rounds, you'll lose the distinct spiral texture that defines the shell.✗ Not stuffing the shell firmly enough with plastic bags while it dries can cause the body to collapse or lose its rounded shape.✗ Adding beads or paint after the glue has dried is much more difficult and can leave messy residue on the finished surface.

Coastal Tulip Shell Amigurumi Pattern

Bring the calming beauty of the shoreline into your home with this exquisitely detailed tulip shell. You'll love watching the elegant spiral take shape as you work from the tip down to the sweeping opening. It's a truly unique project that combines traditional crochet with a bit of creative sculpting, resulting in a piece that looks like it was plucked straight from a sandy beach. Whether you're making a single statement piece or a whole collection for a glass display, the process is as relaxing as a day by the sea.

Intermediate 3-5 Hours

Materials Needed for Coastal Tulip Shell Amigurumi Pattern

— Main Fabric

  • 01
    Madame Tricote Camilla (100% cotton, 50g/125m) or similar sports weight cotton yarn for the main shell body
  • 02
    Madame Tricote Maxi (100% cotton, 100g/565m) or similar lace weight cotton thread for the delicate trim and border

— Tools Required

  • 01
    1.5 mm crochet hook for the main shell
  • 02
    1.0 mm crochet hook for the fine thread details
  • 03
    Sharp scissors
  • 04
    Yarn needle for weaving in ends
  • 05
    White craft glue for stiffening
  • 06
    Water for mixing with the glue
  • 07
    Small plastic bags for internal shaping during drying
  • 08
    Chopstick or similar thin tool to help shape the narrow tip
  • 09
    Rubber gloves (optional for the glue dipping process)

Progress Tracker

0% Complete

— 1. Shell Body :

Info :

The body of the shell is worked in continuous rounds. To create the spiral texture, work every stitch in BLO.

Round 1 :

Start with 6 sc into a MR (6)

Round 2 :

* 1 sc in each of the next 2 sts, then inc in the next st; repeat from * once more (8)

Round 3 :

* 1 hdc in each of the next 3 sts, then 2 hdc in the next st; repeat from * once more (10)

Round 4 :

* 1 dc in each of the next 4 sts, then 2 dc in the next st; repeat from * once more (12)

Round 5 :

* 1 dc in each of the next 2 sts, then 2 dc in the next st; repeat from * 3 more times (16)

Round 6 :

* 1 dc in each of the next 3 sts, then 2 dc in the next st; repeat from * 3 more times (20)

Round 7 :

* 1 tr in each of the next 3 sts, then 2 tr in the next st; repeat from * 4 more times (25)

Round 8 :

* 1 tr in each of the next 4 sts, then 2 tr in the next st; repeat from * 4 more times (30)

— 2. Shell Opening :

Info :

From this point on, you will turn your work at the end of every row.

Row 1 :

Work this row in FLO: ch 1 (counts as first sc), 2 sc in the next st, then 1 sc in every remaining st; turn (31)

Info :

Work all following rows through both loops.

Row 2 :

ch 1 (counts as first sc), sc2tog, * 1 sc in each of the next 2 sts, inc in the next st; repeat from * 7 more times, then 1 sc in the last 4 sts; turn (38)

Row 3 :

ch 1 (counts as first sc), 2 sc in the next st, then 1 sc in every remaining st; turn (39)

Row 4 :

ch 1 (counts as first sc), sc2tog, then 1 sc in every remaining st; turn (38)

Row 5 :

ch 1 (counts as first sc), 2 sc in the next st, then 1 sc in every remaining st; turn (39)

Row 6 :

ch 1 (counts as first sc), sc2tog, then 1 sc in every remaining st; turn (38)

Row 7 :

ch 1 (counts as first sc), 2 sc in the next st, then 1 sc in every remaining st; turn (39)

Row 8 :

ch 1 (counts as first sc), sc2tog, then 1 sc in every remaining st; turn (38)

Row 9 :

ch 1 (counts as first sc), 2 sc in the next st, then 1 sc in every remaining st; turn (39)

Row 10 :

ch 1 (counts as first sc), sc2tog, then 1 sc in every remaining st; turn (38)

Row 11 :

ch 1 (counts as first sc), 2 sc in the next st, then 1 sc in every remaining st; turn (39)

Row 12 :

ch 1 (counts as first sc), * sc2tog, 1 sc in each of the next 2 sts; repeat from * 8 more times, then 1 sc in the last 2 sts; turn (30)

Row 13 :

ch 1 (counts as first sc), 2 sc in the next st, then 1 sc in every remaining st; turn (31)

Row 14 :

ch 1 (counts as first sc), * sc2tog, 1 sc in each of the next 2 sts; repeat from * 6 more times, then 1 sc in the last 2 sts; turn (24)

Row 15 :

ch 1 (counts as first sc), 2 sc in the next st, then 1 sc in every remaining st; turn (25)

Row 16 :

ch 1 (counts as first sc), * sc2tog, 1 sc in each of the next 2 sts; repeat from * 5 more times; turn (19)

Row 17 :

ch 1 (counts as first sc), 2 sc in the next st, then 1 sc in every remaining st; turn (20)

Row 18 :

ch 1 (counts as first sc), * sc2tog, 1 sc in each of the next 2 sts; repeat from * 3 more times, then 1 sc in the last 3 sts; turn (16)

Row 19 :

ch 1 (counts as first sc), 1 sc in the next st, then 1 sc in every remaining st; turn (16)

Row 20 :

ch 1 (counts as first sc), * sc2tog, 1 sc in the next st; repeat from * 3 more times, then 1 sc in the last 3 sts; turn (12)

Row 21 :

ch 1 (counts as first sc), then 1 sc in every remaining st; turn (12)

Row 22 :

ch 1 (counts as first sc), * sc2tog, 1 sc in the next st; repeat from * 2 more times, then 1 sc in the last 2 sts; turn (9)

Row 23 :

ch 1 (counts as first sc), then 1 sc in every remaining st; turn (9)

Row 24 :

ch 1 (counts as first sc), * sc2tog, 1 sc in the next st; repeat from * 1 more time, then 1 sc in the last 2 sts; turn (7)

Row 25 :

ch 1 (counts as first sc), then 1 sc in every remaining st; turn (7)

Row 26 :

ch 1 (counts as first sc), then 1 sc in every remaining st; turn (7)

Row 27 :

ch 1 (counts as first sc), then 1 sc in every remaining st; turn (7)

Row 28 :

ch 1 (counts as first sc), then 1 sc in every remaining st; turn (7)

Finish :

Cut the yarn and weave in your ends securely.

— 3. Delicate Trim :

Info :

Switch to your 1.0 mm hook and the thinner lace weight thread.

Step 1 :

Join the thread to the BLO of the very last stitch of Round 8.

Step 2 :

Working into those remaining front loops, place 2 sc into every stitch all the way back to the center of the shell spiral.

Finish :

Fasten off and hide the thread ends.

— 4. Opening Border :

Info :

Keep using the 1.0 mm hook and thin thread for the border.

Round 1 :

Join the thread at the top of the shell opening. ch 1 and sc evenly all the way around the opening edge.

Row 2 :

Work back down the opening side: * 2 dc in the next st, 1 dc in the following st; repeat from * until you are near the tip.

Transition :

As you approach the narrow tip, switch to 2 hdc for a few stitches, then finish with 4-5 sc to taper the edge.

Finish :

Secure the thread, cut, and weave in all remaining ends.

Assembly Instructions

  • Ensure all crocheting is complete and all yarn tails are woven in before beginning the shaping process.
  • Prepare a stiffening mixture by combining two parts water with one part white glue in a small cup.
  • Fully submerge the crocheted shell into the glue mixture until every fiber is saturated, then gently squeeze out the excess liquid.
  • Use a chopstick to help straighten the narrow tip of the shell and pull the fabric to define the spiral shape.
  • Fill the hollow body of the shell with small plastic bags to give it volume and help it hold its rounded form while drying.
  • Pinch the edges of the opening together and pull gently on the trim to create a natural-looking wave in the border.
  • Set the shaped shell on a dry towel and let it sit undisturbed until it is completely dry and firm to the touch.

Important Notes

  • 💡Using a hook much smaller than the yarn label suggests is essential for creating the tight, stiff fabric required for this project.
  • 💡Always work in the back loops (BLO) for the first eight rounds to achieve the characteristic spiral ridges of a real shell.
  • 💡If you prefer a very rigid finish, you can increase the glue-to-water ratio to 1:1 for extra stiffness.
  • 💡If you want to add color with watercolors or acrylics, do so after the shell has dried completely for the best control.
  • 💡Be sure to add any decorative beads or embroidery before the glue-stiffening step to ensure they are properly secured.

I really hope you enjoy making this shell as much as I did! It’s such a unique way to combine crochet with a bit of sculpture work. Once your shell is dry and sitting on your shelf, it’s hard to believe it started as just a ball of cotton. Don’t forget to share your finished photos—I’d love to see the colors you choose for your shoreline treasures. Happy crafting, and may your hook always find its way through the perfect stitch! 🧶 ✨
You ask,

we answer.

FAQs

Can I use regular worsted weight yarn for this shell?

You can, but it will result in a much larger and heavier shell. The pattern is designed for sports weight cotton to maintain its delicate, realistic appearance. If you scale up the yarn, make sure to use a hook that keeps your stitches very tight.

What kind of glue is best for the stiffening process?

Regular white school glue or PVA craft glue works perfectly. It dries clear and provides a firm structure once mixed with water. Avoid using hot glue or super glue for this step as they won't saturate the fibers evenly.

How long does it typically take for the shell to dry?

Depending on the humidity in your home, it usually takes 24 to 48 hours to dry completely. It's important not to remove the plastic bags until the shell is totally firm, or it might lose its shape.

Can I skip the stiffening step?

You can, but the shell will be soft and floppy. The stiffening is what allows it to stand up as a piece of decor and hold the open shape of the 'mouth.' If you skip it, it will behave more like a standard stuffed toy.