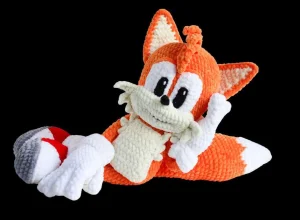
Get ready to bring a beloved video game icon to life! This pattern helps you craft the most famous flying sidekick in gaming history using wonderfully soft plush yarn. You'll love the tactile experience of working with velvet textures while creating his signature twin tails and flight-ready expression. It's a nostalgic project that results in a high-quality, huggable hero perfect for any collection. I've designed this to capture every little detail, from his iconic gloves to his sculpted muzzle.
Progress Tracker
0% Complete
— 1. Thumb (Make 2) :
Round 1 :
Using white yarn, create 6 SC into a MR (6)
Round 2 :
Work 1 SC in each stitch around (6)
Round 3 :
Work 1 SC in each stitch around (6)
Round 4 :
Work 1 SC in each stitch around (6)
Round 5 :
Work 1 SC in each stitch around (6)
Info :
ch1, fold the piece flat and work 3 SC through both layers to close. Fasten off and cut the yarn. Do not stuff the thumb.
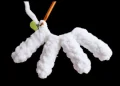
— 2. Fingers (Make 4 per arm) :
Round 1 :
Using white yarn, create 6 SC into a MR (6)
Round 2 :
Work 1 SC in each stitch around (6)
Round 3 :
Work 1 SC in each stitch around (6)
Round 4 :
Work 1 SC in each stitch around (6)
Round 5 :
Work 1 SC in each stitch around (6)
Round 6 :
Work 1 SC in each stitch around (6)
Info :
Fasten off the first three fingers. On the fourth finger, do not cut the yarn as we will continue to join all fingers together.
— 3. Hand and Arm (Make 2) :
Round 7 :
Join the fingers: 3 SC on finger 1, 3 SC on finger 2, 3 SC on finger 3, 6 SC on finger 4, 3 SC on finger 3, 3 SC on finger 2, 3 SC on finger 1 (24)
Round 8 :
Work 1 SC in each stitch around (24)
Round 9 :
Work 1 SC in each stitch around (24)
Round 10 :
Work 1 SC in each stitch around (24)
Round 11 :
Work 1 SC in each stitch around (24)
Round 12 :
Work 1 SC in each stitch around (24)
Info :
Fold the piece to find the side placement for the thumb. Shift your marker if necessary to ensure the thumb aligns correctly.
Round 13 (Left) :
For the left arm: 1 SC, 3 SC through both the thumb and the hand, 20 SC (24)
Round 13 (Right) :
For the right arm: 8 SC, 3 SC through both the thumb and the hand, 13 SC (24)
Round 14 :
(10 SC, DEC) repeat 2 times (22)
Round 15 :
(9 SC, DEC) repeat 2 times (20)
Round 16 :
(3 SC, DEC) repeat 4 times (16)
Round 17 :
(2 SC, DEC) repeat 4 times (12)
Colour Change :
Switch to orange yarn and fasten off the white thread.
Round 18 :
(4 SC, DEC) repeat 2 times (10)
Round 19 :
(3 SC, DEC) repeat 2 times (8)
Round 20 :
(2 SC, DEC) repeat 2 times (6)
Info :
Stuff only the palm area lightly so it remains flat. Do not stuff the rest of the arm.
Round 21-30 :
Work 10 rounds of 6 SC (6)
Info :
ch1, fold the top of the arm flat and work 3 SC through both layers to close. Fasten off.
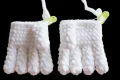
— 4. Glove Edge (Make 2) :
Row 0 :
Using white yarn, ch 22
Row 1 :
Starting in the second chain from the hook, work 21 SC, ch1 and turn (21)
Row 2 :
Work 21 SC in the BLO, ch1 and turn (21)
Row 3 :
Work 21 SC in the FLO, ch1 and turn (21)
Info :
Fasten off, leaving a long tail for sewing. Fold the piece so the loose loops are on the outside, sew the short ends together, and slide onto the arm between rounds 15 and 16.
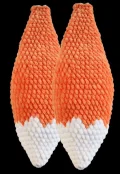
— 5. Tails (Make 2) :
Round 1 :
Using white yarn, create 6 SC into a MR (6)
Round 2 :
(1 SC, INC) repeat 3 times (9)
Round 3 :
(2 SC, INC) repeat 3 times (12)
Round 4 :
(3 SC, INC) repeat 3 times (15)
Round 5 :
(4 SC, INC) repeat 3 times (18)
Round 6 :
(5 SC, INC) repeat 3 times (21)
Round 7 :
(6 SC, INC) repeat 3 times (24)
Round 8 :
(7 SC, INC) repeat 3 times (27)
Round 9 :
(8 SC, INC) repeat 3 times (30)
Round 10 :
(4 SC, switch to orange, 1 SC, switch back to white) repeat 6 times (30)
Round 11 :
3 SC white, switch to orange, 3 SC, switch back to white, (2 SC white, switch to orange, 3 SC, switch back to white) repeat 4 times, 2 SC white, switch to orange, 2 SC orange (30)
Info :
Fasten off white yarn; continue with orange only.
Round 12 :
(9 SC, INC) repeat 3 times (33)
Round 13 :
Work 1 SC in each stitch around (33)
Round 14 :
(10 SC, INC) repeat 3 times (36)
Round 15-19 :
Work 5 rounds of 36 SC (36)
Round 20 :
(10 SC, DEC) repeat 3 times (33)
Round 21 :
Work 1 SC in each stitch around (33)
Round 22 :
(9 SC, DEC) repeat 3 times (30)
Round 23 :
Work 1 SC in each stitch around (30)
Round 24 :
(8 SC, DEC) repeat 3 times (27)
Round 25 :
Work 1 SC in each stitch around (27)
Round 26 :
(7 SC, DEC) repeat 3 times (24)
Round 27 :
Work 1 SC in each stitch around (24)
Round 28 :
(6 SC, DEC) repeat 3 times (21)
Round 29 :
Work 1 SC in each stitch around (21)
Round 30 :
(5 SC, DEC) repeat 3 times (18)
Round 31 :
Work 1 SC in each stitch around (18)
Round 32 :
(4 SC, DEC) repeat 3 times (15)
Round 33 :
Work 1 SC in each stitch around (15)
Round 34 :
(3 SC, DEC) repeat 3 times (12)
Round 35 :
Work 1 SC in each stitch around (12)
Round 36 :
(2 SC, DEC) repeat 3 times (9)
Info :
Stuff the bottom half of the tail lightly. ch1, fold the top flat and work 4 SC through both layers. Fasten off.
— 6. Shoe and Leg (Make 2) :
Row 0 :
Using grey yarn, ch 10
Round 1 :
Starting in 2nd chain: 8 SC, 3 SC in the last chain. On other side: 7 SC, INC (20)
Round 2 :
INC, 7 SC, 3 INC, 7 SC, 2 INC (26)
Round 3 :
1 SC, INC, 7 SC, (1 SC, INC) x3, 7 SC, (1 SC, INC) x2 (32)
Round 4 :
(2 SC, INC) x2, 4 SC, (2 SC, INC) x3, 4 SC, (2 SC, INC) x3 (40)
Round 5 :
(3 SC, INC) x2, 4 SC, (3 SC, INC) x3, 4 SC, (3 SC, INC) x3 (48)
Round 6 :
Switch to red yarn (do not cut grey). Work in BLO: 11 SC, change to white, 24 SC, change back to red, 13 SC (48)
Round 7 :
12 SC red, change to white, 8 SC, 4 DEC, 8 SC, change back to red, 12 SC (44)
Info :
Pick up the grey yarn and work 48 SS into the front loops of Round 5. Fasten off grey.
Round 8 :
In red: 12 SC, change to white, 6 SC, 4 DEC, 6 SC, change back to red, 12 SC (40)
Round 9 :
12 SC red, change to white, 4 SC, 4 DEC, 4 SC, change back to red, 12 SC (36)
Round 10 :
12 SC red, change to white, 2 SC, 4 DEC, 2 SC, change back to red, 12 SC (32)
Round 11 :
12 SC red, change to white, 4 DEC, change back to red, 12 SC (28). Fasten off white.
Round 12 :
Using red: 10 SC, 4 DEC, 10 SC (24)
Round 13 :
8 SC, 4 DEC, 8 SC (20)
Round 14 :
6 SC, 4 DEC, 6 SC (16)
Colour Change :
Switch to orange yarn.
Round 15 :
(6 SC, DEC) repeat 2 times (14)
Round 16 :
(5 SC, DEC) repeat 2 times (12)
Round 17 :
(4 SC, DEC) repeat 2 times (10)
Round 18 :
(3 SC, DEC) repeat 2 times (8)
Round 19-29 :
Work 11 rounds of 8 SC (8)
Info :
Fasten off the first leg (left). On the second leg (right), do not cut yarn; we will use it to join the legs.
— 7. Sock Edge (Make 2) :
Row 0 :
Using white yarn, ch 27
Row 1 :
Starting in 2nd chain: 26 SC, ch1 and turn (26)
Row 2 :
Work 26 SC in BLO, ch1 and turn (26)
Row 3 :
Work 26 SC, ch1 and turn (26)
Row 4 :
Work 26 SC in BLO, ch1 and turn (26)
Info :
Fasten off. Wrap around the leg and sew the edges together. Position it so the starting chain is at the top.
— 8. Body and Head :
Round 30 :
Ch 4 from the right leg, attach to the left leg: 8 SC on left leg, 4 SC on chain, 8 SC on right leg, 4 SC on other side of chain (24)
Round 31 :
(2 SC, INC) repeat 8 times (32)
Round 32 :
(3 SC, INC) repeat 8 times (40)
Round 33 :
Work 1 SC in each stitch around (40)
Round 34 :
34 SC, 4 SC through both the first tail and the body, 2 SC through the second tail and body (40)
Round 35 :
2 SC through the remaining part of the second tail and body, 38 SC (40)
Round 36 :
Work 1 SC in each stitch around (40)
Round 37 :
(8 SC, DEC) repeat 4 times (36)
Round 38 :
Work 1 SC in each stitch around (36)
Round 39 :
(10 SC, DEC) repeat 3 times (33)
Round 40 :
Work 1 SC in each stitch around (33)
Round 41 :
(9 SC, DEC) repeat 3 times (30)
Round 42 :
Work 1 SC in each stitch around (30)
Round 43 :
(8 SC, DEC) repeat 3 times (27)
Round 44 :
(7 SC, DEC) repeat 3 times (24)
Round 45 :
5 SC, 3 SC through both the arm and the body, 9 SC, 3 SC through the other arm and body, 4 SC (24)
Round 46 :
(6 SC, DEC) repeat 3 times (21)
Round 47 :
(5 SC, DEC) repeat 3 times (18)
Round 48 :
(1 SC, INC) repeat 9 times (27)
Round 49 :
(2 SC, INC) repeat 9 times (36)
Round 50 :
(5 SC, INC) repeat 6 times (42)
Round 51 :
(6 SC, INC) repeat 6 times (48)
Round 52-55 :
Work 4 rounds of 48 SC (48)
Round 56 :
(15 SC, INC) repeat 3 times (51)
Round 57 :
(16 SC, INC) repeat 3 times (54)
Round 58-60 :
Work 3 rounds of 54 SC (54)
Round 61 :
(17 SC, INC) repeat 3 times (57)
Round 62 :
(18 SC, INC) repeat 3 times (60)
Round 63 :
Work 1 SC in each stitch around (60)
Round 64 :
(8 SC, DEC) repeat 6 times (54)
Round 65 :
(7 SC, DEC) repeat 6 times (48)
Round 66 :
(6 SC, DEC) repeat 6 times (42)
Round 67 :
(5 SC, DEC) repeat 6 times (36)
Round 68 :
(4 SC, DEC) repeat 6 times (30)
Round 69 :
(3 SC, DEC) repeat 6 times (24)
Round 70 :
(2 SC, DEC) repeat 6 times (18)
Round 71 :
(1 SC, DEC) repeat 6 times (12)
Info :
Do not pull the final hole tight yet; leave it open for facial sculpting. Fasten off with a long tail.
— 9. Tummy Patch :
Row 0 :
Using ivory yarn, ch 11
Row 1 :
Starting in 2nd chain: 10 SC, ch1 and turn (10)
Row 2-3 :
Work 2 rows of 10 SC, ch1 and turn (10)
Row 4 :
Skip first stitch, 9 SC, ch1 and turn (9)
Row 5 :
Skip first stitch, 8 SC, ch1 and turn (8)
Row 6-9 :
Work 4 rows of 8 SC, ch1 and turn (8)
Row 10 :
Skip first stitch, 5 SC, DEC (6)
Edging :
Work around the edge of the patch, adding chains and slip stitches to create the 'fur' tufts as shown in the visual guide. Fasten off.
— 10. Muzzle Fur Ends (3 Sizes) :
Large :
Using ivory: ch 6, starting in 2nd chain: 1 SS, 1 SC, 3 HDC. Fasten off.
Middle :
Using ivory: ch 5, starting in 2nd chain: 1 SS, 1 SC, 2 HDC. Fasten off.
Small :
Using ivory: ch 4, starting in 2nd chain: 1 SS, 1 SC, 1 HDC. Fasten off.
— 11. Muzzle :
Row 0 :
Using ivory yarn, ch 14
Round 1 :
Starting in 2nd chain: 12 SC, 3 SC in last chain. On other side: 11 SC, INC (28)
Round 2 :
INC, 11 SC, 3 INC, 5 SC, 3 SC in one stitch, 5 SC, 2 INC (36)
Round 3 :
1 SC, INC, 11 SC, (1 SC, INC) x3, 6 SC, 3 SC in one stitch, 6 SC, (1 SC, INC) x2 (44)
Round 4 :
15 SC, 2 SC with small tuft, 2 SC with middle tuft, 2 SC with large tuft, 20 SC, 2 SC with large tuft, 2 SC with middle tuft, 2 SC with small tuft (44)
Round 5 :
Work 1 SC in each stitch around (44)
— 12. Nose :
Round 1 :
Using black semi-cotton, 6 SC into a MR (6)
Round 2-3 :
Work 2 rounds of 6 SC (6)
Info :
Fasten off and sew to the muzzle center.
— 13. Eye Whites (Make 2) :
Row 0 :
Using white yarn, ch 10
Round 1 :
Starting in 2nd chain: 8 SC, 3 SC in last chain. On other side: 8 SC, ch1 and turn (19)
Round 2 (Right) :
9 SC, 3 INC, 7 SC (22)
Round 2 (Left) :
7 SC, 3 INC, 9 SC (22)
— 14. Pupils (Make 2) :
Row 0 :
Using black semi-cotton, ch 7
Round 1 :
Starting in 2nd chain: 5 SC, 3 SC in last chain. On other side: 4 SC, INC (14)
— 15. Ears (Make 2) :
Inner Ear :
Using ivory: ch 2, work INC in 2nd chain. Continue increasing at the start of each row until you have 13 stitches at Row 11.
Outer Ear :
Using orange: ch 2, work INC in 2nd chain. Continue increasing at the start of each row until you have 11 stitches at Row 10. Work 10 SC down the side, 3 SC in the top, and 10 SC down the other side.
Joining :
Place inner ear against outer ear and SC them together around the entire edge, working 3 SC in each corner.
— 16. Hair Locks (Make 3) :
Row 0 :
Using orange yarn, ch 3
Row 1 :
Starting in 2nd chain: 2 SC, ch1 and turn (2)
Row 2-7 :
Work 6 rows of 2 SC, ch1 and turn (2)
Row 8 :
Skip first stitch, 1 SC, ch1 and turn (1)
Edging :
Work a series of SS down the side of the piece back to the start. Fasten off.
You've done it! Your Copter-tailed Fox is ready for his next high-flying adventure. I hope you enjoyed every stitch of this nostalgic journey. There's something so special about seeing those twin tails come together and finally adding the sculpted facial details that give him his signature personality. Whether he's sitting on a shelf or being gifted to a fellow fan, he's sure to bring a smile to anyone's face. Don't forget to share your finished fox with the community — I can't wait to see your version! Happy crafting! 🧶✨🦊