About This Cowboy Cat Hat Pattern
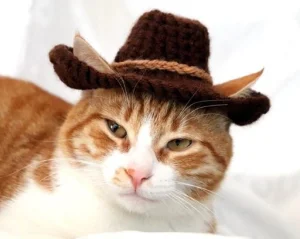
This little hat is the ultimate gift for the pet lover in your life who enjoys a good laugh. It’s also a fantastic prop for pet photographers looking to add some personality to their portraits.
Ideal for those with basic crocheting experience, featuring slightly more advanced stitches and techniques to expand your skills.
Fits nicely into a free afternoon — 2 to 5 hours of focused, enjoyable crocheting.
Delightful animal designs with sweet details that capture the essence of your favorite woodland and farmyard friends.
This little hat is the ultimate gift for the pet lover in your life who enjoys a good laugh. It’s also a fantastic prop for pet photographers looking to add some personality to their portraits.
I honestly had the best time making this because it’s such a fast reward. Seeing the little ear holes come together was so satisfying, and the way the brim naturally curls up at the end feels like magic. It’s one of those projects where you’ll want to make five more in different colors just for the fun of it!
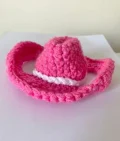
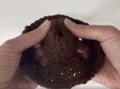
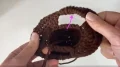
I remember the first time I tried to put a hat on my cat—it was a total disaster until I realized that ear holes are the secret to success! This pattern was born out of a need for something that actually stays on while looking absolutely dashing. When you're picking out your yarn, don't feel like you have to stick to traditional brown. I once made a neon pink version for a friend's 'space cowgirl' themed cat party, and it was the hit of the night!
If you find the brim is a little too floppy for your liking, you can always go down a hook size for the final round to pull those stitches tighter. And for the chin straps, I like to use a soft cotton yarn if the cat is particularly picky about textures. The best part is the 'pinch' at the top—it’s what really gives it that authentic Stetson shape. Just a tiny stitch or two is all it takes to transform a simple crochet dome into a piece of western wear. I can't wait to see your little ranch hands in their new gear!
There's nothing quite like seeing your favorite feline friend strutting around in a tiny hat, and this cowboy look is just the cutest thing I've ever made. You'll love how the rustic brown yarn gives it that authentic rancher vibe, making your cat the star of every photo. It's a quick project that brings so much joy to the crafting process and even more to your Instagram feed!
Using your brown yarn, create a MR and work 8 sc into the center. (8)
Do not join with a slip stitch yet; you will be working in a continuous spiral until you reach the brim transition at Round 9.
Work 2 sc into every st around the circle. (16)
Work 1 sc into each st around. (16)
Work 1 sc into each of the first 3 sts, then 2 sc into the next st. Repeat this sequence 3 more times. (20)
Work 1 sc into each st around. (20)
Work 1 sc into each of the next 4 sts, then 2 sc into the next st. Repeat this sequence 3 more times. (24)
Work 1 sc into each st around, then finish by making a ss into the very next st to level off the spiral. (24)
Work 1 sc into every st around, then ss into the first st to join the round. (24)
Start with a ch 2 (this won't count as a st). Work 2 dc into each of the next 6 sts. To create the first ear hole, ch 10 and sk the next 6 sts. Work 2 dc into each of the following 6 sts, then ch 10 and sk the final 6 sts. Join with a ss to the first dc. (24)
ch 1, * (sc 1 into each of the next 3 sts, then 2 sc into the next st) repeat from * 2 more times. Now, work directly into the ch 10 sp by making (1 hdc, 10 dc, 1 hdc). Repeat the entire sequence from * to * once more to finish the second side. ss to join. (54)
Turn your work so you are looking at the inside. ch 1 and work 1 sc into every st around. This creates the structural edge that helps the brim flip up. ss to join and fasten off. (54)
Using your tan yarn, ch 35 and join with a ss to the first ch to create a loop. Fasten off, leaving a tail for sewing.
To add straps, join your yarn to the bottom of the hat near the center of the two dc stitches from Round 10 that sit right above the ear opening.
ch 25 and fasten off. (25)
Attach yarn to the opposite side in the same relative position and ch 25. Fasten off. (25)
I hope you and your furry friend have a blast with this project! There's something so special about creating something handmade for our pets, and this little cowboy hat is sure to be a conversation starter. Don't forget to take plenty of photos—those little ears popping through the holes are just too cute for words. If you run into any trouble with the shaping, just remember that a little steam blocking can go a long way in setting that perfect western silhouette. Happy crocheting, and may your ranch be full of happy cats! 🧶🤠✨
The ear holes help quite a bit, but the optional chin straps are the best way to keep it secure if your cat is active.
Check your gauge! If it's too small, you might need to go up a hook size or add an extra increase round to the crown.
Yes, but cotton has less stretch than acrylic, so the brim might be stiffer and the ear holes less forgiving.
The secret is in Round 11 where you turn the work—this creates a ridge that naturally helps the brim flip up.
