🧶 Beautiful ✨ Detailed 💝 Adorable

Eira the Snowy Owl Amigurumi Pattern

Eira the Snowy Owl Amigurumi Pattern
4.5★Rating
5-7 HoursTime Needed
3.9KMade This
✂️

Intermediate Level

Ideal for those with basic crocheting experience, featuring slightly more advanced stitches and techniques to expand your skills.

⏱️

Weekend Treat

Takes 5-7 hours, making it an enjoyable project to finish over a couple of days.

🧸

Cute Companion

An adorable friend to cherish, handcrafted with love to bring comfort and joy for years to come.

About This Eira the Snowy Owl Amigurumi Pattern

Eira the Snowy Owl Amigurumi Pattern crochet pattern - detailed view

This project is a dream for crafters who love storytelling through their work. The finished owl makes a thoughtful, magical gift for students, teachers, or any fan of whimsical woodland creatures.

Why You'll Love This Eira the Snowy Owl Amigurumi Pattern

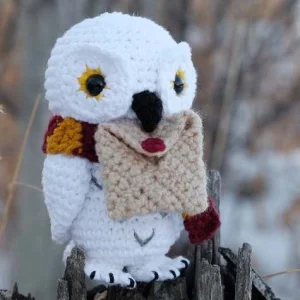
I absolutely adore how this pattern combines classic amigurumi with tiny, detailed accessories. The fact that the beak is functional and can actually 'hold' the envelope just makes my heart melt every time I see it finished!

Eira the Snowy Owl Amigurumi Pattern step 1 Eira the Snowy Owl Amigurumi Pattern step 2 Eira the Snowy Owl Amigurumi Pattern step 3 Eira the Snowy Owl Amigurumi Pattern step 4

Switch Things Up

I’ve always had a soft spot for snowy owls—there’s something so mysterious and elegant about them, isn’t there? When I was designing Eira, I really wanted her to feel like she had a job to do, which is why the little envelope is my favorite part. The beak is actually designed so it’s not fully sewn down at the tip, allowing her to 'hold' the letter!

One thing I discovered while making my first version is that the tail placement is absolutely key. If you sew it just a bit too high, she might tip over, but if you get it right at that 7-8 row mark from the bottom, it acts like a perfect little kickstand. It makes her so sturdy for displaying on a desk or mantle.

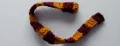
For the scarf, don’t feel like you have to stick to the red and gold—I’ve seen people make her with a soft blue scarf or even a tiny scrap-yarn rainbow one, and they all look darling. If you’re gifting this to a fellow book lover, you could even tuck a tiny handwritten note inside the envelope to make it extra special. I can’t wait to see the little personalities you all give your owls!

Common Mistakes & How to Fix Them

✗ If you attach the eyes too high or too low, Eira loses her signature expression; make sure they are exactly between rounds 21 and 22 as instructed.✗ The tail is meant to be a kickstand, so if you sew the high side facing down, she won't be able to stand upright on her own.✗ When making the envelope, if your piece isn't a perfect square, the flaps won't meet correctly in the center during the whip-stitching phase.✗ Forgetting to leave the safety eye hole loose in the yellow patch makes it nearly impossible to push the post through without distorting the stitches.

Eira the Snowy Owl Amigurumi Pattern

Meet Eira, the most studious little snowy owl you'll ever crochet! This pattern is packed with personality, featuring a cozy winter scarf and a tiny handmade envelope she can carry in her beak. You'll love the unique construction of her textured eye patches and the clever way her tail acts as a kickstand so she stands perfectly on her own. It's a wonderful project for anyone looking to create a gift with a story or a whimsical new friend for their bookshelf.

Intermediate 5-7 Hours

Materials Needed for Eira the Snowy Owl Amigurumi Pattern

— Main Fabric

  • 01
    Approximately 92 meters of worsted weight yarn in white for the main body
  • 02
    Small amounts of worsted weight yarn in yellow, black, grey, beige, and red for details
  • 03
    Roughly 12 meters of worsted yarn in your preferred colors for the scarf

— Tools Required

  • 01
    3.5mm crochet hook for the owl
  • 02
    5.0mm crochet hook for the scarf and envelope
  • 03
    Two 12mm safety eyes
  • 04
    Black embroidery thread for the talons
  • 05
    Polyester fiberfill stuffing
  • 06
    Stitch markers
  • 07
    Darning and sewing needles
  • 08
    Scissors

Progress Tracker

0% Complete

— 1. Eye Patches (Make 2) :

Round 1 :

Using yellow yarn, start with a mr and work 3 sc, 1 hdc, 1 dc, 1 hdc, and 2 sc. Do not tighten the ring completely yet; leave a small gap for the safety eye post. sl st to join (8).

Round 2 :

Switch to white yarn. ch 2 (this counts as your first st), hdc in the same spot as the ch. Work 1 hdc inc in every remaining st. sl st to join (16).

Round 3 :

ch 1, sc in the same st. {1 sc, 1 inc} repeat 7 times, then 1 sc in the final st (24).

Info :

Fasten off and leave a long tail for sewing. Push the safety eye through the center of the magic ring and pull the starting tail tight to secure it.

— 2. Head and Body :

Round 1 :

Using white yarn, create a mr and work 6 sc into it (6).

Round 2 :

Work 1 inc in every st around (12).

Round 3 :

{1 sc, 1 inc} repeat 6 times (18).

Round 4 :

1 sc, 1 inc, {2 sc, 1 inc} repeat 5 times, 1 sc (24).

Round 5 :

{3 sc, 1 inc} repeat 6 times (30).

Round 6-15 :

Work 1 sc in each st around (30).

Round 16 :

{3 sc, 1 dec} repeat 6 times (24).

Round 17 :

{3 sc, 1 inc} repeat 6 times (30).

Round 18 :

2 sc, 1 inc, {4 sc, 1 inc} repeat 5 times, 2 sc (36).

Round 19 :

{5 sc, 1 inc} repeat 6 times (42).

Round 20-24 :

Work 1 sc in each st around (42).

Round 25 :

{5 sc, 1 dec} repeat 6 times (36).

Round 26 :

Work 1 sc in each st around (36).

Round 27 :

2 sc, 1 dec, {4 sc, 1 dec} repeat 5 times, 2 sc (30).

Round 28 :

{3 sc, 1 dec} repeat 6 times (24).

Info :

Pause here to attach the eyes. Count 7 rows down from the current round and insert the eye posts between Rounds 21 and 22. Leave 3 stitches visible between the eye patches.

Info :

Begin stuffing the body and head firmly. Continue stuffing as you finish the remaining rounds.

Round 29 :

1 sc, 1 dec, {2 sc, 1 dec} repeat 5 times, 1 sc (18).

Round 30 :

{1 sc, 1 dec} repeat 6 times (12).

Round 31 :

Work 1 dec in every st around (6).

Info :

Fasten off and weave in the remaining yarn tail.

— 3. Feet (Make 2) :

Step 1 :

ch 4. Starting in the 2nd ch from the hook, 1 sc (mark this st), 1 sc. In the last ch, work 3 sc. Turn to work along the bottom of the chain, skip the loop with the 3 sts, and work 1 inc in each of the next 2 ch spaces (9).

Step 2 :

In flo, {sl st, ch 2, sc in 2nd ch from hook, sl st in same st} repeat 3 times in the next 3 sts. Switch to both loops, 2 sc (mark the first sc). In flo, sl st, ch 3, sc in 2nd ch, 1 sc, sl st in the flo of the next st. Switch to both loops, 2 sc (4 toes created).

Note :

The original instructions refer to back loops from Round 3 here, but this likely refers to the foundation or the previous step's loops; use the loops behind the toes to secure the foot.

Step 3 :

Fold toes down and work 3 sc into the open back loops (one per toe). Skip the marked st. In both loops, 1 sc in the next st, then sl st. Fold the back toe down, work 2 sc in blo, then 2 sc in both loops (9).

Info :

Fasten off and leave a tail for sewing.

— 4. Wings (Make 2) :

Round 1 :

Using white yarn, create a mr and work 6 sc (6).

Round 2 :

Work 1 inc in every st around (12).

Round 3 :

{1 sc, 1 inc} repeat 6 times (18).

Round 4 :

{5 sc, 1 inc} repeat 3 times (21).

Round 5-6 :

Work 1 sc in each st around (21).

Round 7 :

{5 sc, 1 dec} repeat 3 times (18).

Round 8 :

Work 1 sc in each st around (18).

Round 9 :

{1 sc, 1 dec} repeat 6 times (12).

Round 10 :

Work 1 sc in each st around (12).

Round 11 :

Work 1 dec in every st around (6).

Round 12 :

Work 1 sc in each st around (6).

Info :

Fasten off and weave in the ends.

— 5. Beak :

Row 1 :

Using black yarn and leaving a long tail, ch 4. sl st in 2nd ch from hook, 1 hdc. In the last ch, work (1 dc, 1 sc, 1 dc). Turn to work on the other side of the chain, skip the loop with the 3 sts, 1 hdc, and sl st in the final ch (7).

Info :

Fasten off. Pinch the sl st end to form a point and sew it together to shape the beak.

— 6. Tail :

Row 1 :

ch 6. Starting in 2nd ch from hook, work 4 sc. In the last ch, work 3 sc. Turn (7).

Row 2 :

Work along the other side of the chain, 3 sc. In the last ch, work 2 sc (5).

Round 3 :

Work in the round from here. 1 sc in each st around (12).

Round 4 :

Work 1 sc in each st around (12).

Round 5 :

{1 dec, 4 sc} repeat 2 times (10).

Round 6 :

Work 1 sc in each st around (10).

Round 7 :

{1 dec, 3 sc} repeat 2 times (8).

Info :

Fasten off and leave a tail for assembly. Note the high and low sides created by working in the round.

— 7. Wax Seal :

Round 1 :

Using red yarn, work 4 sc into a mr. Pull tight and fasten off with a small tail (4).

— 8. Envelope :

Row 1 :

Using beige yarn and a 5mm hook, leave a 6-inch tail and ch 15. sc in 2nd ch from hook and in every ch across (14).

Row 2 :

ch 1, turn. Work 1 sc in each st across (14).

Row 3-14 :

Repeat Row 2 until the piece forms a 3x3 inch square. Fasten off with a tail for sewing.

— 9. Scarf :

Row 1 :

Using a 5mm hook, ch 4. Starting in 2nd ch from hook, work 3 sc (3).

Row 2-4 :

ch 1, turn. Work 1 sc in each st across (3).

Colour Change :

Switch to your second scarf color.

Row 5-7 :

ch 1, turn. Work 1 sc in each st across (3).

Info :

Continue alternating colors every 3 rows until the scarf is roughly 13 inches long. Fasten off and weave in ends. Sew a small loop on one end to secure it around the owl.

Assembly Instructions

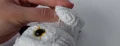
  • Position the eye patches so the double crochet side faces outward. Sew about two-thirds around the patch, then stitch the top at a downward angle to let the edge fold over slightly.
  • Place the beak so its top edge aligns with the bottom of the safety eyes. Sew across the top and sides, leaving the tip free so the owl can 'hold' the envelope.
  • Use grey yarn to embroider small 'V' shapes across the chest to represent feathers.
  • Attach the wings to the sides of the body, just below the head. Tilt them back slightly and only sew through the top edge for a natural look.
  • Sew the feet to the bottom of the body, positioned one row away from the starting magic ring. Stitch only around the leg portion, leaving the toes free.
  • Attach the tail to the center back, about 7-8 rows up from the bottom magic ring. Ensure the 'low' side faces down so it acts as a kickstand.
  • Fold the left and right sides of the envelope square inward, then the bottom up. Whip stitch the seams and sew the red wax seal onto the top flap's point.

Important Notes

  • 💡Always use an invisible decrease (flo) when working the body and head to keep the fabric smooth and professional.
  • 💡Keep your tension tight throughout the project to ensure no stuffing shows through the stitches.
  • 💡Stuff the head and body as you go, making sure the neck area is firm enough to support the head.
  • 💡Ensure you insert the safety eyes and secure the patches before the body opening becomes too small to work through.
  • 💡The envelope size is based on a 3x3 inch square; adjust your row count or hook size if your gauge differs to keep it proportional.

There is something so rewarding about finishing a project with this much character. Eira isn't just a toy; she’s a little messenger ready to bring some handmade joy into your home. I hope you enjoyed every part of the process, from the tricky little toes to the final wax seal on her envelope. Don't forget to give her a good name and find her a cozy spot to perch! If you’re like me, you’ll probably find yourself wanting to make a whole parliament of owls in different colors. Happy crafting and enjoy your new feathered friend! 🧶 ✨
You ask,

we answer.

FAQs

Can I use a different yarn weight for this owl?

Yes, you can substitute other weights, but remember to adjust your hook size and safety eye size accordingly. A bulkier yarn will result in a much larger owl!

Why won't my owl stand up on its own?

This usually happens if the tail is attached too high or upside down. Make sure the 'low' side of the tail faces the ground and it sits about 7-8 rows up from the bottom center.

How do I make the beak 'hold' the envelope?

When sewing the beak, only attach the top and the upper sides. Leave the bottom tip unsewn so you can slide the corner of the envelope underneath it.

The eye patches look wavy, is that normal?

A little bit of texture is fine, but if they are very ruffled, check your stitch count in Round 3. Once sewn down, they should lay mostly flat against the head.