About This Crochet Fox Hand Puppet Amigurumi Pattern
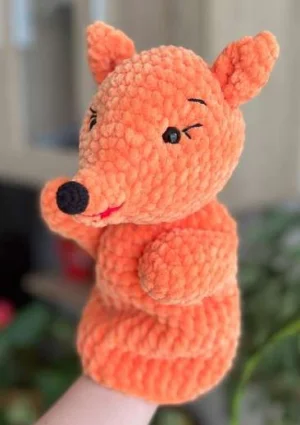
This fox puppet makes a genuinely thoughtful handmade gift — perfect for a young child who loves storytime, or a teacher who brings characters to life in the classroom.
Ideal for those with basic crocheting experience, featuring slightly more advanced stitches and techniques to expand your skills.
Fits nicely into a free afternoon — 2 to 5 hours of focused, enjoyable crocheting.
Playful characters full of personality, designed to spark imagination and become cherished playtime favorites.
This fox puppet makes a genuinely thoughtful handmade gift — perfect for a young child who loves storytime, or a teacher who brings characters to life in the classroom.
I fell hard for this pattern the moment I finished the head — there's something so satisfying about watching those decreases pull that round little face into shape. The arm attachment method is clever and actually fun to work through, and switching to double crochet for the body skirt gives such a lovely drape. I've made a few hand puppets over the years and this one genuinely stands out for how polished the finish looks with minimal fuss.
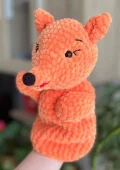
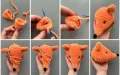
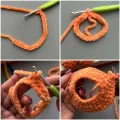
I have a real soft spot for hand puppets — there's something about them that feels more alive than a regular stuffed animal. When I first saw this fox pattern I immediately thought about my nephew, who is absolutely obsessed with foxes right now, and I knew I had to make it for him.
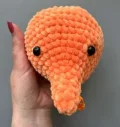
What I didn't expect was how quickly the head comes together. Starting from that tiny magic ring and watching the shape expand into this round, expressive little face is genuinely satisfying. The plush yarn does so much of the work for you — it has this natural loft that fills out the shape beautifully and hides any slight tension inconsistencies.
The arm attachment in Round 5 of the body is the one moment that looks trickier than it is. You're basically crocheting across the open edge of each arm as you work the round, locking them in at the sides. I'd recommend placing a stitch marker at your midpoint before you start that round so you can check you're splitting the body stitches evenly between the two arm joins.
One thing I changed on my second make: I used a slightly deeper red for the mouth embroidery — more of a brick red than the coral shade in the original — and it made the expression look even more fox-like and cheeky. Color play is one of my favorite parts of amigurumi and there's real room to personalize this little guy.
If you're planning to make a whole puppet set — and I genuinely think you should — this fox pairs beautifully with a grey wolf or brown bear worked in the same plush yarn. They photograph together wonderfully.
This little fox is just waiting to come to life on your hand! Whether you're making him for storytime with the kids, a classroom prop, or just because he's too cute to resist — this pattern walks you through every step with total clarity. The plush yarn gives him the most irresistible texture, and that cheeky embroidered face? Absolutely melts hearts. You'll love how quickly he comes together, and trust me, once he's on your hand you won't want to take him off.
Work with orange plush yarn and 4.5mm hook throughout this section.
Start with a MR, work 6 sc into the ring. (6)
Work 6 sc evenly. (6)
(1 sc, inc) repeat 3 times. (9)
Work 9 sc evenly. (9)
(1 sc, inc) repeat 3 times, then 3 sc. (12)
(2 sc, inc) repeat 3 times, then 3 sc. (15)
(3 sc, inc) repeat 3 times, then 3 sc. (18)
(1 sc, inc) repeat 8 times, then 2 sc. (26)
Work 26 sc evenly. (26)
(2 sc, inc) repeat 8 times, then 2 sc. (34)
Work 34 sc evenly. (34)
(3 sc, inc) repeat 8 times, then 2 sc. (42)
Work 42 sc evenly. (42)
Work 42 sc evenly. (42)
Work 42 sc evenly. (42)
Work 42 sc evenly. (42)
Work 42 sc evenly. (42)
(5 sc, dec) repeat 6 times. (36)
(4 sc, dec) repeat 6 times. (30)
(3 sc, dec) repeat 6 times. (24)
Insert the 7mm plastic safety eyes now. Position them between rounds 10 and 11 counting from the MR, on the nose side. Leave 11 stitches between the two eyes. Then stuff the head firmly with fiber fill before continuing.
(2 sc, dec) repeat 6 times. (18)
(1 sc, dec) repeat 6 times. (12)
dec repeat 6 times. (6)
Thread the yarn tail through the 6 remaining front loops, pull tight to close, then cut and fasten off securely.
Switch to black cotton yarn and a large needle. Thread the yarn and push the needle in through the back of the head, bringing it out just above the right eye — leave a yarn tail at the back. Pass the needle under the left eye from below and bring it out beneath the right eye, keeping the yarn on the inside of the left eye. Next, pass the needle in above the right eye so the thread sits on the inside of that eye, and pull the needle back out through the same exit point at the back of the head. Gently tighten both ends until both eyes appear sunken and symmetrical. Knot the threads together and bury the tails inside the head.
Work with black cotton yarn and the 2.0mm hook.
Start with a MR, work 6 sc into the ring. (6)
(1 sc, inc) repeat 3 times. (9)
Work 9 sc evenly. (9)
(2 sc, inc) repeat 3 times. (12)
(2 sc, dec) repeat 3 times. (9)
Leave a yarn tail of about 20cm for sewing. Cut the yarn. Lightly stuff the nose with fiber fill, then sew it onto the front of the muzzle.
Work with orange plush yarn and the 4.5mm hook. Make two identical pieces.
Start with a MR, work 4 sc into the ring. (4)
inc in every stitch around. (8)
(1 sc, inc) repeat 4 times. (12)
Work 12 sc evenly. (12)
(2 sc, inc) repeat 4 times, then make 1 sl st. (16)
Leave about 20cm of yarn for sewing, then cut. Sew both ears onto the head between rounds 15 and 17 counting from the MR, positioned on the nose-facing side, with 9 stitches separating the two ears.
Using black cotton yarn threaded onto a large needle, embroider the eyebrows and eyelashes directly onto the face. Work small straight stitches above each eye for the brows and short radiating stitches at the outer corners for lashes.
Thread a large needle with red cotton yarn and embroider the fox's mouth and tongue onto the lower muzzle area using straight stitches.
Work with orange plush yarn and 4.5mm hook. Make two pieces. Do not stuff.
Start with a MR, work 6 sc into the ring. (6)
inc in every stitch around. (12)
(2 sc, inc) repeat 4 times. (16)
Work 16 sc evenly. (16)
Work 16 sc evenly. (16)
(2 sc, dec) repeat 4 times. (12)
Work 12 sc evenly. (12)
Work 12 sc evenly. (12)
Work 12 sc evenly. (12)
Finish with a sl st, cut yarn. Do not stuff. Set both arms aside — they'll be joined in during Body Round 5.
Work with orange plush yarn and 4.5mm hook. Leave a yarn tail at the start for sewing later. Begin without a sl st — chain 24, then join with a sl st into the first chain to form a ring.
Work 24 sc around the ring. (24)
(3 sc, inc) repeat 6 times. (30)
(4 sc, inc) repeat 6 times. (36)
(5 sc, inc) repeat 6 times. (42)
Note: The PDF lists Round 4 as '(5 sc, ins)' — this appears to be a typo for 'inc'. Treat as a standard increase to reach 42 stitches, consistent with Round 5.
Work this round joining both arms to the body as follows: work 7 sc crocheting together with the first arm, then 13 sc on the body only, work 7 sc crocheting together with the second arm, then 15 sc on the body only. (42)
sc2tog at the first arm junction, work 4 sc on the arm only, sc2tog, work 12 sc on body only, sc2tog at the second arm junction, work 4 sc on the arm only, sc2tog, work 14 sc on body only. (38)
dec, 2 sc, dec, 12 sc, dec, 2 sc, dec, 14 sc. (34)
Work 34 sc evenly, then ch 1 to prepare for the switch to double crochet. (34)
Work 34 dc evenly. (34)
Work 34 dc evenly. (34)
Work 34 dc evenly. (34)
Work 34 dc evenly. (34)
Work 34 dc evenly. (34)
Work 34 dc evenly. (34)
Fasten off. The body is now complete and ready to be joined to the finished head.
There's something genuinely magical about putting a hand puppet you made yourself on your hand for the first time — and this fox delivers that feeling completely. 🦊 He's squishy, expressive, and absolutely full of character thanks to that embroidered face and velvety plush texture. Make him for a little one in your life, donate him to a school, or keep him for yourself (zero judgment here). Once you finish one, you'll want to make the whole woodland crew. 🧶 Happy making! ✨
You can, but the result will be noticeably smaller — probably around 18–20cm instead of 28cm — and the texture will be much flatter. The plush yarn is a big part of what makes this fox so soft and appealing. If you do substitute, you'll also want to drop down to a 3.5mm hook to maintain fabric tension.
This is exactly what the sc2tog steps in Rounds 6 and 7 are for. Work those decreases right at the junction where arm stitches and body stitches meet — one on each side of each arm. If you skip or misplace them, you'll get an obvious gap at both sleeve openings.
The nose is worked with sport weight cotton on a 2.0mm hook, so if you're seeing loose or shapeless stitches, the most likely cause is tension. Cotton yarn at that gauge needs a firm, consistent tension. Also double-check Round 5 — the source pattern has a minor formatting quirk, but it should read (2 sc, dec) x3 to bring you back down to 9 stitches.
The 34 dc rounds at the base of the body create a fairly generous opening — most adult hands will fit comfortably. If you have larger hands, you could add an extra repeat in the foundation chain or work one more increase round before the arm join to widen the sleeve.
The 7mm plastic safety eyes need to be attached very securely for use with young children. For babies under 3, it's worth embroidering felt eyes instead and skipping the plastic safety eyes altogether — embroidered features carry no choking risk.
