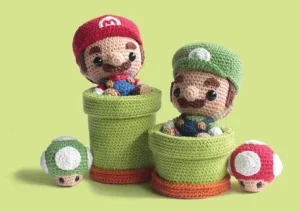
If you grew up with a controller in your hand, you are going to absolutely adore this project. I have put together a full set including both brothers, their iconic green pipes, and even some power-up mushrooms to round out the scene. They are the perfect size for a desk buddy or a nostalgic gift for the gamer in your life. Grab your favorite hooks and let's bring these pixelated legends into the real world with some soft, handmade charm.
Progress Tracker
0% Complete
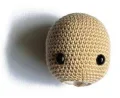
— 1. Mario — Head :
Round 1 :
Using beige yarn, start with 6 sc into a mr (6)
Round 2 :
Work 6 inc around (12)
Round 3 :
Repeat (1 inc, 1 sc) 6 times (18)
Round 4 :
Repeat (1 inc, 2 sc) 6 times (24)
Round 5 :
Repeat (1 inc, 3 sc) 6 times (30)
Round 6 :
Repeat (1 inc, 4 sc) 6 times (36)
Round 7 :
Repeat (1 inc, 5 sc) 6 times (42)
Round 8 :
Repeat (1 inc, 6 sc) 6 times (48)
Round 9 :
Work 1 sc in every st around (48)
Round 10 :
Work 1 sc in every st around (48)
Round 11 :
Work 1 sc in every st around (48)
Round 12 :
Work 1 sc in every st around (48)
Round 13 :
Work 1 sc in every st around (48)
Round 14 :
Work 1 sc in every st around (48)
Round 15 :
Work 1 sc in every st around (48)
Round 16 :
Work 1 sc in every st around (48)
Round 17 :
Work 1 sc in every st around (48)
Round 18 :
Repeat (1 dec, 6 sc) 6 times (42)
Round 19 :
Repeat (1 dec, 5 sc) 6 times (36)
Round 20 :
Repeat (1 dec, 4 sc) 6 times (30)
Info :
Place 10mm eyes between Rounds 16 and 17, leaving about 10 stitches between them. Secure with washers and begin stuffing firmly.
Round 21 :
Repeat (1 dec, 3 sc) 6 times (24)
Round 22 :
Repeat (1 dec, 2 sc) 6 times (18)
Info :
Finish with a slst, fasten off, and weave in your tail. Add a bit more stuffing if the head feels soft.
— 2. Mario — Collar :
Left Collar :
Using red yarn, ch 4. Starting in the 2nd ch from hook, work 2 sc, then 1 slst (3)
Right Collar :
Using red yarn, ch 4. Starting in the 2nd ch from hook, work 1 slst, then 2 sc (3)
Info :
Fasten off. You can leave a tail for sewing or cut it short if you plan to use glue later.
— 3. Mario — Body :
Round 1 :
Using red yarn, start with 6 sc into a mr (6)
Round 2 :
Work 6 inc around (12)
Round 3 :
Repeat (1 inc, 1 sc) 6 times (18)
Round 4 :
Repeat (1 inc, 2 sc) 6 times (24)
Round 5 :
Work 1 sc in every st around (24)
Round 6 :
Work 1 sc in every st around (24)
Round 7 :
Work 1 sc in every st around (24)
Round 8 :
Work 1 sc in every st around (24)
Round 9 :
Work 1 sc in every st around (24)
Round 10 :
Work (1 dec, 2 sc) twice, then 1 dec, 1 sc. Switch to beige for 1 sc, then back to red for (1 dec, 2 sc) 3 times (18)
Round 11 :
With red, work 8 sc. Switch to beige for 2 sc, then back to red for 8 sc (18)
Info :
Finish with a slst and fasten off, leaving a long tail for sewing. Stuff the body completely.
— 4. Mario — Legs (Make 2) :
Round 1 :
Using tan yarn, start with 6 sc into a mr (6)
Round 2 :
Work 6 inc around (12)
Round 3 :
Switch to brown and work 12 sc into the BLO (12)
Round 4 :
Work 12 sc into the FLO (12)
Info :
Turn the top part inside out temporarily to make working into the back loops easier.
Round 5 :
Using the back loops from Round 3 and switching to blue yarn: 5 sc, sk 1 st, 5 sc, sk 1 st (10)
Round 6 :
Work 1 sc in every st around (10)
Round 7 :
Work 1 sc in every st around (10)
Round 8 :
Repeat (1 dec, 3 sc) twice (8)
Info :
Slst and fasten off with a sewing tail. Fill firmly with stuffing.
— 5. Mario — Uniform :
Round 1 :
Using blue yarn, start with 6 sc into a mr (6)
Round 2 :
Work 6 inc around (12)
Round 3 :
Repeat (1 inc, 1 sc) 6 times (18)
Round 4 :
Repeat (1 inc, 2 sc) 6 times (24)
Round 5 :
Repeat (1 inc, 11 sc) twice (26)
Round 6 :
Work 1 sc in every st around (26)
Round 7 :
Work 1 sc in every st around (26)
Round 8 :
Work 1 sc in every st around (26)
Info :
We will now create the back flap by working in rows. ch 1 to begin.
Row 9 :
Work 8 sc, ch 1 and turn (8)
Row 10 :
1 sc, sk 1 st, 4 sc, sk 1 st, 1 sc (6)
Info :
Fasten off. To make the front flap, skip 5 stitches to the left of your back flap and repeat Rows 9 and 10. Hide all yarn tails.
— 6. Mario — Pocket :
Row 1 :
Using blue yarn, ch 5. Starting in the 2nd ch: 1 sc, 2 dc, 1 sc (4)
Info :
Fasten off and leave a tail for assembly.
— 7. Mario — Straps (Make 2) :
Row 1 :
Using blue yarn, ch 14. Starting in the 2nd ch: work 13 slst (13)
Info :
Fasten off and leave a tail for sewing.
— 8. Mario — Buttons (Make 2) :
Row 1 :
Using bronze yarn, ch 3. Starting in the 3rd ch: work 1 hdc (1)
Info :
Fasten off and hide the tails.
— 9. Mario — Arms (Make 2) :
Round 1 :
Using white yarn, start with 4 sc into a mr (4)
Round 2 :
Work 4 inc around (8)
Round 3 :
Work 1 sc in every st around (8)
Round 4 :
Work 8 sc into the FLO (8)
Info :
Flip the top inside out to access the back loops easily.
Round 5 :
Working into the back loops of Round 3 and switching to red yarn: work 1 sc in every st around (8)
Round 6 :
Work 1 sc in every st around (8)
Round 7 :
Work 1 sc in every st around (8)
Round 8 :
Work 1 sc in every st around (8)
Round 9 :
Work 1 sc in every st around (8)
Info :
Slst and fasten off with a sewing tail. Stuff the arm lightly.
— 10. Mario — Sideburns (Make 2) :
Row 1 :
Using dark brown yarn, ch 7. Starting in the 2nd ch: 1 slst, 3 sc, 2 hdc (6)
Info :
Fasten off and leave a tail for sewing.
— 11. Mario — Eyebrows (Make 2) :
Row 1 :
Using dark brown yarn, ch 5. Starting in the 2nd ch: 1 slst, 2 sc, 1 slst (4)
Info :
Fasten off and leave a tail for sewing.
— 12. Mario — Moustache :
Row 1 :
Using dark brown yarn, ch 10. Starting in the 2nd ch: 1 slst, 1 hdc inc, 1 slst, (1 dc inc, 1 slst) repeated twice, 1 hdc inc, 1 slst (13)
Info :
Fasten off and leave a tail for sewing.
— 13. Mario — Hair Base :
Round 1 :
Using dark brown yarn, start with 6 sc into a mr (6)
Round 2 :
Work 6 inc around (12)
Round 3 :
Repeat (1 inc, 1 sc) 6 times (18)
Round 4 :
Repeat (1 inc, 2 sc) 6 times (24)
Round 5 :
Repeat (1 inc, 3 sc) 6 times (30)
Round 6 :
Repeat (1 inc, 4 sc) 6 times (36)
Round 7 :
Repeat (1 inc, 5 sc) 6 times (42)
Round 8 :
Repeat (1 inc, 6 sc) 6 times (48)
Round 9 :
Work 1 sc in every st around (48)
Round 10 :
Work 1 sc in every st around (48)
Round 11 :
Work 1 sc in every st around (48)
Round 12 :
Work 1 sc in every st around (48)
Round 13 :
Work 1 sc in every st around (48)
Round 14 :
Work 1 sc in every st around (48)
Round 15 :
Work 1 sc in every st around (48)
Round 16 :
Work 1 sc in every st around (48)
Round 17 :
Work 1 sc in every st around (48)
Info :
Finish with a slst and leave a long tail for sewing.
— 14. Mario — Nose :
Round 1 :
Using beige yarn, start with 5 sc into a mr (5)
Round 2 :
Work 5 inc around (10)
Round 3 :
Work 1 sc in every st around (10)
Info :
Slst and fasten off with a long tail. Stuff the nose lightly.
— 15. Mario — Ears (Make 2) :
Row 1 :
Using beige yarn, ch 5. Starting in the 2nd ch: 1 slst, 2 dc, 1 slst (4)
Info :
Fasten off and leave a tail for sewing.
— 16. Mario — Cap :
Round 1 :
Using red yarn, start with 6 sc into a mr (6)
Round 2 :
Work 6 inc around (12)
Round 3 :
Repeat (1 inc, 1 sc) 6 times (18)
Round 4 :
Repeat (2 sc, 1 inc) 6 times (24)
Round 5 :
Repeat (1 inc, 3 sc) 6 times (30)
Round 6 :
Repeat (4 sc, 1 inc) 6 times (36)
Round 7 :
Repeat (1 inc, 5 sc) 6 times (42)
Round 8 :
Repeat (6 sc, 1 inc) 6 times (48)
Round 9 :
Repeat (1 inc, 7 sc) 6 times (54)
Round 10 :
Repeat (8 sc, 1 inc) 6 times (60)
Round 11 :
Repeat (1 inc, 9 sc) 6 times (66)
Round 12 :
Work 1 sc in every st around (66)
Round 13 :
Work 1 sc in every st around (66)
Round 14 :
Work 1 sc in every st around (66)
Round 15 :
Work 1 sc in every st around (66)
Round 16 :
Repeat (1 dec, 9 sc) 6 times (60)
Round 17 :
Work 1 sc in every st around (60)
Round 18 :
Repeat (8 sc, 1 dec) 6 times (54)
Info :
Fasten off. Skip 18 stitches from your last stitch. Join red yarn and work into the FLO to create the brim. ch 1 to start.
Round 19 :
In FLO: 1 slst, 1 sc, 1 hdc, 1 dc, 1 htc, 1 tc inc, 6 tc, 1 tc inc, 1 htc, 1 dc, 1 hdc, 1 sc, 1 slst (20)
Info :
Fasten off and hide all ends.
— 17. Cap Emblem :
Round 1 :
Using white yarn, start with 5 sc into a mr (5)
Round 2 :
Work 5 inc around (10)
Round 3 :
Repeat (1 inc, 1 sc) 5 times (15)
Info :
Slst and fasten off. Embroider the letter 'M' (for Mario) or 'L' (for Luigi) onto the center using red or green yarn, then attach to the cap.
— 18. Luigi — Head :
Round 1 :
Using beige yarn, start with 6 sc into a mr (6)
Round 2 :
Work 6 inc around (12)
Round 3 :
Repeat (1 inc, 1 sc) 6 times (18)
Round 4 :
Repeat (1 inc, 2 sc) 6 times (24)
Round 5 :
Repeat (1 inc, 3 sc) 6 times (30)
Round 6 :
Repeat (1 inc, 4 sc) 6 times (36)
Round 7 :
Repeat (1 inc, 5 sc) 6 times (42)
Round 8 :
Repeat (1 inc, 13 sc) 3 times (45)
Round 9-19 :
Work 1 sc in every st around for 11 rounds (45)
Round 20 :
Repeat (1 dec, 13 sc) 3 times (42)
Round 21 :
Repeat (1 dec, 5 sc) 6 times (36)
Round 22 :
Repeat (1 dec, 4 sc) 6 times (30)
Info :
Insert 10mm eyes between Rounds 17 and 18, about 9 stitches apart. Stuff the head firmly.
Round 23 :
Repeat (1 dec, 3 sc) 6 times (24)
Round 24 :
Repeat (1 dec, 2 sc) 6 times (18)
Info :
Slst and fasten off, weaving in the tail.
— 19. Luigi — Hair Base :
Round 1 :
Using dark brown yarn, ch 7. Start in 2nd ch: 6 sc. Turn and work 6 sc along the other side of the chain (12)
Round 2 :
Repeat (1 inc, 1 sc) 6 times (18)
Round 3 :
Repeat (1 inc, 2 sc) 6 times (24)
Round 4 :
Repeat (1 inc, 3 sc) 6 times (30)
Round 5 :
Repeat (1 inc, 4 sc) 6 times (36)
Round 6 :
Repeat (1 inc, 5 sc) 6 times (42)
Round 7 :
Repeat (1 inc, 6 sc) 6 times (48)
Round 8-11 :
Work 1 sc in every st around for 4 rounds (48)
Round 12 :
Repeat (1 inc, 15 sc) 3 times (51)
Round 13-16 :
Work 1 sc in every st around for 4 rounds (51)
Info :
Finish with a slst and leave a long sewing tail.
— 20. Luigi — Cap :
Round 1-10 :
Follow Mario Cap instructions for Rounds 1 through 10.
Round 11 :
Using green yarn, repeat (1 inc, 19 sc) 3 times (63)
Round 12-15 :
Work 1 sc in every st around for 4 rounds (63)
Round 16 :
Repeat (1 dec, 19 sc) 3 times (60)
Round 17 :
Repeat (18 sc, 1 dec) 3 times (57)
Round 18 :
dec, 8 sc, dec, 7 sc, dec, 8 sc, dec, 7 sc, dec, 8 sc, dec, 7 sc (51)
Info :
Fasten off. Skip 17 stitches from the end. Join green yarn to FLO, ch 1.
Round 19 :
In FLO: 1 slst, 1 sc, 1 hdc, 1 dc, 1 htc, 1 tc inc, 5 tc, 1 tc inc, 1 htc, 1 dc, 1 hdc, 1 sc, 1 slst (19)
— 21. Luigi — Moustache :
Row 1 :
Using dark brown yarn, ch 10. Starting in the 2nd ch: 1 slst, 1 sc, 1 hdc inc, 1 hdc, 1 slst, 1 hdc, 1 hdc inc, 1 sc, 1 slst (11)
Info :
Fasten off and leave a tail for sewing.
— 22. Pipe Pattern :
Round 1 :
Using terracotta yarn, start with 6 sc into a mr (6)
Round 2 :
Work 6 inc around (12)
Round 3 :
Repeat (1 inc, 1 sc) 6 times (18)
Round 4 :
Repeat (2 sc, 1 inc) 6 times (24)
Round 5 :
Repeat (1 inc, 3 sc) 6 times (30)
Round 6 :
Repeat (4 sc, 1 inc) 6 times (36)
Round 7 :
Repeat (1 inc, 5 sc) 6 times (42)
Round 8 :
Repeat (6 sc, 1 inc) 6 times (48)
Round 9 :
Repeat (1 inc, 7 sc) 6 times (54)
Round 10 :
Repeat (8 sc, 1 inc) 6 times (60)
Round 11 :
Repeat (1 inc, 9 sc) 6 times (66)
Round 12 :
Work 66 sc into the BLO (66)
Round 13 :
Work 1 sc in every st around (66)
Round 14 :
Work 66 sc into the FLO (66)
Info :
Flip the piece inside out temporarily to work into the back loops.
Round 15 :
Using the back loops from Round 13 and switching to light green yarn: Repeat (1 dec, 9 sc) 6 times (60)
Round 16-24 :
Work 1 sc in every st around for 9 rounds (60)
Round 25 :
Work (1 inc, 9 sc) 6 times into the FLO (66)
Round 26 :
Repeat (10 sc, 1 inc) 6 times (72)
Round 27 :
Work 72 sc into the BLO (72)
Round 28-31 :
Work 1 sc in every st around for 4 rounds (72)
Round 32 :
Repeat (1 dec, 10 sc) 6 times into the BLO (66)
Round 33 :
Repeat (9 sc, 1 dec) 6 times (60)
Info :
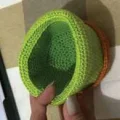
We are now starting the inner portion of the pipe.
Round 34 :
Switch to green yarn and work (1 dec, 18 sc) 3 times into the BLO (57)
Round 35-43 :
Work 1 sc in every st around for 9 rounds (57)
Round 44 :
Work (17 sc, 1 dec) 3 times into the FLO (54)
Round 45 :
Repeat (1 dec, 7 sc) 6 times (48)
Round 46 :
Repeat (6 sc, 1 dec) 6 times (42)
Round 47 :
Repeat (1 dec, 5 sc) 6 times (36)
Info :
Add stuffing. You can add popcorn kernels at the bottom to weigh it down so it won't tip over.
Round 48 :
Repeat (4 sc, 1 dec) 6 times (30)
Round 49 :
Repeat (1 dec, 3 sc) 6 times (24)
Round 50 :
Repeat (2 sc, 1 dec) 6 times (18)
Round 51 :
Repeat (1 dec, 1 sc) 6 times (12)
Info :
Fasten off and hide the tail. Push the inner green piece down into the pipe to shape it. For a taller pipe, work 18 rounds instead of 9 for Round 16.
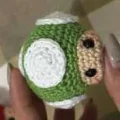
— 23. Bonus — Mushrooms :
Head R1 :
Using red or green yarn, start with 6 sc into a mr (6)
Head R2 :
Work 6 inc around (12)
Head R3 :
Repeat (1 inc, 1 sc) 6 times (18)
Head R4 :
Repeat (2 sc, 1 inc) 6 times (24)
Head R5 :
Repeat (1 inc, 7 sc) 3 times (27)
Head R6 :
Repeat (1 inc, 8 sc) 3 times (30)
Head R7 :
Repeat (4 sc, 1 inc) 6 times (36)
Head R8-10 :
Work 1 sc in every st around for 3 rounds (36)
Head R11 :
Repeat (1 inc, 5 sc) 6 times (42)
Head R12 :
Repeat (1 dec, 5 sc) 6 times (36)
Head R13 :
Repeat (4 sc, 1 dec) 6 times (30)
Head R14 :
Repeat (1 dec, 3 sc) 6 times (24)
Info :
Slst, fasten off with a tail, and stuff fully. Now start the body.
Body R1 :
Using beige yarn, start with 6 sc into a mr (6)
Body R2 :
Work 6 inc around (12)
Body R3 :
Repeat (1 inc, 1 sc) 6 times (18)
Body R4 :
Repeat (1 inc, 5 sc) 3 times (21)
Body R5-8 :
Work 1 sc in every st around for 4 rounds (21)
Info :
Slst and fasten off. Insert 5mm safety eyes between Rounds 5 and 6, 4 stitches apart. Stuff the body.
Dots :
Using white yarn, make 5: R1: 4 sc in mr (4). R2: 4 inc (8). R3: (inc, 1 sc) x 4 (12). R4: (inc, 2 sc) x 4 (16). Fasten off.
I hope you have as much fun making this little crew as I did! There is something so satisfying about seeing these characters come to life stitch by stitch. Whether they are guarding your desk or being gifted to a fellow gamer, they are sure to spark some wonderful memories. Don't forget to share your finished photos with our community—I absolutely love seeing your color choices and how you style your little plumber dioramas! Happy stitching, and may your hook always find the right loops! 🧶✨🎮