About This Cupid Whale Amigurumi Pattern
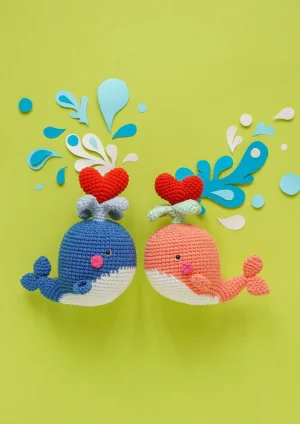
This makes a wonderful handmade gift for someone special or a sweet addition to a sea-themed nursery. It's compact enough for a shelf but sturdy enough for play.
Ideal for those with basic crocheting experience, featuring slightly more advanced stitches and techniques to expand your skills.
Fits nicely into a free afternoon — 2 to 5 hours of focused, enjoyable crocheting.
Playful characters full of personality, designed to spark imagination and become cherished playtime favorites.
This makes a wonderful handmade gift for someone special or a sweet addition to a sea-themed nursery. It's compact enough for a shelf but sturdy enough for play.
I'm a sucker for clever construction, and the way the water fountain is built from four separate pieces joined together is just genius. It's so satisfying to see the recessed blowhole take shape! Plus, the color changes on the belly give it such a clean, polished look that makes you feel like a pro.
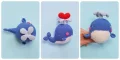
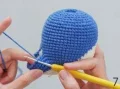
There is something so incredibly satisfying about amigurumi that uses clever shaping, and this Cupid Whale is a perfect example. When I first saw the design, I was so intrigued by the blowhole construction. It's not every day you see a pattern that asks you to push part of the crochet back inside itself! It creates such a professional, clean finish that you just don't get with simple flat sewing.
I personally love playing with the colors on this one. While the classic blue and white is a total winner, I've seen some makers try a soft mint or even a lilac for the body, and it looks just as darling. If you're making this for a special occasion like an anniversary or Valentine's Day, you could even embroider a tiny initial onto the heart to make it extra personal.
One little tip from my own experience: when you're joining the four pieces of the water fountain, keep your tension quite snug. Those joins can sometimes leave tiny gaps if you're a loose crocheter, but a tight stitch there will keep the 'water' looking smooth and cohesive. It's those little details that really make the finished toy shine!
This little whale is such a joy to hook up! It's got that perfect mix of classic amigurumi shaping with a really unique water spout detail that makes it stand out. You'll love seeing the character come to life as you add the tiny heart on top. It's the kind of project that keeps you engaged with clever construction while still being a relatively quick finish for your weekend crafting.
In this section, we use two colors. Instructions in White refer to Yarn A, and instructions in Blue refer to Yarn B.
Using White, work 7 sc into a mr (7)
inc in every stitch around (14)
[sc 1, inc] 7x (21)
[sc 1, inc, sc 1] 7x (28)
[sc 3, inc] 7x (35)
[sc 2, inc, sc 2] 7x (42)
[sc 5, inc] 7x, then switch to Blue (49)
With White: sc 3, inc, sc 3. With Blue: sc 3, inc, [sc 6, inc] 2x, sc 6, inc, [sc 6, inc] 2x, sc 3 (56)
With White: sc 7, inc, sc 1. With Blue: sc 6, inc, [sc 7, inc] 2x, sc 1, sc 6, inc, [sc 7, inc] 2x (63)
With White: sc 4, inc, sc 6, sc 2, inc. With Blue: [sc 8, inc] 2x, sc 4, sc 4, inc, [sc 8, inc] 2x, sc 4 (70)
With White: sc 13. With Blue: sc 27, sc 30 (70)
With White: sc 14. With Blue: sc 25, sc 31 (70)
With White: sc 15. With Blue: sc 23, sc 16. Skip the next 16 stitches (these will be used later for the tail), then continue to the next round (54)
With White: sc 16. With Blue: sc 21, sc 17 (54)
With White: sc 18. With Blue: sc 17, sc 19 (54)
With White: sc 20. With Blue: sc 13, sc 21. Fasten off White (54)
Using Blue, sc 54 in each round. Place safety eyes between Rounds 20 and 21, spaced 17 stitches apart (54)
[sc 7, dec] 6x (48)
[sc 6, dec] 6x (42)
[sc 5, dec] 6x (36)
[sc 4, dec] 6x. Stuff the body firmly (30)
[sc 3, dec] 6x (24)
[sc 2, dec] 6x (18)
[sc 1, dec] 6x (12)
Work sc 12 in the blo (12)
sc 12. Do not add stuffing to this narrow tube (12)
dec 6 (6)
Fasten off and weave the tail through the last 6 stitches. Use your hook to push these final rounds into the body to create the blowhole effect.
Locate the 16 stitches skipped in Round 13. Skip the first 2 stitches from the last body stitch, join Blue yarn.
sc 12, skip the remaining 2 stitches, then slst to the first sc of this round to join (12)
[sc 4, dec] 2x (10)
sc 10. Add stuffing firmly (10)
dec 5 (5)
Fasten off and weave in the end through the last 5 stitches.
Using Blue, work 3 sc into a mr (3)
inc in every stitch (6)
[sc 1, inc] 3x (9)
[sc 2, inc] 3x (12)
sc 12 (12)
dec 6 (6)
Fasten off and weave in the ends.
Using Blue, work 5 sc into a mr (5)
inc in every stitch (10)
sc, hdc, dc, [dc inc] 4x, dc, hdc, sc (14)
Fasten off leaving a long tail for sewing.
Using Fuchsia, work 6 sc into a mr (6)
Fasten off leaving a tail for assembly.
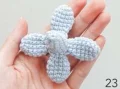
Make 4 separate pieces using Baby Blue. On the 4th piece, do not break the yarn.
Work 6 sc into a mr (6)
inc in every stitch (12)
sc 12 (12)
[sc 4, dec] 2x (10)
[sc 3, dec] 2x (8)
Join the pieces: sc 4 on piece 4, sc 4 on piece 3, sc 4 on piece 2, sc 4 on piece 1. slst to the first stitch to form a ring (16)
[sc 2, dec] 4x (12)
[sc 4, dec] 2x (10)
[sc 3, dec] 2x (8)
sc 8. Stuff this section firmly as you go (8)
Fasten off and weave in the ends. Now join Baby Blue yarn to the remaining stitches on the upper part of the fountain pieces.
sc 16 (this is 4 stitches from each piece) (16)
dec 8. Stuff firmly (8)
Fasten off and weave in. Use a needle to create a small dent in the center of the fountain.
Using Red yarn, make two pieces. Do not break the yarn on the second piece.
Work 6 sc into a mr (6)
inc in every stitch (12)
[sc 1, inc] 6x (18)
sc 18 (18)
Join the pieces: sc 18 on the first piece, then sc 18 on the second piece (36)
sc 36 (36)
[sc 4, dec] 6x (30)
[sc 3, dec] 6x (24)
[sc 2, dec] 6x. Stuff firmly (18)
[sc 1, dec] 6x (12)
dec 6 (6)
Fasten off and weave in the ends.
I hope you enjoyed making this little Cupid Whale as much as I did! There's something so rewarding about finishing those final assembly steps and seeing that tiny heart perched on top. It's the perfect little companion for your desk or a thoughtful gift for a friend who loves all things ocean-related. Don't forget to share your finished photos with the community — I absolutely love seeing the different shades of blue and pink everyone chooses for their whales. Happy hooking, and may your stitches always be even! 🧶 ✨ 🐋
Absolutely! If you use a thicker yarn like worsted weight, your whale will just turn out a bit larger. Just remember to use a hook size that creates a tight fabric so the stuffing doesn't peek through.
The trick is in Round 32 where you work in the back loops only. This creates a natural fold line. When you push the tube inside, use the back of your crochet hook to get it centered and deep enough.
No problem at all! You can easily embroider the eyes using black yarn or embroidery floss. Just make sure they are placed in the same spot (between Rounds 20 and 21) to keep the character's look.
Make sure you've stuffed the central tube (Rounds 12-17) very firmly. If it still won't stand up, you can add a tiny bit of extra stuffing into the recessed blowhole before sewing the fountain in.
