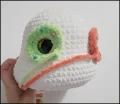
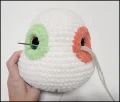
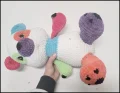
🧶 Beautiful ✨ Detailed 💝 Adorable

Dottie the Colorful Panda Amigurumi Pattern

Dottie the Colorful Panda Amigurumi Pattern
4.5★Rating
5-8 HoursTime Needed
2.9KMade This
✂️

Intermediate Level

Ideal for those with basic crocheting experience, featuring slightly more advanced stitches and techniques to expand your skills.

⏱️

Weekend Treat

Takes 5-7 hours, making it an enjoyable project to finish over a couple of days.

🐰

Whimsical Buddy

Playful characters full of personality, designed to spark imagination and become cherished playtime favorites.

About This Dottie the Colorful Panda Amigurumi Pattern

Dottie the Colorful Panda Amigurumi Pattern crochet pattern - detailed view

This project is a fantastic way to use up those leftover skeins of plush yarn. She makes an incredible nursery gift or a standout piece for an amigurumi collection that everyone will want to squeeze.

Why You'll Love This Dottie the Colorful Panda Amigurumi Pattern

I personally love how the bobble stitches on the paws add that tiny bit of realistic detail. It's those little touches, combined with the squishy velvet texture, that make this panda so hard to put down once you start. Plus, the color changes keep things interesting the whole way through!

Dottie the Colorful Panda Amigurumi Pattern step 1 Dottie the Colorful Panda Amigurumi Pattern step 2 Dottie the Colorful Panda Amigurumi Pattern step 3 Dottie the Colorful Panda Amigurumi Pattern step 4

Switch Things Up

I have to tell you, there's something so therapeutic about working with these bright, chunky yarns. When I first sat down to design Dottie, I wanted to move away from the traditional black and white. I started digging through my stash of plush yarn and found these incredible shades of mango, turquoise, and iris—they just felt right together!

One tip I really want to share from my own experience making her: when you get to the eye patches, don't rush the placement. I spent a good twenty minutes just pinning and re-pinning them until I got that perfect 'curious' expression. It makes such a difference! Also, if you find your tension is a bit loose with the 3.75mm hook, don't be afraid to drop down a size. You really want those stitches tight so the stuffing doesn't peek through her colorful tummy.

I honestly think the best part is the bobble stitches on the arms and legs. They look like little toe beans! It’s such a small detail, but it’s the one everyone comments on when they see her. I hope you have as much fun mixing and matching your favorite colors as I did. Happy making!

Common Mistakes & How to Fix Them

✗ When working the head's Round 15, be very careful with your increase placement; if they shift too far, the cheeks won't sit symmetrically under the eye patches.✗ If you don't pull the yarn tight enough during the needle sculpting phase, the eyes won't have that deep, expressive 'sunken' look that gives Dottie her character.✗ The bobble stitches on the arms are made in a contrasting black yarn; make sure to pop them out toward the right side so they don't get lost inside the stuffing.✗ Sewing the legs too far back on the body will make the panda tip over—pin them while the panda is in a sitting position to ensure she stays upright.

Dottie the Colorful Panda Amigurumi Pattern

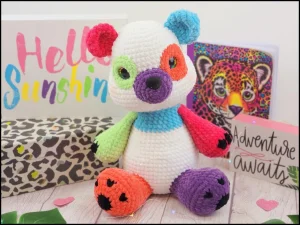
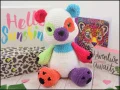
Get ready to meet your new favorite project! Dottie isn't your standard panda; she's a vibrant, patchwork-style sweetheart that brings a pop of joy to any space. You'll love the way the different colors play together, especially using that super squishy velvet yarn. This pattern is all about texture and personality, from her bobble-stitch paws to those oversized, colorful eye patches. Whether you're making her for a nursery or just to brighten your own shelf, she's a total delight to hook up.

Intermediate 5-8 Hours

Materials Needed for Dottie the Colorful Panda Amigurumi Pattern

— Main Fabric

  • 01
    Approximately 150g of Super Bulky weight #6 yarn in White for the main body
  • 02
    About 50g each of Super Bulky yarn in Pink, Green, Blue, Orange, and Purple for the colorful accents
  • 03
    A small amount of black Super Bulky yarn for the paw details

— Tools Required

  • 01
    3.75 mm (F) crochet hook
  • 02
    23 mm safety eyes
  • 03
    24 mm safety nose
  • 04
    Fiberfill stuffing for a squishy finish
  • 05
    Large-eye sewing needle for assembly
  • 06
    Stitch markers to track spiral rounds
  • 07
    Sharp scissors

Progress Tracker

0% Complete

— 1. Eye Patches :

Info :

Make one patch using Green yarn and one patch using Orange yarn.

Round 1 :

Work 6 sc into a mr (6)

Round 2 :

Work 1 inc into every stitch around (12)

Round 3 :

Repeat (3 inc, 3 sc) twice (18)

Round 4 :

Repeat ((1 sc, 1 inc) three times, 3 sc) twice (24)

Info :

F/O and leave a long tail for sewing. Insert your safety eyes between rounds 1 and 2, specifically after the second increase.

— 2. Head :

Info :

The head is worked from the top down using White yarn.

Round 1 :

ch 6, starting in the 2nd ch from hook: 4 sc, inc3 in the last chain, then work along the bottom of the chain: 3 sc, 1 inc (12)

Round 2 :

1 inc, 3 sc, 3 inc, 3 sc, 2 inc (18)

Round 3 :

(2 sc, 1 inc) x 6 (24)

Round 4 :

(3 sc, 1 inc) x 6 (30)

Round 5 :

(4 sc, 1 inc) x 6 (36)

Round 6 :

(5 sc, 1 inc) x 6 (42)

Round 7 :

(6 sc, 1 inc) x 6 (48)

Round 8-14 :

sc in every stitch around (48)

Info :

In the next round, place stitch markers on the first and last sc of the 12 sc segment that sits between your increases.

Round 15 :

Repeat ((1 sc, 1 inc) three times, 12 sc, (1 inc, 1 sc) three times) twice (60)

Round 16 :

Repeat ((2 sc, 1 inc) twice, 18 sc, (1 inc, 2 sc) twice) twice (68)

Round 17-20 :

sc in every stitch around (68)

Info :

Position the safety eyes (already in the patches) between rounds 12 and 13, aligning them above your markers. Space the eyes 10 stitches apart. Begin stuffing the head firmly.

Round 21 :

6 dec, 10 sc, 10 dec, 18 sc, 4 dec (48)

Round 22 :

(6 sc, 1 dec) x 6 (42)

Round 23 :

(5 sc, 1 dec) x 6 (36)

Round 24 :

(4 sc, 1 dec) x 6 (30)

Round 25 :

(3 sc, 1 dec) x 6 (24)

Info :

F/O and sew the eye patches onto the face.

— 3. Body :

Round 1 :

Using White yarn, work 12 sc into a mr (12)

Round 2 :

(1 sc, 1 inc) x 6 (18)

Round 3 :

(2 sc, 1 inc) x 6 (24)

Round 4 :

(3 sc, 1 inc) x 6 (30)

Round 5 :

(4 sc, 1 inc) x 6 (36)

Round 6 :

(5 sc, 1 inc) x 6 (42)

Round 7 :

(6 sc, 1 inc) x 6 (48)

Round 8 :

(7 sc, 1 inc) x 6 (54)

Round 9-15 :

sc in every stitch around (54)

Round 16 :

15 sc, (1 dec, 2 sc) x 3, 15 sc, (1 dec, 2 sc) x 3 (48)

Round 17 :

sc in every stitch around (48)

Round 18 :

(6 sc, 1 dec) x 6 (42)

Round 19-20 :

sc in every stitch around (42)

Round 21 :

(5 sc, 1 dec) x 6 (36)

Info :

Start stuffing the body.

Round 22 :

sc in every stitch around (36)

Colour Change :

Switch to Blue yarn.

Round 23 :

sc in every stitch around (36)

Round 24 :

(4 sc, 1 dec) x 6 (30)

Round 25-26 :

sc in every stitch around (30)

Round 27 :

(3 sc, 1 dec) x 6 (24)

Round 28 :

sc in every stitch around (24)

Info :

F/O and leave a long tail for sewing to the head.

— 4. Arms :

Info :

Make one arm starting with Green yarn and one arm starting with Pink yarn.

Round 1 :

Work 6 sc into a mr (6)

Round 2 :

Work 1 inc into every stitch around (12)

Round 3 :

(1 sc, 1 inc) x 6 (18)

Round 4 :

(2 sc, 1 inc) x 6 (24)

Round 5 :

4 sc, repeat (Color G: 1 bob, Color C or B: 1 sc) three times, 14 sc (24)

Round 6 :

sc in every stitch around (24)

Round 7 :

(1 dec, 10 sc) twice (22)

Round 8 :

(1 dec, 9 sc) twice (20)

Info :

Stuff the hand portion of the arm.

Round 9 :

(1 dec, 8 sc) twice (18)

Info :

Stop stuffing the arm now; the top should remain flat.

Round 10 :

sc in every stitch around (18)

Round 11 :

(1 dec, 7 sc) twice (16)

Round 12 :

sc in every stitch around (16)

Round 13 :

(1 dec, 6 sc) twice (14)

Round 14 :

sc in every stitch around (14)

Round 15 :

(1 dec, 5 sc) twice (12)

Round 16 :

sc in every stitch around (12)

Info :

Work 1 sc to reach the side, fold the top flat, and sc through both layers to close. F/O and leave a tail.

— 5. Ears :

Info :

Make one ear in Pink and one ear in Blue. Do not stuff these.

Round 1 :

Work 6 sc into a mr (6)

Round 2 :

Work 1 inc into every stitch around (12)

Round 3 :

(1 sc, 1 inc) x 6 (18)

Round 4 :

(2 sc, 1 inc) x 6 (24)

Round 5 :

sc in every stitch around (24)

Round 6 :

(2 sc, 1 dec) x 6 (18)

Round 7 :

(1 sc, 1 dec) x 6 (12)

Info :

Fold the ear flat and sc the opening closed. F/O and leave a sewing tail.

— 6. Muzzle :

Round 1 :

Using Purple yarn, work 6 sc into a mr (6)

Round 2 :

Work 1 inc into every stitch around (12)

Round 3 :

(1 sc, 1 inc) x 6 (18)

Round 4 :

1 sc, 1 inc, repeat (2 sc, 1 inc) five times, 1 sc (24)

Round 5 :

sc in every stitch around (24)

Info :

Insert safety nose between rounds 2 and 3. F/O and leave a tail for sewing.

— 7. Tail :

Round 1 :

Using Blue yarn, work 6 sc into a mr (6)

Round 2 :

Work 1 inc into every stitch around (12)

Round 3 :

(1 sc, 1 inc) x 6 (18)

Round 4 :

sc in every stitch around (18)

Round 5 :

(1 sc, 1 dec) x 6 (12)

Round 6 :

Work 6 dec (6)

Info :

Stuff lightly and sew closed. Leave a tail for attachment.

— 8. Legs :

Info :

Make one leg using Orange/Black and one leg using Purple/Black.

Round 1 :

Using Black yarn, work 6 sc into a mr (6)

Round 2 :

Work 1 inc into every stitch around (12)

Colour Change :

Switch to Orange or Purple yarn.

Round 3 :

(1 sc, 1 inc) x 6 (18)

Round 4 :

(2 sc, 1 inc) x 6 (24)

Round 5 :

3 sc, 1 inc, repeat (Color E or F: 3 sc, Color G: 1 inc) three times, Color E or F: (3 sc, 1 inc) twice (30)

Round 6 :

(4 sc, 1 inc) x 6 (36)

Round 7-8 :

sc in every stitch around (36)

Round 9 :

10 sc, (2 sc, 1 dec) x 4, 10 sc (32)

Round 10 :

10 sc, (1 sc, 1 dec) x 4, 10 sc (28)

Round 11 :

10 sc, 4 dec, 10 sc (24)

Info :

Begin stuffing the leg.

Round 12 :

(1 dec, 10 sc) twice (22)

Round 13 :

sc in every stitch around (22)

Round 14 :

(1 dec, 9 sc) twice (20)

Round 15 :

sc in every stitch around (20)

Info :

F/O and leave a long tail for sewing.

Assembly Instructions

  • Start by needle sculpting the face; use a long strand of yarn to pull the eye areas inward toward the base of the head to create depth.
  • Position the colorful eye patches over the sculpted eye areas and sew them down securely before attaching the safety eyes.
  • Stuff the muzzle firmly and pin it centered between the eyes, then sew it in place, adding a bit more stuffing just before closing.
  • Align the head with the top of the body and use a mattress stitch to join them, ensuring the head is facing forward.
  • Attach the ears to the top of the head, spacing them evenly on either side of the starting magic ring.
  • Pin the arms to the sides of the body between rounds 26 and 27, then sew them at a slight downward angle.
  • Place the legs on the lower front of the body so the panda sits balanced, and stitch them on through both the leg and body fabric.

Important Notes

  • 💡This pattern is worked in a continuous spiral, so don't join your rounds with a slip stitch unless the instructions specifically say to.
  • 💡Since we are using chunky yarn, the stitches can be tight; using a stitch marker at the start of every round is a lifesaver.
  • 💡When stuffing the head, pay extra attention to the cheek area (Round 15-16) to make sure they are plump and defined.
  • 💡All stitches should be worked through both loops to ensure the fabric is strong enough to hold the stuffing without gaps.
  • 💡If you're making this for a very small child, consider embroidering the eyes and nose instead of using plastic safety parts.

Dottie is more than just a toy; she's a handmade hug waiting to happen. Finishing a project this size feels like such an accomplishment, and I know you're going to feel so proud when she's finally sitting on your lap. I can’t wait to see the color combinations you choose—maybe a pastel version or even a neon one? Whatever you decide, she's going to be absolutely stunning. Thank you for letting me be a part of your creative journey today. Now, go grab your hook and let’s get started on this colorful adventure! 🧶✨
You ask,

we answer.

FAQs

Can I use a regular worsted weight yarn instead of the bulky yarn listed?

You definitely can, but keep in mind that Dottie will turn out much smaller—probably around 7 or 8 inches tall. You'll also want to use a smaller hook, like a 2.5mm or 3.0mm, to keep the fabric dense.

Is the needle sculpting part mandatory for the face?

It's not strictly required, but I highly recommend it! It’s what gives her that sweet, 'pouty' look and helps the eye patches sit flatter against the head. Without it, the face might look a bit too round and flat.

How do I make the bobble stitches pop out on the paws?

When you finish the bobble stitch, use your finger to poke it toward the 'right' side (the outside) of the arm or leg. If you don't, they tend to sink into the stuffing and won't look like little toes.

What if I can't find 23mm safety eyes?

You can use 20mm or 25mm eyes as well. Just remember to adjust the placement slightly by pinning them first to see where they look best on the patches before securing the backings.