🧶 Beautiful ✨ Detailed 💝 Adorable

Elvina the Delicate Butterfly Amigurumi Pattern

Elvina the Delicate Butterfly Amigurumi Pattern
4.8★Rating
3-5 HoursTime Needed
1.1KMade This
✂️

Intermediate Level

Ideal for those with basic crocheting experience, featuring slightly more advanced stitches and techniques to expand your skills.

⏱️

Quick Craft

Fits nicely into a free afternoon — 2 to 5 hours of focused, enjoyable crocheting.

🐰

Whimsical Buddy

Playful characters full of personality, designed to spark imagination and become cherished playtime favorites.

About This Elvina the Delicate Butterfly Amigurumi Pattern

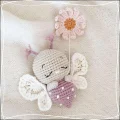
Elvina the Delicate Butterfly Amigurumi Pattern crochet pattern - detailed view

This little butterfly makes a precious baby shower gift or a charming addition to a nature-themed nursery. Her small size also makes her a great candidate for a whimsical keychain or bag charm that gets compliments every time.

Why You'll Love This Elvina the Delicate Butterfly Amigurumi Pattern

I’m absolutely obsessed with the way these wings come together—the mix of textures from the puff stitches is just so satisfying to crochet. Plus, adding the French knot polka dots at the end really brings her to life in the cutest way possible.

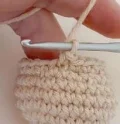
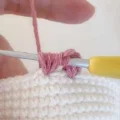
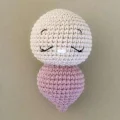
Elvina the Delicate Butterfly Amigurumi Pattern step 1 Elvina the Delicate Butterfly Amigurumi Pattern step 2 Elvina the Delicate Butterfly Amigurumi Pattern step 3 Elvina the Delicate Butterfly Amigurumi Pattern step 4

Switch Things Up

There is something so incredibly peaceful about making Elvina. I remember sitting on my porch with a cup of tea when I first worked out the wing construction—I wanted something that felt light and airy but still had that chunky, tactile feel. The puff stitches were the perfect answer! They give the wings this beautiful 'quilted' look that catches the light so nicely.

One thing I love to do is experiment with the body colors. While the violet is classic, I’ve seen versions in soft sage green or even a sunny yellow that look absolutely stunning. If you’re feeling extra creative, try adding a few tiny beads into the French knots on her body for a little bit of sparkle. It makes her look like she’s covered in morning dew!

When you get to the daisy, don't rush it. That little flower is the crowning jewel of the whole piece. If you find the stem a bit too floppy, you can always crochet over a thin piece of floral wire to give it some structure. It’s those tiny personal touches that turn a pattern into a keepsake. I really hope you enjoy every stitch of this delicate little lady!

Common Mistakes & How to Fix Them

✗ When working the puff stitches in the wings, keep your tension loose; if you pull too tight, it's nearly impossible to pull the hook through all seven loops on your hook.✗ Don't forget the flo transition at Round 20 — if you skip this, the body won't have that distinct skirt edge where the head meets the torso.✗ The antennas use a fringe technique; make sure to brush out the yarn plies thoroughly with a needle or comb to get that soft, fluffy look shown in the photos.✗ If you sew the wings on too low, Elvina might tip over; pin them higher up on the back to ensure she stays balanced and upright when sitting.

Elvina the Delicate Butterfly Amigurumi Pattern

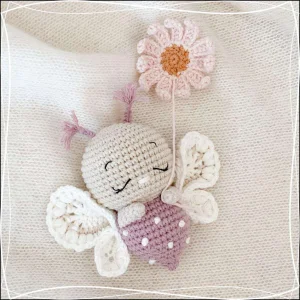
Meet Elvina, a dreamy little butterfly that's as sweet as a spring morning. I designed this pattern for anyone who loves tiny details, from her dainty puff-stitch wings to that cheerful daisy she carries wherever she goes. She's the perfect size for a nursery shelf or to keep as a little pocket-sized friend for your daily adventures. You'll love watching her personality emerge with every stitch of her soft, teardrop-shaped body.

Intermediate 3-5 Hours

Materials Needed for Elvina the Delicate Butterfly Amigurumi Pattern

— Main Fabric

  • 01
    Cotton yarn in Cream (Ricorumi n°02) for the wing highlights
  • 02
    Cotton yarn in Pastel Pink (Ricorumi n°07) for the daisy petals
  • 03
    Cotton yarn in Violet (Ricorumi n°18) for the body and antennas
  • 04
    Cotton yarn in Caramel (Ricorumi n°53) for the daisy center
  • 05
    Cotton yarn in Ivory (Ricorumi n°61) for the head and wing accents
  • 06
    Small amount of black embroidery thread for the sleepy eyes and eyebrows

— Tools Required

  • 01
    2.5 mm crochet hook
  • 02
    Large-eye yarn needle
  • 03
    Sharp scissors
  • 04
    Stitch markers
  • 05
    Sewing pins for assembly
  • 06
    High-quality fiberfill stuffing

Progress Tracker

0% Complete

— 1. Head and Body :

Info :

Begin with the Ivory yarn and work in a continuous spiral.

Round 1 :

Start by placing 6 sc into a mr (6)

Round 2 :

Work 6 inc around the circle (12)

Round 3 :

Repeat (1 sc, 1 inc) 6 times (18)

Round 4 :

Repeat (1 sc, 1 inc, 1 sc) 6 times (24)

Round 5 :

Repeat (3 sc, 1 inc) 6 times (30)

Round 6 :

Repeat (2 sc, 1 inc, 2 sc) 6 times (36)

Round 7 :

Repeat (5 sc, 1 inc) 6 times (42)

Round 8-16 :

Work 42 sc evenly around for these 9 rounds (42)

Round 17 :

Repeat (5 sc, 1 dec) 6 times (36)

Round 18 :

Repeat (1 sc, 1 dec, 1 sc) 9 times (27)

Round 19 :

Repeat (1 sc, 1 dec) 9 times (18)

Colour Change :

Stuff the head firmly and switch to the Violet yarn for the body.

Round 20 :

Working in flo only: repeat (1 sc, 1 inc, 1 sc) 6 times (24)

Round 21 :

Repeat (3 sc, 1 inc) 6 times (30)

Round 22 :

Repeat (2 sc, 1 inc, 2 sc) 6 times (36)

Round 23-26 :

Work 36 sc evenly around for these 4 rounds (36)

Round 27 :

Repeat (2 sc, 1 dec, 2 sc) 6 times (30)

Round 28 :

Repeat (3 sc, 1 dec) 6 times (24)

Info :

Begin stuffing the body and continue as you work the remaining rounds.

Round 29 :

Repeat (2 sc, 1 dec, 2 sc) 4 times (20)

Round 30 :

Repeat (3 sc, 1 dec) 4 times (16)

Round 31 :

Repeat (1 sc, 1 dec, 1 sc) 4 times (12)

Round 32 :

Repeat (1 sc, 1 dec) 4 times (8)

Round 33 :

Repeat (2 sc, 1 dec) 2 times (6)

Info :

Fasten off leaving a 20 cm tail. Use a needle to thread through the flo of the last 6 stitches and pull tight to close.

— 2. Antennas :

Info :

Make two using the Violet yarn.

Row 1 :

ch 6, then starting in the 3rd ch from your hook, work 4 sl st. Fasten off with a long tail.

Fringe :

Cut three 7 cm strands of Violet yarn. Fold them in half and pull the loop through the 2 skipped ch at the start. Pull the ends through the loop to create a fringe. Trim to 15 mm and fluff the yarn.

— 3. Arms :

Info :

Make two using the Ivory yarn.

Round 1 :

Work 6 sc into a mr (6)

Round 2-6 :

Work 6 sc around for these 5 rounds (6)

Info :

Finish with a sl st and fasten off, leaving a 30 cm tail. Flatten the piece and sew the opening shut.

— 4. Large Half-Wings :

Info :

Make two. These use Puff stitches (3 unfinished dc joined together).

Row 1 :

With Cream: ch 8, then starting in 2nd ch: 2 sc, 2 hdc, 2 dc. In the final ch work: [ (1 dc, 1 ch) x5, 1 dc ]. On the back of the ch: 2 dc, 2 hdc, 2 sc. Fasten off.

Row 2 :

With Ivory: Join with 1 sc in the first st of Row 1. Work 6 sc, then in each of the 5 ch-spaces work: (2 ch, 1 sc). Finish with 7 sc and fasten off.

Row 3 :

With Cream: Join with 1 sc in the first st of Row 2. Work 1 sc, 3 hdc, 1 Puff, 1 ch, 1 Puff, 2 ch. In each of the 5 ch-spaces work: [ (1 Puff, 2 ch) x2 ]. Skip the next st, then work: 1 Puff, 1 ch, 1 Puff, 3 hdc, 2 sc.

Info :

Fasten off with a 30 cm tail. Sew the first and last stitches of Row 3 together to create a drop shape.

— 5. Small Half-Wings :

Info :

Make two using the Cream yarn.

Row 1 :

ch 6, then starting in 2nd ch: 4 sc. In the last ch work: (2 ch, 1 sc, 2 ch, 1 sc, 2 ch). On the back of the ch: 4 sc. Fasten off.

Row 2 :

Join with 1 sc in the first st of Row 1. Work 1 sc, 1 hdc, 1 dc. In the first two ch-spaces work: [ (1 Puff, 2 ch) x2 ]. In the 3rd ch-space work: (1 Puff, 2 ch, 1 Puff, 1 ch). Finish with 1 dc, 1 hdc, 2 sc.

Info :

Fasten off with a 30 cm tail and sew the first and last stitches of Row 2 together to form a drop shape.

— 6. Daisy :

Round 1 :

With Caramel: 5 sc into a mr. Close with 1 sl st and ch 2 (5)

Round 2 :

Work 2 dc into every st. Close with 1 sl st using Pastel Pink yarn (10)

Round 3 :

ch 8, starting in 3rd ch: 4 dc, 1 hdc, 1 sc. Repeat the petal in the next st: (1 sl st, 8 ch, start in 3rd ch: 4 dc, 1 hdc, 1 sc) 10 times around. sl st to finish.

Assembly Instructions

  • Use ivory yarn to stitch a small nose across two stitches between Rounds 14 and 15, passing the thread through three times for a raised look.
  • Embroider the sleepy eyes on Round 14 and the dainty eyebrows on Round 10 using black thread, following the grid guide for placement.
  • Attach the antennas to Round 4 on either side of the head, ensuring the fluffy fringe is facing upward and trimmed evenly.
  • Create tiny polka dots on the violet body using ivory yarn and the French knot technique, scattering them randomly for a natural look.
  • Sew the large and small half-wings together at their folded edges, making sure to create two symmetrical wings (one left, one right).
  • Position the wings behind the arms on the back of the body and secure them firmly so they sit upright and balanced.
  • Sew the arms between the head and body, angling them slightly forward as if she is reaching out for her daisy.

Important Notes

  • 💡Always work in continuous spiral rounds unless the pattern specifically mentions closing the round with a slip stitch.
  • 💡Use an invisible decrease for the head and body to keep the stuffing from peeking through and ensure a professional finish.
  • 💡When changing colors, finish the last stitch of the old color with the new color loop for a seamless transition.
  • 💡Stuff the head firmly to maintain its round shape, but go a bit lighter on the bottom of the body to help the butterfly sit upright.
  • 💡Leave long tails on every piece you crochet; it makes sewing everything together much easier and more secure.
  • 💡The wing symmetry is key—be sure to sew the large and small pieces inversely for the second wing so they mirror each other.

I can't wait to see your version of Elvina! Whether you stick to these soft pastels or go bold with bright garden colors, she is sure to be a showstopper. There’s something so meditative about working those puff stitches, isn't there? I hope this project brings a little bit of spring magic to your hook today. Happy crocheting, and don't forget to share your finished butterfly with the community! I'm sure she'll be cherished wherever she goes. 🧶 ✨
You ask,

we answer.

FAQs

The wings look complicated, are they beginner-friendly?

They use puff stitches which can be a bit tricky if you're brand new, but I've included a breakdown of the stitch. Just take it slow and don't pull your loops too tight!

Can I use safety eyes instead of embroidery?

Absolutely! 6mm safety eyes would look adorable placed around Round 14, just make sure to secure them before you finish stuffing the head.

My butterfly won't stand up, what did I do wrong?

Check your wing placement! If they are too low or too heavy, she might tip. Try pinning them higher up on the back to shift the center of gravity.

What kind of yarn is best for the antenna fringe?

A cotton yarn that splits easily or a soft acrylic works best. Once you cut the ends, use a needle to separate the individual plies for that fuzzy look.