About This Super Hedgehog Hero Amigurumi Pattern
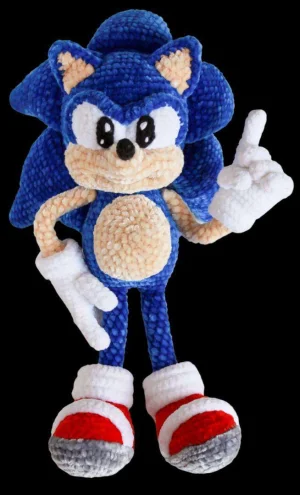
This finished hedgehog makes an incredible centerpiece for a nursery or a nostalgic gift for a lifelong gamer who appreciates the art of handmade plushies.
Designed for experienced crocheters, these patterns involve intricate designs and complex techniques to challenge and inspire.
A 10-12 hour project—great for savoring the process over several sessions.
Playful characters full of personality, designed to spark imagination and become cherished playtime favorites.
This finished hedgehog makes an incredible centerpiece for a nursery or a nostalgic gift for a lifelong gamer who appreciates the art of handmade plushies.
I absolutely adore how this pattern uses 'sculpting' techniques to bring out the character's personality. Seeing the face transform during the muzzle tightening phase is like magic! It's a longer project, but the way the different textures of the plush yarn and semi-cotton accents work together makes every hour spent stitching totally worth it.
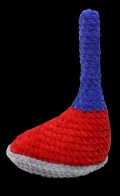
When I first saw this design, I knew I had to share it with you all. There is something so nostalgic about this specific blue hero, right? Working with plush yarn like Himalaya Dolphin Baby is a total dream for amigurumi because it hides your stitches so well, but it does mean you have to feel for your stitches rather than just seeing them.
One thing I really want to emphasize is the muzzle tightening. I always say it is like 'crochet plastic surgery' because those few tugs of thread are what really give him his personality. Don't rush that part! I spent nearly an hour just pinning the prickles on his head before I even touched my sewing needle.
If you find the deep blue a bit hard to see, try working under a bright desk lamp. It makes a world of difference for your eyes. I also found that using a slightly smaller hook for the pupils helped keep them nice and tight with no stuffing peeking through. I can't wait to see your versions—maybe a yellow 'Super' version is in my future?
Get ready to bring the fastest hero in the gaming world to your crochet hook! This project is a wonderful challenge that results in a large, cuddly, and incredibly detailed plush. You will love watching his iconic features come together, from those signature blue prickles to his classic red sneakers. It is a rewarding journey for any crafter looking to create a truly professional-looking handmade treasure.
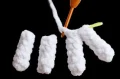
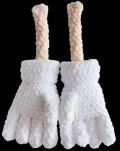
The arms are worked first so they can be joined directly to the body later. Use white yarn for the hands.
Work 6 SC into a MR (6)
Work 6 SC in each round (6)
For the thumb: CH 1, flatten the piece and crochet through both sides with 3 SC. Fasten off. Do not stuff.
For the other fingers (make 4): Work 6 SC into a MR (6)
Work 6 SC in each round (6)
Fasten off the first 3 fingers. On the 4th finger, do not cut the yarn; you will use it to join all fingers together.
Join fingers: 3 SC on the 1st finger, 3 SC on the 2nd, 3 SC on the 3rd, 6 SC around the 4th, 3 SC back on the 3rd, 3 SC on the 2nd, and 3 SC on the 1st (24)
Work 24 SC in each round (24)
For the left arm: 1 SC, 3 SC joining the thumb to the hand, 20 SC (24). For the right arm: 8 SC, 3 SC joining the thumb, 13 SC (24)
Repeat (10 SC, 1 DEC) 2 times (22)
Repeat (9 SC, 1 DEC) 2 times (20)
Repeat (3 SC, 1 DEC) 4 times (16)
Repeat (2 SC, 1 DEC) 4 times (12)
Switch yarn color to ivory and stuff only the palm area lightly so it remains flat.
Repeat (4 SC, 1 DEC) 2 times (10)
Repeat (3 SC, 1 DEC) 2 times (8)
Repeat (2 SC, 1 DEC) 2 times (6)
Work 6 SC in each round (6)
CH 1, flatten the arm and SC through both layers with 3 SC. Fasten off.
Using white yarn, CH 22
Starting in the 2nd CH from the hook, work 21 SC, CH 1, turn (21)
Work 21 SC in BLO, CH 1, turn (21)
Work 21 SC in FLO, fasten off leaving a long tail (21)
Using grey yarn, CH 10
Start in 2nd CH: 8 SC, 3 SC in last CH. On other side: 7 SC, 1 INC (20)
1 INC, 7 SC, 3 INC, 7 SC, 2 INC (26)
1 SC, 1 INC, 7 SC, (1 SC, 1 INC) 3 times, 7 SC, (1 SC, 1 INC) 2 times (32)
Repeat (2 SC, 1 INC) 2 times, 4 SC, (2 SC, 1 INC) 3 times, 4 SC, (2 SC, 1 INC) 3 times (40)
Repeat (3 SC, 1 INC) 2 times, 4 SC, (3 SC, 1 INC) 3 times, 4 SC, (3 SC, 1 INC) 3 times (48)
Switch to red yarn but do not cut the grey yarn; leave it on the outside for later.
Work 48 SC in BLO (48)
20 SC, 4 DEC, 20 SC (44)
Pick up the grey yarn and work 48 SS in the leftover front loops of Round 5. Fasten off grey.
Using red: 18 SC, 4 DEC, 18 SC (40)
16 SC, 4 DEC, 16 SC (36)
14 SC, 4 DEC, 14 SC (32)
12 SC, 4 DEC, 12 SC (28)
10 SC, 4 DEC, 10 SC (24)
8 SC, 4 DEC, 8 SC (20)
6 SC, 4 DEC, 6 SC (16)
Stuff the foot firmly into a pointed triangle shape. Switch to deep blue yarn.
Repeat (6 SC, 1 DEC) 2 times (14)
Repeat (5 SC, 1 DEC) 2 times (12)
Repeat (4 SC, 1 DEC) 2 times (10)
Repeat (3 SC, 1 DEC) 2 times (8)
Work 8 SC in each round (8)
Fasten off the left leg. Do not fasten off the right leg; you will continue to the body from here.
Join legs: From right leg, CH 4. Work 8 SC on left leg, 4 SC across the CH, 8 SC on right leg, 4 SC across other side of CH (24)
Repeat (3 SC, 1 INC) 6 times (30)
Work 30 SC (30)
Repeat (4 SC, 1 INC) 6 times (36)
Work 36 SC (36)
Repeat (5 SC, 1 INC) 6 times (42)
Work 42 SC in each round (42)
Repeat (5 SC, 1 DEC) 6 times (36)
Work 36 SC in each round (36)
Repeat (4 SC, 1 DEC) 6 times (30)
Attach arms: 5 SC, 3 SC through arm and body, 12 SC, 3 SC through second arm and body, 7 SC (30)
Work 30 SC (30)
Repeat (3 SC, 1 DEC) 6 times (24)
Repeat (2 SC, 1 DEC) 6 times (18)
Head starts: Repeat (1 SC, 1 INC) 9 times (27)
Repeat (2 SC, 1 INC) 9 times (36)
Repeat (3 SC, 1 INC) 9 times (45)
Repeat (4 SC, 1 INC) 9 times (54)
Repeat (8 SC, 1 INC) 6 times (60)
Work 60 SC in each round (60)
Repeat (8 SC, 1 DEC) 6 times (54)
Repeat (7 SC, 1 DEC) 6 times (48)
Repeat (6 SC, 1 DEC) 6 times (42)
Repeat (5 SC, 1 DEC) 6 times (36)
Repeat (4 SC, 1 DEC) 6 times (30)
Repeat (3 SC, 1 DEC) 6 times (24)
Repeat (2 SC, 1 DEC) 6 times (18)
Repeat (1 SC, 1 DEC) 6 times (12)
Work 6 DEC (6)
Fasten off but do not close the hole yet; it is needed for muzzle tightening.
The muzzle is worked with ivory yarn. Start with CH 16.
14 SC, 3 SC in last CH. On other side: 13 SC, 1 INC (32)
1 INC, 13 SC, 3 INC, 6 SC, 3 SC in one St, 6 SC, 2 INC (40)
1 SC, 1 INC, 13 SC, (1 SC, 1 INC) 3 times, 7 SC, 3 SC in one St, 7 SC, (1 SC, 1 INC) 2 times (48)
2 SC, 1 INC, 13 SC, (2 SC, 1 INC) 3 times, 8 SC, 3 SC in one St, 8 SC, (2 SC, 1 INC) 2 times (56)
Work 56 SC in each round (56)
Eye Whites (make 2): R1: 6 SC in MR. R2: 6 INC (12). R3: (3 INC, 3 SC) 2 times (18). R4: (1 SC, 1 INC) 3 times, 3 SC, (1 SC, 1 INC) 3 times, 3 SC (24).
Eyelids: Join blue yarn to eyes. Row 1: 28 SC in FLO, turn. Row 2: 28 SC, turn. Row 3: 28 SC joining with BLO of eye whites.
All prickles use deep blue yarn and are worked in rounds starting with 6 SC in MR.
Central Upper Prickle: Increase every round using the (X SC, INC) pattern until you reach 30 SC.
Work 30 SC in each round (30)
For the Middle/Lower prickles (make 2): Work same as above until 30 SC, then work 8 rounds of 30 SC (Rounds 10-17).
For the Side prickles (make 4): Work shaping with increases until Round 12 (28 SC), then work 8 rounds of 28 SC (Rounds 13-20).
I hope you had as much fun making this speedy little guy as I did! Amigurumi is such a special way to capture characters we love, and seeing him standing tall in those bright red sneakers is just the best feeling. Don't forget to share your finished photos with the community—we all love seeing your unique take on these projects. Keep your hooks busy and your yarn stash full, and I'll see you in the next pattern. Happy stitching, friends! 🧶✨
You can, but it will significantly change the size. This pattern is designed for bulky plush yarn; using DK cotton will result in a much smaller toy, and you'll need to adjust your hook size to ensure the stuffing doesn't show.
Because of the large head and many prickles, he is top-heavy. To help him stand, stuff the feet and legs very firmly with high-density fiberfill, and ensure the neck is reinforced with extra stuffing.
The trick is to stuff them very lightly—just enough to hold the shape—and sew them 'edge-to-edge' against the head. Adding a few hidden anchor stitches a couple of rounds down from the base will also help keep them in place.
Technically no, but it is highly recommended! Without the tightening, the muzzle will look like a flat oval. The tightening is what creates the cheeks and the characteristic smirk that makes him look like the real hero.
