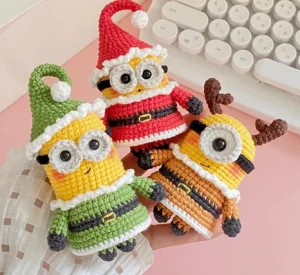
You're going to love bringing these little troublemakers to life for the holidays! Whether you want a Santa Bob, an Elf Kevin, or a Reindeer Stuart, these patterns are packed with personality. They're the perfect size for ornaments or stocking stuffers, and the colorful outfits make them such a joy to hook up while you're curled up on the sofa. Get ready to add some yellow-hued mischief to your Christmas decor!
Progress Tracker
0% Complete
— 1. Bob's Body (Santa) :
Round 1 :
Using yellow yarn, create a MR and work 7 sc into it (7)
Round 2 :
Work 1 inc in every stitch around (14)
Round 3 :
Repeat the pattern of 1 sc then 1 inc 7 times (21)
Round 4 :
Repeat the pattern of 1 inc then 2 sc 7 times (28)
Round 5 :
Repeat the pattern of 3 sc then 1 inc 7 times (35)
Round 6 :
Work 35 sc around (35)
Round 7 :
Work 35 sc around (35)
Round 8 :
Work 35 sc around (35)
Round 9 :
Work 35 sc around (35)
Round 10 :
Work 35 sc around (35)
Round 11 :
Work 35 sc around (35)
Round 12 :
Work 35 sc around (35)
Round 13 :
Work 35 sc around (35)
Round 14 :
Work 35 sc around (35)
Round 15 :
Switch to red yarn. Working in BLO, repeat 4 sc then 1 inc 7 times (42)
Round 16 :
Work 42 sc around (42)
Round 17 :
Work 42 sc around (42)
Round 18 :
Switch to black yarn. Work 42 sc around (42)
Round 19 :
Work 42 sc around (42)
Round 20 :
Switch back to red yarn. Working in BLO, work 42 sc around (42)
Round 21 :
Work 42 sc around (42)
Round 22 :
Repeat the pattern of 4 sc then 1 dec 7 times (35)
Round 23 :
Repeat the pattern of 3 sc then 1 dec 7 times (28)
Info :
Firmly pack the body with fiberfill before the opening gets too small.
Round 24 :
Repeat the pattern of 2 sc then 1 dec 7 times (21)
Round 25 :
Repeat the pattern of 1 sc then 1 dec 7 times (14)
Round 26 :
Work 7 dec around (7)
Info :
Fasten off using an invisible finish. Use a needle to weave through the remaining stitches and pull tight to close.
— 2. Kevin's Body (Elf) :
Round 1 :
Using yellow yarn, work 7 sc into a MR (7)
Round 2 :
Work 1 inc in each of the 7 sts (14)
Round 3 :
Repeat 1 sc and 1 inc 7 times (21)
Round 4 :
Repeat 1 inc and 2 sc 7 times (28)
Round 5 :
Repeat 3 sc and 1 inc 7 times (35)
Round 6-21 :
Work 16 rounds of 35 sc in yellow (35)
Round 22 :
Switch to green yarn. Working in BLO, repeat 4 sc then 1 inc 7 times (42)
Round 23 :
Work 42 sc around (42)
Round 24 :
Work 42 sc around (42)
Round 25 :
Switch to black yarn. Work 42 sc around (42)
Round 26 :
Work 42 sc around (42)
Round 27 :
Switch back to green yarn. Working in BLO, work 42 sc around (42)
Round 28 :
Work 42 sc around (42)
Round 29 :
Repeat 4 sc then 1 dec 7 times (35)
Round 30 :
Repeat 3 sc then 1 dec 7 times (28)
Info :
Stuff the body firmly with fiberfill.
Round 31 :
Repeat 2 sc then 1 dec 7 times (21)
Round 32 :
Repeat 1 sc then 1 dec 7 times (14)
Info :
Fasten off and sew the gap closed.
— 3. Stuart's Body (Reindeer) :
Round 1 :
With yellow yarn, start with 7 sc in a MR (7)
Round 2 :
Work 1 inc in every stitch (14)
Round 3 :
Repeat 1 sc and 1 inc 7 times (21)
Round 4 :
Repeat 1 inc and 2 sc 7 times (28)
Round 5 :
Repeat 3 sc and 1 inc 7 times (35)
Round 6-17 :
Work 12 rounds of 35 sc in yellow (35)
Round 18 :
Switch to brown yarn. In BLO, repeat 4 sc then 1 inc 7 times (42)
Round 19 :
Work 42 sc around (42)
Round 20 :
Work 42 sc around (42)
Round 21 :
Switch to black yarn. Work 42 sc around (42)
Round 22 :
Work 42 sc around (42)
Round 23 :
Switch back to brown yarn. In BLO, work 42 sc around (42)
Round 24 :
Work 42 sc around (42)
Round 25 :
Repeat 4 sc then 1 dec 7 times (35)
Round 26 :
Repeat 3 sc then 1 dec 7 times (28)
Info :
Pack the body tight with fiberfill.
Round 27 :
Repeat 2 sc then 1 dec 7 times (21)
Round 28 :
Repeat 1 sc then 1 dec 7 times (14)
Round 29 :
Work 7 dec around (7)
Info :
Fasten off and close the remaining hole with a needle.
— 4. Arms (Make Two) :
Round 1 :
Start with black yarn and work 4 sc in a MR (4)
Round 2 :
Work 1 inc in each of the 4 sts (8)
Round 3-8 :
Switch to the shirt color (red, green, or brown) and work 6 rounds of 8 sc (8)
Info :
Leave a long tail for sewing. Attach to the body at the round where the color change for the shirt occurs.
— 5. Legs (Make Two) :
Round 1 :
Using black yarn, work 7 sc in a MR (7)
Round 2 :
Work 1 inc, then 6 sc (8)
Round 3-4 :
Switch to the shirt color and work 2 rounds of 8 sc (8)
Info :
Leave a tail and sew these to the bottom of the body.
— 6. Bob's and Kevin's Glasses :
Round 1 :
Start with white yarn and work 7 sc in a MR (7)
Round 2 :
Work 7 inc around (14)
Round 3 :
Switch to gray yarn. In FLO, work 14 sc then 1 slst (14)
Info :
Leave a tail for sewing. Glue or snap safety eyes into the center before attaching to the face.
— 7. Stuart's Glasses :
Round 1 :
Start with white yarn and work 7 sc in a MR (7)
Round 2 :
Work 7 inc around (14)
Round 3 :
Repeat 1 sc and 1 inc 7 times (21)
Round 4 :
Switch to gray yarn. In FLO, work 21 sc then 1 slst (21)
Info :
Leave a tail. Attach eye and sew the assembly to the body.
— 8. Goggle Straps :
Bob & Kevin :
With black yarn, ch32, then work 31 slst back along the chain. Sew to the head sides.
Stuart :
With black yarn, ch37, then work 36 sc back along the chain. Sew to the head sides.
— 9. Shirt Trim & Collar :
Shirt Flap R1 :
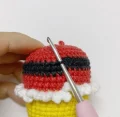
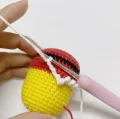
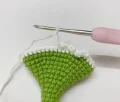
Join shirt color yarn to the FLO of the second BLO round on the body. ch1, repeat 5 sc then 1 inc 7 times, slst to join (49)
Shirt Flap R2-3 :
ch1, 49 sc around, slst (49)
Shirt Flap R4 :
Switch to white yarn. Work 49 sc around, slst (49)
Collar :
Join white yarn to the FLO of the first BLO round on the body. Repeat (ch3, slst into the next stitch) until the round is complete.
— 10. Bob's and Kevin's Hat :
Round 1 :
Using shirt color yarn, work 4 sc in a MR (4)
Round 2-4 :
Work 3 rounds of 4 sc (4)
Round 5 :
Work 3 sc then 1 inc (5)
Round 6-8 :
Work 3 rounds of 5 sc (5)
Round 9 :
Work 4 sc then 1 inc (6)
Round 10-12 :
Work 3 rounds of 6 sc (6)
Round 13 :
Repeat 1 sc and 1 inc 3 times (9)
Round 14 :
Work 9 sc around (9)
Round 15 :
Repeat 2 sc and 1 inc 3 times (12)
Round 16-17 :
Work 2 rounds of 12 sc (12)
Round 18 :
Repeat 1 sc and 1 inc 6 times (18)
Round 19 :
Work 18 sc around (18)
Round 20 :
Repeat 2 sc and 1 inc 6 times (24)
Round 21 :
Work 24 sc around (24)
Round 22 :
Repeat 3 sc and 1 inc 6 times (30)
Round 23 :
Repeat 4 sc and 1 inc 6 times (36)
Round 24 :
Work 2 sc, 1 inc, then repeat 5 sc and 1 inc 5 times, finishing with 3 sc (42)
Round 25 :
Work 42 sc around (42)
Round 26 :
Switch to white yarn. Work 42 sc around (42)
Round 27 :
Repeat (ch3, slst in next stitch) all the way around to create a fluffy edge.
— 11. Stuart's Horns (Make Two) :
Big Piece R1 :
Using dark brown, work 6 sc in a MR (6)
Big Piece R2 :
Repeat 2 sc and 1 inc twice (8)
Big Piece R3 :
Work 8 sc around (8)
Big Piece R4 :
Work 2 sc, 2 dec, then 2 sc (6)
Big Piece R5 :
Work 2 sc, 1 dec, then 2 sc (5)
Big Piece R6-7 :
Work 2 rounds of 5 sc (5)
Big Piece R8 :
Work 3 sc, 1 dec, then 1 slst (4)
Small Piece R1 :
Work 4 sc in a MR (4)
Small Piece R2-3 :
Work 2 rounds of 4 sc (4)
Info :
Sew the small piece to the big piece across rounds 5 and 6. Then sew the assembled horn to the head between rounds 4 and 5.
I really hope you enjoyed making these festive little guys as much as I did! There’s something so satisfying about seeing their goofy personalities emerge as soon as you sew on those goggles. Whether they're guarding your tree or tucked into a gift basket, they're sure to bring a bit of holiday cheer and a lot of smiles. Don't forget to share your finished minions with the community—I'd love to see the different expressions you give them! Happy crafting and have a wonderful, yarn-filled holiday season! 🧶✨🎄