🧢 Beautiful ✨ Detailed πŸ’ Adorable

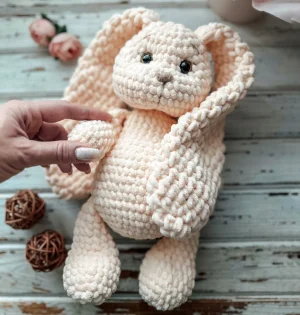
Floppy Eared Plush Bunny Amigurumi Pattern

Floppy Eared Plush Bunny Amigurumi Pattern
4.9β˜…Rating
5-7 HoursTime Needed
2.9KMade This
βœ‚οΈ

Intermediate Level

Ideal for those with basic crocheting experience, featuring slightly more advanced stitches and techniques to expand your skills.

⏱️

Weekend Treat

Takes 5-7 hours, making it an enjoyable project to finish over a couple of days.

🐰

Whimsical Buddy

Playful characters full of personality, designed to spark imagination and become cherished playtime favorites.

About This Floppy Eared Plush Bunny Amigurumi Pattern

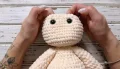
Floppy Eared Plush Bunny Amigurumi Pattern crochet pattern - detailed view

Perfect for gifting at baby showers or birthdays, this plush rabbit looks stunning in any color palette and is designed to be a cherished childhood companion for years to come.

Why You'll Love This Floppy Eared Plush Bunny Amigurumi Pattern

I'm a huge fan of how the ears are crocheted directly into the head rounds! It saves so much tedious sewing at the end and makes the whole toy feel much more durable. Plus, the contrast between the dense body and the floppy ears is just delightful.

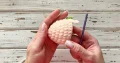
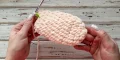
Floppy Eared Plush Bunny Amigurumi Pattern step 1 Floppy Eared Plush Bunny Amigurumi Pattern step 2 Floppy Eared Plush Bunny Amigurumi Pattern step 3 Floppy Eared Plush Bunny Amigurumi Pattern step 4

Switch Things Up

There’s something truly magical about working with plush yarn. I remember the first time I picked up a skein of velvetβ€”I was so worried about the 'worming' and the tension, but once you get into a rhythm, it’s like crocheting a cloud! This bunny is one of those projects that just makes you smile as it comes together. Those ears are definitely the star of the show. I decided to use a 6mm hook for them specifically because I wanted that extra drape. There’s nothing worse than a floppy-eared bunny with stiff, cardboard-like ears, right?

If you’re feeling adventurous, try making the bow in a sparkly yarn or a bright contrast color to really make it pop. I actually made one of these in a soft lavender last spring, and it looked like a little dream. One thing I’ve learned the hard way: when you’re joining the limbs as you go, triple-check your alignment. It’s a bit of a heart-breaker to get to the head only to realize the legs are slightly wonky. Take your time, use those stitch markers, and most importantly, enjoy the squish! It’s such a rewarding finish when you finally get to give that big, soft head a squeeze. Happy hooking, everyone!

Common Mistakes & How to Fix Them

βœ— Using the 4mm hook for the ears instead of switching to the 6mm hook will make them too stiff and they won't have that signature floppy look.βœ— If you don't stuff the neck area very firmly during the final head rounds, the head may sag or wobble instead of sitting upright.βœ— Placing the safety eyes even one row too high can dramatically change the bunny's expression, so count carefully from the neck up before securing them.βœ— When joining the paws in Round 9 and Round 21, ensure the 'toes' are facing the front of the body or the bunny will look like its limbs are twisted.

Floppy Eared Plush Bunny Amigurumi Pattern

Get ready to create the softest, most huggable friend you've ever held! This bunny is all about those oversized, floppy ears and a squishy texture that makes it impossible to put down. You'll love how the chunky yarn works up quickly into a substantial plushie that's perfect for nursery decor or a cozy handmade gift for someone special. It's a joyful project that brings a little bit of magic to your crochet hook.

Intermediate 5-7 Hours

Materials Needed for Floppy Eared Plush Bunny Amigurumi Pattern

β€” Main Fabric

  • 01
    Approximately 200g of plush or velvet yarn (Bulky weight, about 120m per 100g) in a soft peach or cream
  • 02
    Small amount of embroidery yarn in a dark or contrasting color for the facial details
  • 03
    Small amount of contrast plush yarn if you choose to make a colorful bow

β€” Tools Required

  • 01
    4 mm crochet hook for the main body and limbs
  • 02
    6 mm crochet hook specifically for the floppy ears
  • 03
    15 mm safety eyes
  • 04
    High-quality polyester fiberfill stuffing
  • 05
    Large-eye tapestry needle for sculpting and embroidery
  • 06
    3 stitch markers to keep track of your spiral rounds
  • 07
    Sharp scissors

Progress Tracker

0% Complete

β€” 1. Hind Paws (Make 2) :

Info :

Use the 4 mm hook for this section.

Round 1 :

ch 5, starting in the 2nd ch from your hook: 3 sc, work 3 sc into the last ch, then continue on the other side of the chain with 2 sc and 1 inc (10)

Round 2 :

1 inc, 2 sc, 3 inc, 2 sc, 2 inc (16)

Round 3 :

1 sc, 1 inc, 3 sc, 1 inc, 3 sc, 1 inc, 3 sc, 1 inc, 2 sc (20)

Round 4 :

1 sc, 1 inc, (4 sc, 1 inc) repeat 3 times, 3 sc (24)

Round 5 :

24 sc (24)

Round 6 :

24 sc (24)

Round 7 :

6 sc, (1 dec, 1 sc) repeat 3 times, 1 dec, 5 sc, 1 dec (19)

Round 8 :

4 sc, 4 dec, 5 sc, 1 dec (14)

Round 9 :

14 sc (14)

Round 10 :

14 sc (14)

Round 11 :

14 sc (14)

Round 12 :

14 sc (14)

Round 13 :

14 sc (14)

Round 14 :

14 sc (14)

Info :

Add stuffing to the lower part of the paw. Fold the top edge flat and work 6 sc through both layers to close. Fasten off.

β€” 2. Front Paws (Make 2) :

Info :

Use the 4 mm hook for this section.

Round 1 :

ch 2, work 6 sc into the 2nd ch from the hook (6)

Round 2 :

6 inc (12)

Round 3 :

(5 sc, 1 inc) repeat 2 times (14)

Round 4 :

14 sc (14)

Round 5 :

14 sc (14)

Round 6 :

14 sc (14)

Round 7 :

14 sc (14)

Round 8 :

10 sc, 2 dec (12)

Round 9 :

12 sc (12)

Round 10 :

12 sc (12)

Round 11 :

12 sc (12)

Round 12 :

12 sc (12)

Round 13 :

12 sc (12)

Info :

Stuff the lower two-thirds of the paw. Fold the opening flat and work 5 sc through both sides to seal it. Fasten off.

β€” 3. Ears (Make 2) :

Info :

Switch to the 6 mm hook for this section to ensure the ears are soft and floppy.

Round 1 :

ch 2, work 6 hdc into the 2nd ch from the hook (6)

Round 2 :

6 inc using hdc (12)

Round 3 :

(1 hdc, 1 inc) repeat 6 times (18)

Round 4 :

18 hdc (18)

Round 5 :

18 hdc (18)

Round 6 :

18 hdc (18)

Round 7 :

18 hdc (18)

Round 8 :

18 hdc (18)

Round 9 :

(4 hdc, 1 dec) repeat 3 times (15)

Round 10 :

15 hdc (15)

Round 11 :

15 hdc (15)

Round 12 :

15 hdc (15)

Round 13 :

(3 hdc, 1 dec) repeat 3 times (12)

Round 14 :

12 hdc (12)

Round 15 :

12 hdc (12)

Round 16 :

12 hdc (12)

Round 17 :

(4 hdc, 1 dec) repeat 2 times (10)

Round 18 :

10 hdc (10)

Round 19 :

(3 hdc, 1 dec) repeat 2 times (8)

Round 20 :

8 hdc (8)

Round 21 :

8 hdc (8)

Round 22 :

8 hdc (8)

Info :

Fold the top of the ear flat and work 4 sl st across both layers to close. Fasten off.

β€” 4. Body :

Info :

Return to the 4 mm hook for the body.

Round 1 :

ch 2, work 6 sc in the 2nd ch from the hook (6)

Round 2 :

6 inc (12)

Round 3 :

12 inc (24)

Round 4 :

(3 sc, 1 inc) repeat 6 times (30)

Round 5 :

(4 sc, 1 inc) repeat 6 times (36)

Round 6 :

(5 sc, 1 inc) repeat 6 times (42)

Round 7 :

42 sc (42)

Round 8 :

(6 sc, 1 inc) repeat 6 times (48)

Round 9 :

sc through the first hind paw and body for 7 sc, 15 sc on body, sc through the second hind paw and body for 7 sc, 19 sc on body (48)

Round 10 :

48 sc (48)

Round 11 :

48 sc (48)

Round 12 :

48 sc (48)

Round 13 :

48 sc (48)

Round 14 :

(6 sc, 1 dec) repeat 6 times (42)

Round 15 :

5 sc, 1 dec, 4 sc, 2 dec, 4 sc, 1 dec, (5 sc, 1 dec) repeat 3 times (35)

Round 16 :

(5 sc, 1 dec) repeat 5 times (30)

Round 17 :

(3 sc, 1 dec) repeat 6 times (24)

Round 18 :

24 sc (24)

Round 19 :

24 sc (24)

Round 20 :

24 sc (24)

Round 21 :

sc through the first front paw and body for 6 sc, 5 sc on body, sc through the second front paw and body for 6 sc, 7 sc on body (24)

Round 22 :

12 dec (12)

Info :

Do not cut the yarn. Stuff the body firmly before proceeding to the head.

β€” 5. Head :

Round 1 :

Continue directly from the body: 12 inc (24)

Round 2 :

(1 sc, 1 inc) repeat 12 times (36)

Round 3 :

(5 sc, 1 inc) repeat 6 times (42)

Round 4 :

(6 sc, 1 inc) repeat 6 times (48)

Round 5 :

48 sc (48)

Round 6 :

48 sc (48)

Round 7 :

48 sc (48)

Round 8 :

48 sc (48)

Round 9 :

48 sc (48)

Round 10 :

(6 sc, 1 dec) repeat 6 times (42)

Round 11 :

(5 sc, 1 dec) repeat 6 times (36)

Round 12 :

36 sc (36)

Round 13 :

(4 sc, 1 dec) repeat 6 times (30)

Round 14 :

(3 sc, 1 dec) repeat 6 times (24)

Info :

Place the safety eyes between Rounds 11 and 12, leaving about 7 stitches between them.

Round 15 :

2 sc, 1 dec, join ear with 2 sc, 1 dec, 2 sc, 1 dec, 2 sc, join 2nd ear with 1 dec, 2 sc, 1 dec, 2 sc, 1 dec (18)

Round 16 :

(1 sc, 1 dec) repeat 6 times (12)

Info :

Stuff the head very tightly, focusing on the neck join to prevent sagging.

Round 17 :

6 dec (6)

Info :

Fasten off and weave the tail through the remaining stitches to close the hole.

β€” 6. Accessories - Bow :

Round 1 :

Create a mr. (ch 5, 5 dtr, ch 5, sl st into the ring) repeat this sequence twice. Pull the ring tight and tie off.

Assembly Instructions

  • Stuff the body and head extremely firmly to ensure the bunny maintains its shape over time.
  • Perform needle sculpting by pulling a strand of yarn between the eye area and the base of the head to give the face a more expressive, sunken-eye look.
  • Embroider a small triangular nose using a satin stitch between the 6th and 7th rounds of the head.
  • Add thin, slightly slanted eyebrows above the eyes to give your bunny a sweet, curious expression.
  • Secure the bow to the head near the base of one ear, tying it firmly and hiding the ends inside the head.
  • Gently pull and shape the ears with your hands to make sure they lay flat and floppy against the sides of the head.

Important Notes

  • πŸ’‘Always pull your working loop up to the level of the hook to avoid creating visible holes in the plush fabric.
  • πŸ’‘The ears use a larger hook size (6mm) to create a looser, more fluid drape compared to the dense body.
  • πŸ’‘Limbs are joined during the crochet process, so ensure they are aligned correctly before finishing the joining round.
  • πŸ’‘Use a strong, non-stretchy yarn for the needle sculpting if your plush yarn is prone to snapping under tension.
  • πŸ’‘If making this for a small child, ensure the safety eyes are backed securely or consider embroidering the eyes instead.

You've just finished your very own Floppy Eared Plush Bunny! There's something so incredibly rewarding about seeing those long ears finally attached and giving the finished toy its first big squeeze. Whether this little one is destined for a nursery shelf or a lifetime of bedtime snuggles, I hope you enjoyed every single stitch. Don't forget to give the ears a final fluff and maybe even add a ribbon around the neck for extra charm. Happy crocheting, and may your new bunny bring lots of joy! 🧢✨🐰

You ask,

we answer.

FAQs

Can I use a different type of yarn besides velvet?

Absolutely! You can use any bulky weight yarn, but keep in mind that the 'squishiness' and size will change. If you use a standard acrylic yarn, the bunny will be smaller and firmer.

Why does the pattern use two different hook sizes?

The 4mm hook creates a tight, dense fabric for the body so the stuffing doesn't show through. The 6mm hook for the ears makes the stitches looser, which is what gives them that lovely floppy movement.

What is needle sculpting and is it necessary?

Needle sculpting involves pulling yarn through the head to 'indent' the eye area. It's not strictly necessary, but it gives the bunny a much more professional, character-filled face.

My bunny's head is tilting. How can I fix it?

This usually happens if the neck isn't stuffed firmly enough. You can try adding more stuffing through a small gap before closing the head, or use a 'neck support' like a rolled-up piece of felt inside the neck.