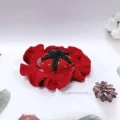
๐Ÿงถ Beautiful โœจ Detailed ๐Ÿ’ Adorable

Fruity Pet Sun Hat Amigurumi Pattern

Fruity Pet Sun Hat Amigurumi Pattern
4.7โ˜…Rating
2-3 HoursTime Needed
3.1KMade This
โœ‚๏ธ

Intermediate Level

Ideal for those with basic crocheting experience, featuring slightly more advanced stitches and techniques to expand your skills.

โฑ๏ธ

Quick Craft

Fits nicely into a free afternoon โ€” 2 to 5 hours of focused, enjoyable crocheting.

๐Ÿฐ

Whimsical Buddy

Playful characters full of personality, designed to spark imagination and become cherished playtime favorites.

About This Fruity Pet Sun Hat Amigurumi Pattern

Fruity Pet Sun Hat Amigurumi Pattern crochet pattern - detailed view

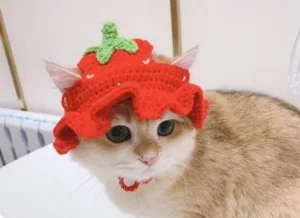
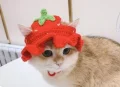
These hats are the ultimate photo prop for your cat or small dog. They make hilarious and sweet gifts for pet parents who love a bit of handmade flair for their furry companions and want something unique for social media.

Why You'll Love This Fruity Pet Sun Hat Amigurumi Pattern

I absolutely love how customizable these are! You can change the colors to match your pet's vibe or go all out with the different toppers like the tiny carrot stems or the detailed peach leaves. Plus, seeing a cat in a ruffled fruit hat is guaranteed to make you smile every single time you walk into the room.

Fruity Pet Sun Hat Amigurumi Pattern step 1 Fruity Pet Sun Hat Amigurumi Pattern step 2 Fruity Pet Sun Hat Amigurumi Pattern step 3 Fruity Pet Sun Hat Amigurumi Pattern step 4

Switch Things Up

When I first started making these, I was worried my cat would stage a protest, but she actually looked so regal in the strawberry version that I couldn't stop laughing! One of my favorite things about this pattern is how much you can play with the colors. If you aren't feeling the traditional fruit vibes, you could easily turn the pink peach base into a 'Dragonfruit' by using white yarn with black speckles for the top and bright pink for the ruffles.

Another little tip I've picked up: if you find the chin straps are a bit too thin for a wiggly dog, you can work a row of slip stitches back up the chain to make them sturdier. It only takes an extra minute but makes a world of difference for durability. I also love using a bit of wire in the leaves if I want them to stand up perfectly for a photo. Just be sure to secure the ends well so they don't poke your pet. These hats are all about having fun and letting your creativity run wild, so don't be afraid to mix and match the stems and leaves!

Common Mistakes & How to Fix Them

โœ— When working the ear hole chains in the middle rounds, it's very easy to twist the chain โ€” keep your stitches facing forward to ensure the brim lays flat and doesn't pucker.โœ— If you don't pull the magic ring tight enough on the small stems, the stuffing or yarn ends might peek through, so give that tail a firm tug before fastening off.โœ— The ruffles in the final rounds use a massive amount of stitches; if you lose count, the brim might look uneven, so I recommend using a marker at every 20th stitch.โœ— Attaching the chin straps too close together can make the hat slip forward โ€” make sure you space them exactly at the indicated points on the ear hole rounds for stability.

Fruity Pet Sun Hat Amigurumi Pattern

Your fur baby is about to be the star of the farmer's market! These adorable fruit-themed hats are such a joy to whip up for your favorite four-legged friends. Whether you want a juicy strawberry or a zesty lemon, these little toppers add so much personality to your pet's look. They're lightweight, comfy, and honestly, just plain fun to make. You'll love seeing how a simple crochet project can bring so much character to your pet's daily routine or their next big photo shoot.

Intermediate 2-3 Hours

Materials Needed for Fruity Pet Sun Hat Amigurumi Pattern

โ€” Main Fabric

  • 01
    Cotton 8/4 yarn in vibrant Red for the strawberry or apple base
  • 02
    Cotton 8/4 yarn in bright Orange for the carrot or orange base
  • 03
    Cotton 8/4 yarn in sunny Yellow for the lemon base
  • 04
    Cotton 8/4 yarn in soft Pink for the peach base
  • 05
    Cotton 8/4 yarn in Green for leaves and stems
  • 06
    Small amount of Brown yarn for the fruit stems
  • 07
    Scraps of Black and Yellow thread for embroidery details

โ€” Tools Required

  • 01
    3.0mm crochet hook for the main hat body
  • 02
    1.5mm crochet hook for the smaller fruit details like the peach and lemon leaves
  • 03
    Tapestry needle for sewing pieces together and weaving in ends
  • 04
    Stitch markers to keep track of your rounds
  • 05
    Scissors

Progress Tracker

0% Complete

โ€” 1. Apple Details :

Stem Round 1 :

Using brown yarn, create a mr and work 4 sc into it, pulling the center tight (4)

Stem Round 2-4 :

Work 1 sc in each st around (4)

Info :

Fasten off and leave a tail for sewing.

Leaf Row 1 :

Using green yarn, ch 5. In the 2nd ch from hook, sl st, then sc, hdc, and 3 sc in the final ch. Turn to work along the back of the foundation ch: hdc, sc, sl st.

Info :

Fasten off and leave a tail.

โ€” 2. Strawberry Details :

Calyx Round 1 :

With green yarn, work 6 sc into a mr and pull tight (6)

Calyx Round 2-3 :

Work 1 sc in each st around (6)

Calyx Round 4 :

Repeat the following 6 times: ch 8, then starting in 2nd ch from hook work sc, sc, 3 hdc, 2 dc, and sl st back into the main base.

Info :

Fasten off. Use yellow thread to embroider small seeds onto the red hat body later.

โ€” 3. Orange Details :

Stem Round 1 :

Using green yarn, place 5 sc into a mr and pull tight (5)

Stem Round 2-4 :

Work 1 sc in each st around (5)

Info :

Fasten off.

Leaf Round 1 :

With green yarn, ch 8. Starting in 2nd ch: sc, 5 sc, 3 sc in the last ch. Work along the other side: 5 sc, inc (16)

Leaf Round 2 :

ch 1, 2 sl st, sc, 2 hdc, dc, 3 inc using dc, dc, 2 hdc, sc, 3 sl st.

Info :

Fasten off.

โ€” 4. Carrot Details :

Stem Round 1 :

Make 3 of these using green yarn. Work 4 sc into a mr (4)

Stem Round 2-4 :

Work 1 sc in each st around (4)

Info :

Fasten off. Use black thread to add horizontal lines to the orange hat body later.

โ€” 5. Peach Details :

Info :

Switch to a 1.5mm hook for these pieces.

Stem Round 1 :

Using brown yarn, work 4 sc into a mr (4)

Stem Round 2-4 :

Work 1 sc in each st around (4)

Leaf Row 1 :

Make 2 using green yarn. ch 8, then starting in 2nd ch: sc, sc, 2 hdc, 2 dc, 3 tr in the last ch, 2 dc, 2 hdc, 2 sl st.

Info :

Fasten off.

โ€” 6. Lemon Details :

Info :

Use a 1.5mm hook for these accessories.

Stem Round 1 :

Using green yarn, work 4 sc into a mr (4)

Stem Round 2-4 :

Work 1 sc in each st around (4)

Leaf Round 1 :

Make 2 using green yarn. ch 8, then starting in 2nd ch: sc, 5 sc, 3 sc in the last ch, 5 sc, inc (16)

Leaf Round 2 :

ch 1, sl st, 2 sc, 2 hdc, dc, 3 inc using dc.

Info :

Fasten off.

โ€” 7. Hat Base โ€” Size S :

Round 1 :

Using your chosen fruit color, work 6 sc into a mr and pull tight (6)

Round 2 :

Work 6 inc around (12)

Round 3 :

Repeat (sc, inc) 6 times (18)

Round 4 :

Repeat (2 sc, inc) 6 times (24)

Round 5 :

Repeat (3 sc, inc) 6 times (30)

Round 6 :

Repeat (4 sc, inc) 6 times (36)

Round 7 :

Repeat (5 sc, inc) 6 times (42)

Round 8-11 :

Work 1 sc in each st around (42)

Round 12 :

Work 6 sc, then ch 7, ch 1, and ch 7 (15 ch total for ear hole), skip 9 st, work 12 sc, then ch 7, ch 1, and ch 7 (15 ch total), skip 9 st, and finish with 6 sc (54)

Round 13 :

Repeat (hdc, inc using hdc) 27 times (81)

Round 14-15 :

Work 1 hdc in each st around (81)

Round 16 :

Work 3 dc into every single st around (243)

Round 17 :

Work 1 sc in each st around (243)

Info :

Fasten off. Make two ropes by chaining 50 and attach them to the Round 12 points.

โ€” 8. Hat Base โ€” Size M :

Round 1 :

Using your chosen fruit color, work 7 sc into a mr and pull tight (7)

Round 2 :

Work 7 inc around (14)

Round 3 :

Repeat (sc, inc) 7 times (21)

Round 4 :

Repeat (2 sc, inc) 7 times (28)

Round 5 :

Repeat (3 sc, inc) 7 times (35)

Round 6 :

Repeat (4 sc, inc) 7 times (42)

Round 7 :

Repeat (5 sc, inc) 7 times (49)

Round 8-12 :

Work 1 sc in each st around (49)

Round 13 :

Work 7 sc, then ch 9, ch 1, and ch 8 (18 ch total), skip 11 st, work 13 sc, then ch 9, ch 1, and ch 8 (18 ch total), skip 11 st, and finish with 7 sc (63)

Round 14 :

Repeat (hdc, inc using hdc) 31 times, then work 1 final hdc (94)

Round 15-16 :

Work 1 hdc in each st around (94)

Round 17 :

Work 3 dc into every single st around (282)

Round 18 :

Work 1 sc in each st around (282)

Info :

Fasten off. Make two ropes by chaining 60 and attach them to the Round 13 points.

โ€” 9. Hat Base โ€” Size L :

Round 1 :

Using your chosen fruit color, work 8 sc into a mr and pull tight (8)

Round 2 :

Work 8 inc around (16)

Round 3 :

Repeat (sc, inc) 8 times (24)

Round 4 :

Repeat (2 sc, inc) 8 times (32)

Round 5 :

Repeat (3 sc, inc) 8 times (40)

Round 6 :

Repeat (4 sc, inc) 8 times (48)

Round 7 :

Repeat (5 sc, inc) 8 times (56)

Round 8-13 :

Work 1 sc in each st around (56)

Round 14 :

Work 8 sc, then ch 10, ch 1, and ch 9 (20 ch total), skip 12 st, work 16 sc, then ch 10, ch 1, and ch 9 (20 ch total), skip 12 st, and finish with 8 sc (72)

Round 15 :

Repeat (hdc, inc using hdc) 36 times (108)

Round 16-17 :

Work 1 hdc in each st around (108)

Round 18 :

Work 3 dc into every single st around (324)

Round 19 :

Work 1 sc in each st around (324)

Info :

Fasten off. Make two ropes by chaining 70 and attach them to the Round 14 points.

Assembly Instructions

  • Place the fruit stem or calyx directly in the center of the hat's top (Round 1) and sew it securely using the leftover yarn tail.
  • For fruits that have leaves, attach them at the base of the stem, angling them slightly to one side for a more natural appearance.
  • If you are making the strawberry version, use yellow thread to stitch small 'seeds' randomly across the main red body of the hat.
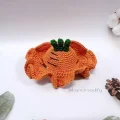
  • For the carrot design, take some black thread and embroider horizontal lines across the orange base to mimic the texture of a real carrot.
  • Locate the specific points on the ear hole round (Round 12, 13, or 14 depending on your size) and tie on the chin straps securely.
  • Before finishing, check the distance between the ear holes against your pet's head to ensure they have plenty of room to be comfortable.

Important Notes

  • ๐Ÿ’กI highly recommend using cotton yarn for these hats because it provides the structure needed to keep those ruffles looking crisp.
  • ๐Ÿ’กThe distance between the ear holes is the most critical part of the fit, so measure your pet's head before choosing between sizes S, M, or L.
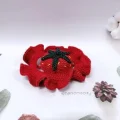
  • ๐Ÿ’กDon't worry if the brim looks extremely wavy as you work the final rounds; that's exactly the 'fruit slice' look we're going for!
  • ๐Ÿ’กIf your pet is right between two sizes, it's usually better to size up for comfort and just tighten the chin straps a little more.
  • ๐Ÿ’กKeep your tension consistent, especially on the ear hole chains, to prevent the hat from pulling or warping to one side.

I hope you and your furry friend absolutely love these fruity little hats! There's nothing quite like the joy of seeing a cat or dog rocking a handmade accessory that you put so much love into. Whether you're prepping for a fun photo shoot or just want to add some color to a lazy afternoon, these hats are sure to be a hit. Don't forget to share your finished pieces with the community โ€” I can't wait to see which fruit you choose! Happy crafting and give your pet an extra treat from me. ๐Ÿงถ ๐Ÿงต โœจ

You ask,

we answer.

FAQs

My cat isn't a fan of things on her head. Is this hat heavy?

Not at all! Because it's made with lightweight 8/4 cotton and a 3mm hook, the hat is very airy and breathable. Most pets find it much more tolerable than heavier store-bought costumes.

Can I use worsted weight yarn instead of the recommended cotton?

You can, but be aware that the hat will turn out much larger. If you decide to use worsted weight, I'd suggest following the 'Small' instructions to get a result closer to a 'Medium' size.

How do I make sure the ear holes are large enough for my dog?

The pattern uses a chain-and-skip method. If your pet has particularly thick or fluffy ears, feel free to add 2-3 extra chains to those sections without affecting the rest of the brim's ruffle.

The brim is curling too much and won't stay flat. What should I do?

If the ruffles are too tight, your tension might be a bit firm on the '3 dc in each st' round. Try using a slightly larger hook for just that round to give the stitches more room to spread out.