🧢 Beautiful ✨ Detailed πŸ’ Adorable

Hepatica Granny Square Halter Top Pattern

Hepatica Granny Square Halter Top Pattern
3.9β˜…Rating
5-7 HoursTime Needed
4.0KMade This
βœ‚οΈ

Intermediate Level

Ideal for those with basic crocheting experience, featuring slightly more advanced stitches and techniques to expand your skills.

⏱️

Weekend Treat

Takes 5-7 hours, making it an enjoyable project to finish over a couple of days.

🧢

Effortless Style

Simple lines for everyday wear, focusing on quality stitchwork and timeless appeal that never goes out of fashion.

About This Hepatica Granny Square Halter Top Pattern

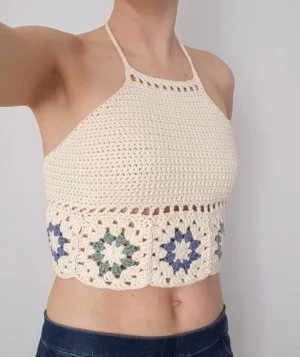
Hepatica Granny Square Halter Top Pattern crochet pattern - detailed view

This top is a total showstopper for festival season or beach days. It looks incredible paired with high-waisted denim and makes a thoughtful, handmade gift for the fashion-forward person in your life.

Why You'll Love This Hepatica Granny Square Halter Top Pattern

I honestly think the best part of this project is the 'join-as-you-go' potential. There is nothing more satisfying than seeing that row of squares come together without a mountain of sewing at the end. Plus, the rhythmic decrease rows in the upper section mean you can really find your flow once the foundation is set. It’s a project that feels substantial but moves along surprisingly quickly.

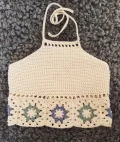
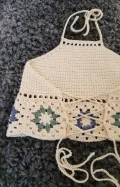
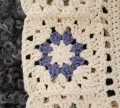
Hepatica Granny Square Halter Top Pattern step 1 Hepatica Granny Square Halter Top Pattern step 2 Hepatica Granny Square Halter Top Pattern step 3 Hepatica Granny Square Halter Top Pattern step 4

Switch Things Up

I remember the first time I saw a field of Anemone hepatica in the spring; those tiny blue petals against the waking earth were so inspiring. That is exactly what I wanted to capture with this top. When choosing your colors, don't feel limited by my choices! I've seen versions of this in sunset oranges and deep purples that look absolutely stunning.

One little tip from my hook to yours: when you're working the ties, try to keep your tension consistent. If the 90cm chains feel a bit fiddly, just take your time. Those long ties are what make the fit so forgiving, allowing you to cinch it exactly where you need it. If you find the cotton yarn is splitting, try switching to a hook with a pointier head. It makes getting into those tight sc stitches much easier. This top is really about the joy of the process, so put on a good podcast, grab a cold drink, and let those squares grow. It’s the ultimate slow-fashion piece that you'll be so proud to wear once the sun comes out.

Common Mistakes & How to Fix Them

βœ— If you accidentally end Row 1 of the top part with an even number of stitches, your mesh pattern in Row 2 won't align correctly at the end.βœ— When joining your granny squares, ensure all of them are facing right-side up so the 'petals' of the flowers look uniform across your waist.βœ— It is easy to skip the slip stitches when working back down the neck ties, but skipping them will leave your straps too thin and prone to snapping.βœ— Be careful not to work your decreases too tightly on Row 4, or the side edges of your top might start to curl inward rather than lying flat against the skin.

Hepatica Granny Square Halter Top Pattern

There is something so nostalgic about a granny square top, and this one has a lovely floral twist. Inspired by the first blooms of spring, you'll create a beautiful row of squares that form the foundation of a flattering, adjustable halter. It is a wonderful way to play with color while making something you can actually wear all summer long. You will love how the solid stitching provides great coverage while the mesh details keep it breezy and light.

Intermediate 5-7 Hours

Materials Needed for Hepatica Granny Square Halter Top Pattern

β€” Main Fabric

  • 01
    Approximately 150g of worsted weight unmercerised cotton yarn in ecru for the main body and square borders
  • 02
    Small amount of worsted weight cotton in blue for the flower centers
  • 03
    Small amount of worsted weight cotton in green for the flower petals

β€” Tools Required

  • 01
    4.5 mm (US size 7) crochet hook
  • 02
    Darning needle for weaving in ends
  • 03
    Sharp scissors

Progress Tracker

0% Complete

β€” 1. The Granny Squares :

Round 1 :

Using blue yarn, create a magic ring or ch4 and join with a slst. ch2, 1dc into the ring (this counts as your first 2dc tog), ch1, then work [2dc tog, ch1] 7 more times into the ring. Join with a slst to the first st and fasten off. You should have 8 petals.

Round 2 :

Attach green yarn in any ch-sp. ch3 (counts as 1dc), 2dc in that same space, ch1. Work [3dc in n ch-sp, ch1] 7 times. Join with a slst to the top of the ch3 and fasten off. You now have 8 clusters.

Round 3 :

Attach ecru yarn in any ch-sp. ch5 (counts as 1dc and ch2), 3dc in the same space, ch1. *3dc in n ch-sp, ch1, [3dc, ch2, 3dc, ch1] in n ch-sp for the corner. Repeat from * 2 more times. 3dc in n ch-sp, ch1, 2dc in the starting space. Join with a slst to the 3rd ch of your starting ch5.

Round 4 :

slst into the corner ch-sp. ch3 (counts as 1dc), [1dc, ch2, 3dc, ch1] in the same space. *3dc in n ch-sp, ch1, 3dc in n ch-sp, ch1, [3dc, ch2, 3dc, ch1] in the corner. Repeat from * 2 more times. 3dc in n ch-sp, ch1, 3dc in n ch-sp, ch1, 1dc in the starting corner. Join with a slst and fasten off.

Info :

Create a total of 7 squares for size S/M or 8 squares for size M/L. Join them into one long horizontal strip using your preferred method.

β€” 2. The Top Section :

Row 1 :

With the right side facing you, join ecru yarn in the top right corner ch-sp of your strip. ch1 (does not count as st), 2sc in the corner. sc into every dc and every join between squares along the top edge, skipping the ch-spaces between clusters. In the final corner, work 1sc (for 7 squares) or 2sc (for 8 squares). Turn. You should have an uneven number of stitches (93 for S/M, 107 for M/L).

Row 2 :

ch4 (counts as 1dc and ch1), sk n st. [1dc in n st, ch1, sk n st] repeat across the row, ending with 1dc in the very last st. Turn.

Row 3 :

ch1 (not a st), sc in every st and every ch-sp across the row. Turn.

Row 4 :

ch1 (not a st), sk the very first st, sc in n st and every st across until only 2 remain. 2sc tog over the last 2 sts. Turn.

Rows 5-39 :

Repeat the instructions for Row 4 approximately 35 times. Continue until the top edge measures roughly 12-15 cm (5-6 inches) across. Ensure you still have an uneven number of stitches.

Finishing Row 1 :

ch4 (counts as 1dc and ch1), sk n st. [1dc in n st, ch1, sk n st] repeat to the end of the row, finishing with 1dc in the last st. Turn.

Finishing Row 2 :

ch1 (not a st), sc in every st and every ch-sp across the row. Fasten off.

β€” 3. Edging and Straps :

Info :

ch for 90 cm to create the first back tie. Attach this chain with a sc into the last stitch of Row 4 on the side of the top.

Info :

Work a row of sc evenly up the slanted side of the top section until you reach the top corner.

Info :

ch for 45 cm to create the first neck strap. Turn and slst into every ch back down to the corner.

Info :

slst into every stitch across the top narrow edge of the bodice.

Info :

ch for 45 cm for the second neck strap. Turn and slst into every ch back down to the corner.

Info :

Work a row of sc evenly down the other slanted side of the top section, finishing at the first stitch of Row 4.

Info :

ch for 90 cm to create the second back tie. Fasten off and weave in all your loose ends.

Assembly Instructions

  • Lay your finished granny squares in a row and join them using a slip stitch seam or a darning needle to create the waistband strip.
  • Follow the pattern to crochet the solid upper bodice directly onto the long top edge of the square strip.
  • Work the edging and straps in one continuous flow as described in Section 3 to ensure the ties are securely attached.
  • Thread the two 90 cm long back ties through the stitches on the opposite sides of the back opening to create a corset-style closure.
  • Lightly steam block the finished top, paying extra attention to the granny squares to ensure they lie flat and the floral pattern is crisp.

Important Notes

  • πŸ’‘The stitch count on Row 1 of the top part is flexible, but having an uneven number of stitches is vital for the mesh rows to work.
  • πŸ’‘If you want more coverage or a longer top, you can add more sc rows before starting the decreases in the top section.
  • πŸ’‘Using a soft, unmercerised cotton will give the top a lovely matte finish and make it much more comfortable against the skin.
  • πŸ’‘Check the length of your back ties as you go; if you prefer a larger bow or have a wider back, feel free to increase the initial chain length.

I really hope you enjoy making this Hepatica Top as much as I enjoyed designing it. There is something so peaceful about working through those granny squares and watching the floral pattern emerge. Once you have finished, give it a good block to really let those stitches shine. It is the kind of piece that feels like a summer breeze in yarn form. I can't wait to see the color combinations you choose for your own version! Happy making, and enjoy your beautiful new handmade wardrobe staple. 🧢 ✨

You ask,

we answer.

FAQs

Can I use acrylic yarn instead of cotton?

You can, but cotton is highly recommended for this pattern because it doesn't stretch out as much as acrylic when wet or worn, which helps the top maintain its shape and support.

How do I make the top larger than a M/L?

Simply add more granny squares to your initial strip. Each square adds about 10cm to the width. Just remember to adjust your Row 1 sc count to remain an uneven number.

Is the top see-through?

The upper section uses solid single crochet which provides good coverage. The granny square section is more open, so some people prefer to wear a bikini top or pasties underneath for extra security.

What is the best way to join the squares?

The 'join-as-you-go' method is great for speed, but a simple whip stitch with a darning needle provides the flattest, most invisible seam if you prefer a cleaner look.