🧶 Beautiful ✨ Detailed 💝 Adorable

Little Brown Bear Amigurumi Pattern

Little Brown Bear Amigurumi Pattern
4.9★Rating
3-5 HoursTime Needed
3.8KMade This
✂️

Intermediate Level

Ideal for those with basic crocheting experience, featuring slightly more advanced stitches and techniques to expand your skills.

⏱️

Quick Craft

Fits nicely into a free afternoon — 2 to 5 hours of focused, enjoyable crocheting.

🐰

Whimsical Buddy

Playful characters full of personality, designed to spark imagination and become cherished playtime favorites.

About This Little Brown Bear Amigurumi Pattern

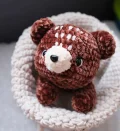
Little Brown Bear Amigurumi Pattern crochet pattern - detailed view

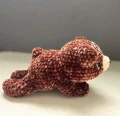
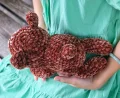
This little cub is the ultimate nursery addition or a heartfelt gift for a loved one. Its soft texture makes it impossible not to squeeze, and it sits perfectly on any flat surface or bookshelf.

Why You'll Love This Little Brown Bear Amigurumi Pattern

I love this bear because he has that classic weighted look without needing actual pellets—the way he is shaped to lie flat makes him so charming. Plus, using chenille yarn means he is finished much faster than you would expect for a bear this size, giving you instant gratification!

Little Brown Bear Amigurumi Pattern step 1 Little Brown Bear Amigurumi Pattern step 2 Little Brown Bear Amigurumi Pattern step 3 Little Brown Bear Amigurumi Pattern step 4

Switch Things Up

I still remember the first time I picked up a ball of chenille yarn. It felt like crocheting with a cloud! This little bear project is my go-to whenever I need a bit of 'yarn therapy.' There is something incredibly satisfying about how the stitches just disappear into that plush texture, creating a seamless, professional look without much extra effort.

The secret to making this bear look really special is in the eye sockets. I know it can feel a bit intimidating to poke a needle through your finished head, but trust me—pulling those threads to indent the eyes gives him so much character. It transforms him from a simple stuffed shape into a little guy with a real expression.

I usually make these in traditional browns, but I once tried a soft mint green for a baby shower gift and it was a total hit. Don't be afraid to play with your color palette! Just keep an eye on your tension, as chenille can be a bit slippery. I hope you enjoy every single stitch of this journey. He is a joy to assemble and even more fun to gift.

Common Mistakes & How to Fix Them

✗ If you do not pull the yarn firmly enough when creating the eye sockets, the bear will lose that soulful, indented look and the face may appear too flat.✗ Be careful not to stuff the muzzle; the pattern is designed for it to lie flat against the face, and adding stuffing will make it protrude awkwardly.✗ When closing the arms and legs, ensure you are crocheting through both layers evenly so the limb doesn't twist when you sew it to the body later.✗ If the safety eyes are placed even one round too high or too low, it can completely change the bear's expression—always double-check the round count before securing the backings.

Little Brown Bear Amigurumi Pattern

Get ready to create the cuddliest companion you have ever held! This little bear is designed to be a soft, squishy friend that looks just as good on a nursery shelf as it does in a child's arms. You will love working with the plush texture of chenille yarn, which makes the project grow quickly and gives it a professional, store-bought finish. It is a wonderful project for anyone looking to practice shaping and facial detailing.

Intermediate 3-5 Hours

Materials Needed for Little Brown Bear Amigurumi Pattern

— Main Fabric

  • 01
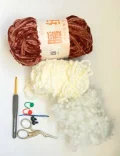
    Approximately 120 meters (about 1.2 skeins) of plush chenille, velvet, or bulky yarn in a deep brown color.
  • 02
    A small amount of white chenille yarn for the muzzle detail.
  • 03
    Scraps of black and white yarn (like cotton or acrylic) for embroidering the facial features.

— Tools Required

  • 01
    4mm crochet hook
  • 02
    14mm safety eyes
  • 03
    10mm safety nose
  • 04
    High-quality polyester fiberfill stuffing
  • 05
    Tapestry needles in black and white
  • 06
    Sharp crafting scissors
  • 07
    Sewing pins for positioning parts
  • 08
    Stitch markers to track your rounds

Progress Tracker

0% Complete

— 1. Head :

Round 1 :

Start with 8 sc into a MR (8)

Round 2 :

Work 2 sc in every stitch around (16)

Round 3 :

Repeat the sequence of 1 sc followed by an inc 8 times (24)

Round 4 :

Work 1 sc, then an inc. Follow this with a repeat of (2 sc, inc) 7 times, and finish with 1 sc (32)

Round 5 :

Repeat the sequence of 3 sc followed by an inc 8 times (40)

Round 6-7 :

Work 1 sc in each stitch around (40)

Round 8 :

Repeat the sequence of 9 sc followed by an inc 4 times (44)

Round 9-10 :

Work 1 sc in each stitch around (44)

Round 11 :

Work 5 sc, then an inc. Repeat the sequence of (10 sc, inc) 3 times, then finish with 5 sc (48)

Round 12-13 :

Work 1 sc in each stitch around (48)

Round 14 :

Repeat the sequence of 4 sc followed by a dec 8 times (40)

Round 15 :

Repeat the sequence of 3 sc followed by a dec 8 times (32)

Info :

Place the 14mm safety eyes between rounds 10 and 11, leaving a gap of 7 stitches between them. Begin adding stuffing to the head.

Round 16 :

Repeat the sequence of 2 sc followed by a dec 8 times (24)

Round 17 :

Work 12 dec around the head (12)

Info :

Finish stuffing the head firmly with fiberfill.

Round 18 :

Work 6 dec, then finish with a sl st (6)

Info :

Cut the yarn leaving a long tail. Thread the tail through the front loops of the remaining 6 stitches and pull tight to close. Hide the end inside the head.

— 2. Muzzle :

Round 1 :

Using white yarn, work 6 sc into a MR (6)

Round 2 :

Repeat the sequence of 1 sc followed by an inc 3 times (9)

Round 3 :

Work 6 sc, then work 3 inc in the remaining stitches, ending with a sl st (12)

Info :

Fasten off and leave a long tail for sewing. Do not add stuffing to this piece.

— 3. Tail :

Round 1 :

Using brown yarn, work 6 sc into a MR (6)

Round 2 :

Repeat the sequence of 1 sc followed by an inc 3 times (9)

Round 3 :

Repeat the sequence of 2 sc followed by an inc 3 times, then sl st (12)

Info :

Fasten off leaving a tail for sewing. Add just a small amount of stuffing.

— 4. Body :

Round 1 :

Work 8 sc into a MR (8)

Round 2 :

Work 2 sc in every stitch around (16)

Round 3 :

Repeat the sequence of 1 sc followed by an inc 8 times (24)

Round 4 :

Repeat the sequence of (1 sc, inc, 1 sc) 8 times (32)

Round 5 :

Repeat the sequence of 3 sc followed by an inc 8 times (40)

Round 6-10 :

Work 1 sc in each stitch around (40)

Round 11 :

Repeat the sequence of 3 sc followed by a dec 8 times (32)

Round 12-14 :

Work 1 sc in each stitch around (32)

Round 15 :

Repeat the sequence of 14 sc followed by a dec 2 times (30)

Round 16 :

Work 30 sc, then finish with a sl st (30)

Info :

Fasten off and leave a long tail. Stuff the body firmly with fiberfill.

— 5. Arms & Legs (Make 4) :

Round 1 :

Work 6 sc into a MR (6)

Round 2 :

Work 2 sc in every stitch around (12)

Round 3-12 :

Work 4 sc, then an inc, followed by 5 sc and a dec (12)

Info :

Stuff the limb firmly with fiberfill. Flatten the opening.

Round 13 :

Work 6 sc through both layers of the flattened opening to close it, then sl st (6)

Info :

Fasten off and leave a long tail for sewing.

— 6. Ears (Make 2) :

Round 1 :

Work 6 sc into a MR (6)

Round 2 :

Work 2 sc in every stitch around (12)

Round 3 :

Repeat the sequence of 5 sc followed by an inc 2 times (14)

Round 4-5 :

Work 1 sc in each stitch around (14)

Info :

Do not stuff the ears. Flatten the opening.

Round 6 :

Work 7 sc through both layers to close the opening, then sl st (7)

Info :

Fasten off and leave a long tail for sewing.

Assembly Instructions

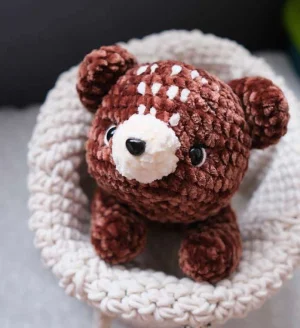
  • Position the white muzzle centered between the eyes and sew it onto the head. Once attached, secure the safety nose into the top center of the muzzle or embroider a nose with black yarn.
  • Attach the ears to the top of the head between rounds 4 and 8, ensuring they are spaced about 8 stitches apart for a balanced look.
  • Use a long strand of brown yarn to create eye sockets by threading from the base of the head up to the inner corner of one eye, across to the other, and back down, pulling firmly to indent the eyes.
  • Embroider small white and black eyelashes or eye details around the safety eyes to give the bear a sweet, sleepy expression.
  • Place the head and body on a flat surface and pin them together to ensure the bear lies flat. Sew the head to the body stitch-for-stitch around the neck opening.
  • Attach two of the limbs as front legs at round 6 of the body, spacing them 10 stitches apart. Sew the remaining two limbs as back legs between rounds 12 and 15 of the body.
  • Finally, sew the lightly stuffed tail onto the back of the body, centered between the back legs.

Important Notes

  • 💡When working with chenille yarn, use a stitch marker religiously as it can be difficult to see individual stitches in the plush texture.
  • 💡To ensure the bear lies flat, always assemble the pieces while the bear is resting on a table rather than holding it in the air.
  • 💡Note: There is a slight typo in the original instructions regarding limb placement rounds; follow the visual guide to ensure the back legs are positioned correctly near the rear.
  • 💡If you find the yarn shedding while sewing, try using a slightly larger tapestry needle to reduce friction on the fibers.
  • 💡Pull your decrease stitches tightly to prevent stuffing from showing through the gaps in the plush fabric.

I can't wait to see your version of this little bear! Whether you stick with the classic chocolate brown or try a polar bear white, he is going to be absolutely adorable. Don't forget to take your time with the facial embroidery—that is where the real magic happens and his personality truly comes to life. This project is such a cozy way to spend a few hours, and the result is a handmade treasure that will be loved for years. Happy stitching, and may your tension be ever consistent! 🧶✨
You ask,

we answer.

FAQs

Can I use a different yarn weight for this bear?

You certainly can! If you use a thinner yarn like DK cotton, your bear will be much smaller and more like a keychain size. Just remember to use a hook size that creates a tight fabric so the stuffing doesn't peek through.

How do I make the eye sockets look deep enough?

The trick is to use a strong, non-stretchy yarn for the sculpting and pull it quite firmly before knotting it at the base of the head. This indents the safety eyes into the plush fabric, giving that 'designer' look.

Why does my bear look like it is standing instead of crawling?

This usually happens during assembly. Make sure to pin the body and head while they are lying flat on a table before sewing. If you sew them while holding the pieces in your hands, the angle of the neck might shift.

Is chenille yarn difficult for beginners to use?

It can be a bit tricky because you have to feel for the stitches rather than see them. I recommend using a bright light and keeping your stitch count very accurate so you don't get lost in the fluff!