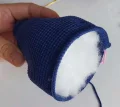
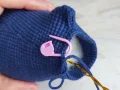
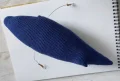
🧶 Beautiful ✨ Detailed 💝 Adorable

Majestic Humpback Whale Amigurumi Pattern

Majestic Humpback Whale Amigurumi Pattern
4.1★Rating
8-10 HoursTime Needed
1.5KMade This
✂️

Advanced Level

Designed for experienced crocheters, these patterns involve intricate designs and complex techniques to challenge and inspire.

⏱️

All-Day Adventure

Requires 8-10 hours, ideal for a full day of immersive crocheting.

🐰

Whimsical Buddy

Playful characters full of personality, designed to spark imagination and become cherished playtime favorites.

About This Majestic Humpback Whale Amigurumi Pattern

Majestic Humpback Whale Amigurumi Pattern crochet pattern - detailed view

This whale makes an unforgettable heirloom gift for ocean lovers or a stunning nursery accent. Its impressive size and poseable features make it feel more like a handmade sculpture than a standard plushie.

Why You'll Love This Majestic Humpback Whale Amigurumi Pattern

I honestly adore the way the lower jaw is constructed separately to give the face so much character. It feels like you're sculpting with your hook, and seeing the whale take shape as you add the wire skeleton is such a 'lightbulb' moment for any maker!

Majestic Humpback Whale Amigurumi Pattern step 1 Majestic Humpback Whale Amigurumi Pattern step 2 Majestic Humpback Whale Amigurumi Pattern step 3 Majestic Humpback Whale Amigurumi Pattern step 4

Switch Things Up

There is something so meditative about working on a project this size. I remember the first time I saw a whale in the wild; that sense of scale is just impossible to capture in words, but I think we’ve come pretty close with this pattern!

When I was designing the workflow for this piece, I realized that the wire armature is the secret sauce. It transforms a standard stuffed toy into something that feels alive. If you're feeling nervous about using wire, don't be! It's just like giving your whale a skeleton. Just make sure those ends are wrapped well so they stay safe and snug inside the stuffing.

One of my favorite parts of this whale is the embroidery at the end. It’s where you really get to add your own artistic flair. I’ve seen some makers use tiny beads instead of knots for the white spots, and it looks absolutely stunning—almost like little barnacles! If you want a more whimsical look, try using a variegated teal yarn for the body. It gives a beautiful 'shimmering water' effect that is just to die for. Whatever you choose, take your time with the assembly; that’s where the magic really happens.

Common Mistakes & How to Fix Them

✗ If you skip the shifting stitches during the body rounds, your whale's belly and eyes will start to spiral and look lopsided.✗ Neglecting to wrap the wire ends with adhesive bandage or tape can lead to the sharp points poking through your stitches later on.✗ Stuffing the tail section too firmly before shaping can make it difficult to get that elegant, tapered look near the flukes.✗ Miscounting the 43-stitch gap between the eyes will throw off the entire facial symmetry, so double-check that placement before securing the backings.

Majestic Humpback Whale Amigurumi Pattern

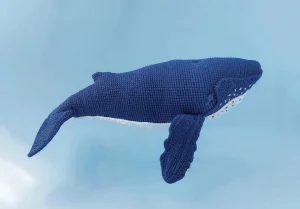
Get ready to bring a giant of the deep into your living room! This humpback whale isn't just a simple toy; it’s a beautifully shaped piece of fiber art that captures the grace of marine life. You'll love how the wire armature makes the fins poseable, giving your finished whale a sense of movement that looks incredible on any shelf. It’s a project that rewards your patience with a truly professional result.

Advanced 8-10 Hours

Materials Needed for Majestic Humpback Whale Amigurumi Pattern

— Main Fabric

  • 01
    About 150g of YarnArt Jeans in Navy Blue (color 54) for the main body and fins
  • 02
    Roughly 50g of YarnArt Jeans in White (color 01) for the belly pleats and fin accents
  • 03
    A small amount of black embroidery thread for the facial details

— Tools Required

  • 01
    1.75mm crochet hook
  • 02
    8mm safety eyes
  • 03
    Three pieces of 40cm craft wire
  • 04
    Synthetic fiberfill stuffing
  • 05
    Adhesive bandage or duct tape for wire safety
  • 06
    Stitch markers
  • 07
    Tapestry needle
  • 08
    Sharp scissors
  • 09
    Small white beads for skin texture

Progress Tracker

0% Complete

— 1. Head & Body :

Round 1 :

Using blue yarn, start with 8 sc into a mr (8)

Round 2 :

8 x inc (16)

Round 3 :

(1 sc, inc) repeated 8 times (24)

Round 4 :

12 sc, then (1 sc, inc) repeated 6 times (30)

Round 5 :

30 sc (30)

Round 6 :

30 sc (30)

Round 7 :

30 sc (30)

Round 8 :

30 sc (30)

Round 9 :

30 sc (30)

Round 10 :

2 sc, inc, (4 sc, inc) repeated 5 times, 2 sc (36)

Round 11 :

36 sc (36)

Round 12 :

12 sc, then (3 sc, inc) repeated 6 times (42)

Round 13 :

3 sc, inc, (6 sc, inc) repeated 5 times, 3 sc (48)

Round 14 :

48 sc (48)

Round 15 :

12 sc, then (5 sc, inc) repeated 6 times (54)

Round 16 :

54 sc (54)

Round 17 :

54 sc (54)

Round 18 :

15 sc, inc, (6 sc, inc) repeated 5 times, 3 sc (60)

Round 19 :

60 sc (60)

Round 20 :

60 sc (60)

Round 21 :

60 sc (60)

Round 22 :

(9 sc, inc) repeated 6 times (66)

Round 23 :

66 sc (66)

Round 24 :

66 sc (66)

Round 25 :

16 sc, inc, (8 sc, inc) repeated 5 times, 4 sc (72)

Round 26 :

72 sc (72)

Round 27 :

72 sc (72)

Round 28 :

30 sc, 3 inc, 30 sc, 3 inc, 6 sc (78)

Round 29 :

30 sc, (1 sc, inc) repeated 3 times, 30 sc, (1 sc, inc) repeated 3 times, 6 sc (84)

Round 30 :

84 sc (84)

Round 31 :

84 sc (84)

Round 32 :

84 sc (84)

Round 33 :

84 sc (84)

Round 34 :

84 sc (84)

Info :

Place the safety eyes between Rounds 29 and 30, keeping them 43 stitches apart.

Round 35 :

84 sc (84)

Round 36 :

84 sc (84)

Round 37 :

84 sc (84)

Round 38 :

84 sc (84)

Round 39 :

84 sc (84)

Round 40 :

84 sc (40)

Round 41 :

84 sc (84)

Round 42 :

84 sc (84)

Round 43 :

84 sc (84)

Round 44 :

84 sc (84)

Info :

Prepare three 40cm wires. Loop one end of each and wrap with tape. Bend the wrapped ends at 90 degrees. Stuff the head. Insert two wires between Rounds 38 and 39 below the eyes, and the third wire in the center. Secure with tape.

Round 45 :

84 sc (84)

Round 46 :

84 sc (84)

Round 47 :

84 sc (84)

Round 48 :

84 sc (84)

Round 49 :

84 sc (84)

Round 50 :

84 sc (84)

Round 51 :

84 sc (84)

Round 52 :

84 sc (84)

Round 53 :

84 sc (84)

Round 54 :

84 sc (84)

Round 55 :

84 sc (84)

Round 56 :

84 sc (84)

Round 57 :

84 sc (84)

Round 58 :

12 sc, then (11 sc, inc) repeated 6 times (90)

Round 59 :

90 sc (90)

Round 60 :

12 sc, then (11 sc, dec) repeated 6 times (84)

Round 61 :

12 sc, then (10 sc, dec) repeated 6 times (78)

Round 62 :

78 sc (78)

Round 63 :

78 sc (78)

Round 64 :

12 sc, then (9 sc, dec) repeated 6 times (72)

Round 65 :

72 sc (72)

Round 66 :

72 sc (72)

Round 67 :

72 sc (72)

Round 68 :

24 sc, then (6 sc, dec) repeated 6 times (66)

Round 69 :

66 sc (66)

Round 70 :

66 sc (66)

Round 71 :

66 sc (66)

Round 72 :

66 sc (66)

Round 73 :

12 sc, 3 hdc in the next st, 53 sc (68)

Round 74 :

26 sc, (5 sc, dec) repeated 6 times (62)

Round 75 :

13 sc, 3 hdc in the next st, 48 sc (64)

Round 76 :

64 sc (64)

Round 77 :

22 sc, (5 sc, dec) repeated 6 times (58)

Round 78 :

58 sc (58)

Round 79 :

14 sc, 3 hdc in the next st, 43 sc (60)

Round 80 :

60 sc (60)

Round 81 :

60 sc (60)

Round 82 :

24 sc, (4 sc, dec) repeated 6 times (54)

Round 83 :

9 sc, skip 10 stitches, 35 sc (44)

Round 84 :

44 sc (44)

Info :

Fold the missed 10 stitches from Round 83 in half and sew them closed.

Round 85 :

44 sc (44)

Round 86 :

44 sc (44)

Round 87 :

44 sc (44)

Round 88 :

(20 sc, dec) repeated 2 times (42)

Round 89 :

(5 sc, dec) repeated 6 times (36)

Round 90 :

36 sc (36)

Round 91 :

36 sc (36)

Round 92 :

(4 sc, dec) repeated 6 times (30)

Round 93 :

30 sc (30)

Round 94 :

30 sc (30)

Round 95 :

30 sc (30)

Round 96 :

30 sc (30)

Round 97 :

30 sc (30)

Round 98 :

(3 sc, dec) repeated 6 times (24)

Round 99 :

24 sc (24)

Round 100 :

24 sc (24)

Round 101 :

24 sc (24)

Round 102 :

24 sc (24)

Round 103 :

24 sc (24)

Round 104 :

(2 sc, dec) repeated 6 times (18)

Round 105 :

18 sc (18)

Round 106 :

18 sc (18)

Round 107 :

(1 sc, dec) repeated 6 times (12)

Round 108 :

12 sc (12)

Round 109 :

12 sc (12)

Round 111 :

6 x dec (6)

Info :

Fasten off and weave the tail through the front loops to close the gap.

— 2. Right Fin (Blue & White) :

Info :

Make one in blue and one in white.

Row 1 :

ch 30. Starting in 2nd ch: 28 sc, 4 sc in the last ch. Work on other side of chain: 28 sc (60)

Row 2 :

ch 1, turn. From 2nd st: 28 sc, 4 x inc, 3 sc, 7 hdc, 7 dc, 2 x inc-dc, 4 dc, 2 hdc, 3 sc (66)

Row 3 :

ch 1, turn. From 2nd st: 3 sc, 2 hdc, 5 dc, 2 x inc-dc, 8 dc, 5 hdc, 3 sc, 14 sl st, 20 sc, 4 sl st (68)

Info :

Place blue and white pieces together. Using blue yarn, sl st the edges together, catching the white stitches in blo.

Edging :

ch 1, turn. From 2nd st: 5 sl st, 9 sc, 4 sl st, 1 sc, 3 hdc in 1 st, 1 sc, 3 sl st, 2 sc, 3 hdc in 1 st, 2 sc, 11 sl st, 2 sc, 3 hdc in 1 st, 2 sc, 1 sl st, 3 hdc in 1 st, 1 sl st, 1 sc, 3 hdc in 1 st, 2 sc, 1 sl st, 3 hdc in 1 st, 1 sc, 2 sl st, 3 sc, 8 sl st.

— 3. Left Fin (Blue & White) :

Info :

Make one in blue and one in white.

Row 1 :

ch 30. Starting in 2nd ch: 28 sc, 4 sc in the last ch. Work on other side: 28 sc (60)

Row 2 :

ch 1, turn. From 2nd st: 3 sc, 2 hdc, 4 dc, 2 x inc-dc, 7 dc, 7 hdc, 3 sc, 4 x inc, 28 sc (66)

Row 3 :

ch 1, turn. From 2nd st: 4 sl st, 20 sc, 14 sl st, 3 sc, 5 hdc, 8 dc, 2 x inc-dc, 5 dc, 2 hdc, 3 sc (68)

Info :

Join pieces with blue yarn in blo as before.

Edging :

ch 1, turn: 8 sl st, 3 sc, 2 sl st, 1 sc, 3 hdc in 1 st, 1 sl st, 2 sc, 3 hdc in 1 st, 1 sc, sl st, 3 hdc in 1 st, sl st, 2 sc, 3 hdc in 1 st, 2 sc, 11 sl st, 2 sc, 3 hdc in 1 st, 2 sc, 3 sl st, 1 sc, 3 hdc in 1 st, 1 sc, 4 sl st, 9 sc, 5 sl st.

— 4. Lower Jaw :

Row 1 :

Using blue yarn, ch 28. From 2nd ch: 26 sc, 3 sc in last ch, 26 sc on other side (55)

Row 2 :

ch 1, turn. 26 sc, 3 x inc, 26 sc (58)

Row 3 :

ch 1, turn. 26 sc, (1 sc, inc) repeated 3 times, 26 sc (61)

Row 4 :

ch 1, turn. 27 sc, inc, (2 sc, inc) repeated 2 times, 27 sc (64)

Row 5 :

ch 1, turn. 26 sc, (3 sc, inc) repeated 3 times, 26 sc (67)

Row 6 :

ch 1, turn. 27 sc, dec (28)

Row 7 :

ch 1, turn. dec, 26 sc (27)

Row 8 :

ch 1, turn. 25 sc, dec (26)

Row 9 :

ch 1, turn. dec, 24 sc (25)

Row 10 :

ch 1, turn. 23 sc, dec (24)

Row 11 :

ch 1, turn. dec, 22 sc (23)

Row 12 :

ch 1, turn. 21 sc, dec (22)

Row 13 :

ch 1, turn. 22 sc (22)

Row 14 :

ch 1, turn. 20 sc, dec (21)

Row 15 :

ch 1, turn. 12 sc (12)

Row 16 :

ch 1, turn. dec, 8 sc, dec (10)

Row 17 :

ch 1, turn. dec, 6 sc, dec (8)

Row 18 :

ch 1, turn. 6 sc, dec (7)

Row 19 :

ch 1, turn. dec, 5 sc (6)

Row 20 :

ch 1, turn. dec, 2 sc, dec (4)

Info :

Attach blue yarn to the other side of Row 5 to finish the jaw symmetry.

Row 1 (Side 2) :

27 sc, dec (28)

Row 2 (Side 2) :

ch 1, turn. dec, 26 sc (27)

Row 3 (Side 2) :

ch 1, turn. 25 sc, dec (26)

Row 4 (Side 2) :

ch 1, turn. dec, 24 sc (25)

Row 5 (Side 2) :

ch 1, turn. 23 sc, dec (24)

Row 6 (Side 2) :

ch 1, turn. dec, 22 sc (23)

Row 7 (Side 2) :

ch 1, turn. 21 sc, dec (22)

Row 8 (Side 2) :

ch 1, turn. 22 sc (22)

Row 9 (Side 2) :

ch 1, turn. 20 sc, dec (21)

Row 10 (Side 2) :

ch 1, turn. 12 sc (12)

Row 11 (Side 2) :

ch 1, turn. dec, 8 sc, dec (10)

Row 12 (Side 2) :

ch 1, turn. dec, 6 sc, dec (8)

Row 13 (Side 2) :

ch 1, turn. 6 sc, dec (7)

Row 14 (Side 2) :

ch 1, turn. dec, 5 sc (6)

Row 15 (Side 2) :

ch 1, turn. dec, 2 sc, dec (4)

Edging :

Finish by crocheting sc all around the edge of the jaw piece.

— 5. Tail Flukes :

Info :

Make 2 blue and 2 white pieces.

Row 1 :

ch 13. Starting in 2nd ch: 12 sc (12)

Row 2 :

ch 1, turn. inc, 9 sc, dec (12)

Row 3 :

ch 1, turn. dec, 9 sc, inc (12)

Row 4 :

ch 1, turn. inc, 9 sc, dec (12)

Row 5 :

ch 1, turn. 12 sc (12)

Row 6 :

ch 1, turn. 12 sc (12)

Row 7 :

ch 1, turn. 12 sc (12)

Row 8 :

ch 1, turn. 10 sc, dec (11)

Row 9 :

ch 1, turn. 11 sc (11)

Row 10 :

ch 1, turn. 11 sc (11)

Row 11 :

ch 1, turn. 9 sc, dec (10)

Row 12 :

ch 1, turn. 8 sc, dec (9)

Row 13 :

ch 1, turn. 9 sc (9)

Row 14 :

ch 1, turn. 7 sc, dec (8)

Row 15 :

ch 1, turn. 8 sc (8)

Row 16 :

ch 1, turn. 6 sc, dec (7)

Row 17 :

ch 1, turn. dec, 5 sc (6)

Row 18 :

ch 1, turn. 4 sc, dec (5)

Row 19 :

ch 1, turn. 2 x dec, inc (4)

Row 20 :

ch 1, turn. 2 x dec (2)

Row 21 :

ch 1, turn. dec (1)

Info :

sc around the edge. Join blue and white pieces together as with the fins.

— 6. Abdomen White Spot :

Row 1 :

Using white yarn, ch 70. Starting in 2nd ch: 68 sc, 4 sc in last ch, 68 sc on other side (140)

Row 2 :

ch 1, turn. 7 sl st, 61 sc, 4 x inc, 61 sc (137)

Row 3 :

ch 1, turn. 3 sl st, 57 sc, (1 sc, inc) repeated 4 times, 58 sc (130)

Row 4 :

ch 1, turn. 57 sc, inc, (2 sc, inc) repeated 3 times, 58 sc (130)

Row 5 :

ch 1, turn. 3 sl st, 53 sc, (3 sc, inc) repeated 4 times, 54 sc (130)

Row 6 :

ch 1, turn. 3 sl st, 52 sc, inc, (4 sc, inc) repeated 3 times, 53 sc (128)

Row 7 :

ch 1, turn. 3 sl st, 47 sc, (5 sc, inc) repeated 4 times, 48 sc (126)

Row 8 :

ch 1, turn. 3 sl st, 7 sc, 3 hdc, 3 dc, 3 hdc, 31 sc, inc, (6 sc, inc) repeated 3 times, 32 sc, 3 hdc, 3 dc, 3 hdc, 10 sc (127)

Row 9 :

ch 1, turn. 3 sl st, 6 sc, 3 hdc, 3 dc, 3 hdc, 29 sc, (7 sc, inc) repeated 4 times, 28 sc, 3 hdc, 3 dc, 3 hdc, 7 sc (127)

Row 10 :

ch 1, turn. 35 sl st, 12 sc, inc, (8 sc, inc) repeated 3 times, 13 sc (92)

Row 11 :

ch 1, turn. 3 sl st, 49 sc (52)

Edging :

Finish with a round of sc along the entire edge.

Assembly Instructions

  • Begin by pinning the lower jaw piece to the head area, matching the curves, and sew it firmly in place.
  • Insert the protruding side wires into the base of the fins and sew the blue/white fins to the body.
  • Attach the tail flukes to the end of the body, ensuring the blue side is facing upwards.
  • Pin the large white abdomen spot along the belly of the whale and sew it down using white yarn.
  • Embroider the blowholes on top of the head by pulling thread between points as shown in the guide.
  • Use white thread to add small decorative dots on the blue snout and fins for a textured look.
  • Add blue embroidered lines or dots onto the white belly spot to finish the ventral pleat detail.

Important Notes

  • 💡Always use a shifting stitch when you notice your round marker drifting to the right to maintain symmetry.
  • 💡Double-check that your wire loops are well-padded with tape so they don't wear through the yarn over time.
  • 💡When sewing the fins, ensure the wire is pushed deep into the fin piece before closing the seam.
  • 💡Use a high-quality fiberfill and stuff the head firmly, but leave the tail slightly softer for better shaping.
  • 💡The abdomen spot is long; pin it in multiple places before sewing to prevent it from bunching up.

I hope you enjoyed this deep-sea journey as much as I did! Crocheting a creature as grand as a humpback whale is no small feat, but the result is something truly magical. Whether he's destined for a shelf of ocean wonders or a gift for a special little explorer, he's sure to make a splash. Don't forget to share your finished photos—I love seeing the different shades of blue and the unique personality each maker brings to their whale. Happy hooking, and may your stitches always be steady! 🧶 🐋 ✨

You ask,

we answer.

FAQs

Can I use a larger hook for this whale?

You can, but it will make the whale significantly larger and may create gaps in the fabric where the stuffing or wire can show through. If you size up the hook, make sure to size up your yarn weight as well!

Is the wire absolutely necessary?

The wire is what gives the fins their iconic poseable look. Without it, the fins will be floppy and won't hold that 'swimming' shape, but the whale will still be a cute, soft plushie.

What is a 'shifting stitch' and why do I need it?

Since we work in a spiral, the start of your round naturally drifts. A shifting stitch is just an extra sc at the end of a round that realigns your marker so the shaping (like eyes and belly) stays perfectly centered.

How do I make the white dots on the snout?

These are added at the very end using a tapestry needle and white yarn. You can use simple French knots or small straight stitches to mimic the tubercles found on a real humpback whale.