🧶 Beautiful ✨ Detailed 💝 Adorable

Peaceful White Dove Amigurumi Pattern

Peaceful White Dove Amigurumi Pattern
4.6★Rating
3-5 HoursTime Needed
2.8KMade This
✂️

Intermediate Level

Ideal for those with basic crocheting experience, featuring slightly more advanced stitches and techniques to expand your skills.

⏱️

Quick Craft

Fits nicely into a free afternoon — 2 to 5 hours of focused, enjoyable crocheting.

🐰

Whimsical Buddy

Playful characters full of personality, designed to spark imagination and become cherished playtime favorites.

About This Peaceful White Dove Amigurumi Pattern

Peaceful White Dove Amigurumi Pattern crochet pattern - detailed view

This project is a joy to display on a shelf or nestle into a holiday display. It is also the perfect size for little hands to hold, making it a sweet nursery gift that will be cherished for years.

Why You'll Love This Peaceful White Dove Amigurumi Pattern

I honestly fell in love with the way the wings are constructed—it is such a clever way to get that layered feather look without needing a million tiny pieces. Plus, using the chunky yarn means the body grows so fast, giving you that wonderful feeling of accomplishment in just one sitting.

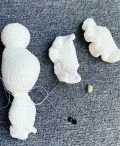
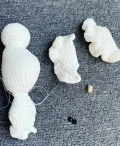
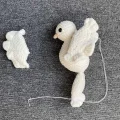
Peaceful White Dove Amigurumi Pattern step 1 Peaceful White Dove Amigurumi Pattern step 2 Peaceful White Dove Amigurumi Pattern step 3 Peaceful White Dove Amigurumi Pattern step 4

Switch Things Up

When I first saw this design, I knew it would be a favorite. There is a certain magic in working with plush yarn; it hides so many little imperfections and creates a toy that is just begging to be squeezed.

I personally love making these in pure white, but do not feel limited! A soft grey or even a pale blue would make a stunning 'morning dove' version. One tip I always give my friends: when you are doing the ruffle edges on the wings and tail, try to keep your tension a bit loose. Those 3 double crochets in one stitch need a little room to bloom so they create that beautiful wavy effect.

If you are making this as a gift for a baby, you might want to embroider the eyes instead of using plastic ones just to be extra safe. It gives the bird a slightly different, more sleepy personality that is just as charming. I also find that using a slightly stronger thread for sewing the wings helps them stay upright and 'perky' rather than flopping down. Enjoy the process of watching this little bird come to life stitch by stitch!

Common Mistakes & How to Fix Them

✗ When you reach the tail section at Round 30, ensure you fold the piece exactly in half; if it is slightly off-center, your tail feathers will look crooked compared to the head.✗ In Round 31, it is easy to miss the remaining six stitches when working the second half of the round—count carefully to make sure you have 12 stitches total before moving on.✗ The wings require a specific folding technique in Round 7; if you close them too tightly, the ruffle edge won't have enough room to fan out properly in the final steps.✗ Since we are using plush yarn for the body, the stitches can be hard to see—I recommend using your fingers to feel for the next stitch gap to avoid accidental increases or skips.

Peaceful White Dove Amigurumi Pattern

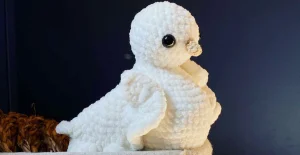
There is something so serene about a white dove, and I wanted to capture that softness in this project. You will love how the plush yarn makes this little bird feel like a soft cloud in your hands. It is a wonderful piece for home decor or a heartfelt gift for someone special. Let's pick up our hooks and create a little bit of peace together.

Intermediate 3-5 Hours

Materials Needed for Peaceful White Dove Amigurumi Pattern

— Main Fabric

  • 01
    Approximately 80-100g of Himalaya Dolphin Baby plush yarn in White
  • 02
    Small amount of Yarn Art Jeans cotton yarn in a light beige or sand color for the beak

— Tools Required

  • 01
    3.0mm crochet hook for the plush body
  • 02
    1.75mm crochet hook for the cotton beak
  • 03
    10mm safety eyes
  • 04
    High-quality polyester fiberfill stuffing
  • 05
    Yarn needle for assembly
  • 06
    Strong sewing thread
  • 07
    Stitch markers

Progress Tracker

0% Complete

— 1. Head, Body, and Tail :

Round 1 :

Start by making 6 sc into a MR (6)

Round 2 :

Work 6 inc around the circle (12)

Round 3 :

Repeat (1 sc, 1 inc) 6 times (18)

Round 4 :

Repeat (2 sc, 1 inc) 6 times (24)

Round 5 :

Repeat (3 sc, 1 inc) 6 times (30)

Round 6 :

Work 1 sc in each stitch around (30)

Round 7 :

Work 1 sc in each stitch around (30)

Round 8 :

Work 1 sc in each stitch around (30)

Round 9 :

Repeat (3 sc, 1 dec) 6 times (24)

Round 10 :

Repeat (2 sc, 1 dec) 6 times (18)

Round 11 :

Repeat (1 sc, 1 dec) 6 times (12)

Round 12 :

Repeat (1 sc, 1 inc) 6 times (18)

Round 13 :

2 sc, 1 inc, 4 sc, 4 inc, 4 sc, 1 inc, 2 sc (24)

Round 14 :

3 sc, 1 inc, 5 sc, 1 inc, repeat (1 sc, 1 inc) 3 times, 4 sc, 1 inc, 3 sc (30)

Round 15 :

13 sc, 4 inc, 13 sc (34). Start adding stuffing to the head.

Round 16 :

15 sc, 4 inc, 15 sc (38)

Round 17 :

Work 1 sc in each stitch around (38)

Round 18 :

Work 1 sc in each stitch around (38)

Round 19 :

Work 1 sc in each stitch around (38)

Round 20 :

Work 1 sc in each stitch around (38)

Round 21 :

Work 1 sc in each stitch around (38)

Round 22 :

15 sc, 4 dec, 15 sc (34)

Round 23 :

Work 1 sc in each stitch around (34)

Round 24 :

13 sc, 4 dec, 13 sc (30)

Round 25 :

Work 1 sc in each stitch around (30)

Round 26 :

1 dec, 11 sc, 2 dec, 11 sc, 1 dec (26)

Round 27 :

1 dec, 10 sc, 1 dec, 12 sc (24)

Round 28 :

Repeat (2 sc, 1 dec) 6 times (18)

Round 29 :

Repeat (1 sc, 1 dec) 6 times (12). Finish stuffing the body firmly.

Round 30 :

Work 3 sc, then fold the opening flat and crochet through both sides with 6 sc to close the gap.

Round 31 :

ch 1 and turn. Work 6 sc into the front loops only, then turn and work 6 sc into the remaining back loops of those same stitches (12)

Round 32 :

Repeat (1 inc, 5 sc) twice (14)

Round 33 :

Repeat (1 inc, 6 sc) twice (16)

Round 34 :

Repeat (1 inc, 7 sc) twice (18)

Round 35 :

2 inc, 7 sc, 2 inc, 7 sc (22)

Round 36 :

2 sc, 1 inc, 10 sc, 1 inc, 8 sc (24)

Round 37 :

Work 1 sc in each stitch around (24)

Round 38 :

Work 1 sc in each stitch around (24)

Round 39 :

Work 1 sc in each stitch around (24)

Round 40 :

Repeat (2 sc, 1 dec) 6 times (18)

Round 41 :

Work 1 sc in each stitch around (18)

Round 42 :

Work 1 sc in each stitch around (18). Do not add any stuffing to this tail section.

Round 43 :

Repeat (1 sc, 1 dec) 6 times (12)

Round 44 :

Work 1 sc in each stitch around (12)

Round 45 :

Work 3 sc, then fold the tail flat and join the front to the back with 6 sc.

Round 46 :

ch 1 and rotate the work. In each of the 6 sc you just made, work 3 dc. Fasten off and weave in your ends (18)

— 2. Wings (Make 2) :

Round 1 :

Make 6 sc into a MR (6)

Round 2 :

Work 6 inc around (12)

Round 3 :

Repeat (1 sc, 1 inc) 6 times (18)

Round 4 :

Repeat (2 sc, 1 inc) 6 times (24)

Round 5 :

Repeat (3 sc, 1 inc) 6 times (30)

Round 6 :

Repeat (4 sc, 1 inc) 6 times (36)

Round 7 :

Fold the circle in half and join the front and back layers with 9 sc. This leaves a circle of 18 stitches remaining.

Round 8 :

Work 18 sc around the remaining circle (18)

Round 9 :

Work 18 sc around the circle (18)

Round 10 :

Fold this tube flat and close the opening by working 4 sc followed by 5 dc.

Round 11 :

ch 1 and turn. In each of the 18 stitches along the edge, work 3 dc to create the ruffle. Fasten off.

— 3. Beak :

Round 1 :

Using the cotton yarn and smaller hook, make 5 sc into a MR (5)

Round 2 :

Work 1 sc in each stitch around (5)

Round 3 :

Work 1 inc, then 5 sc (6)

Round 4 :

Work 1 inc, then 6 sc. Fasten off, leaving a tail for sewing (7)

Assembly Instructions

  • Stuff the head and body sections firmly as you progress through the pattern, but keep the tail completely empty so it stays flat.
  • Place the 10mm safety eyes on either side of the head, ensuring they are level and symmetrical before securing the backings.
  • Sew the small cotton beak centrally between the eyes, positioning it so it points slightly downward for a natural look.
  • Pin the wings to the sides of the body near the neck area; angle them slightly toward the back to mimic a bird in rest.
  • Use a strong sewing thread to attach the wings securely, following the curved line of the body to keep them flush.
  • Check the symmetry of the wings from both the front and the top of the dove before knotting and hiding your thread tails.
  • Give your dove a final squish to distribute the stuffing evenly and ensure the tail and wings sit perfectly flat.

Important Notes

  • 💡This pattern is worked in a continuous spiral, also known as the 'snail' method, so do not join rounds unless specifically told.
  • 💡Plush yarn can make it difficult to see individual stitches; always use a stitch marker to denote the start of each round.
  • 💡When creating the magic ring with velvet yarn, be gentle when pulling it closed to prevent the yarn from breaking.
  • 💡The tail is designed to be unfilled to maintain its characteristic flared shape and allow the ruffles to stand out.
  • 💡If you find the 1.75mm hook too small for the beak, you can use a slightly larger one, but keep your tension tight.
  • 💡Ensure your stuffing is firm in the chest area (the increases in Rounds 13-16) to give the dove its proud, rounded shape.

I hope you enjoyed making this peaceful little dove as much as I did. There is something so rewarding about seeing those ruffled wings take shape! Whether this bird finds a home in a spring display or becomes a cherished toy, it is a piece made with love. Don't forget to share your finished photos with the community—I would love to see your color choices and how you style your finished bird! Happy hooking, and may your day be as peaceful as your new creation! 🧶 ✨

You ask,

we answer.

FAQs

Can I use safety eyes smaller than 10mm?

You can, but the 10mm eyes provide that signature sweet, 'kawaii' look that balances the size of the plush head. Smaller eyes might make the face look a bit sparse.

Why is the beak made with a different yarn weight?

Using a thinner cotton yarn for the beak allows for much finer detail and a sharper point. Plush yarn is too bulky for such a tiny, delicate feature.

My tail looks twisted, how can I fix it?

This usually happens if the fold in Round 30 wasn't perfectly centered. Try re-aligning the fold so it sits exactly opposite the center of the chest before crocheting across.

Is it okay to stuff the tail slightly?

It is best to leave it empty. The pattern relies on the tail being flat to achieve the correct ruffled effect at the end; stuffing it would make it look more like a bulb than feathers.