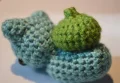
🧢 Beautiful ✨ Detailed πŸ’ Adorable

Mini Bulbasaur Amigurumi Pattern

Mini Bulbasaur Amigurumi Pattern
4.8β˜…Rating
3-5 HoursTime Needed
2.9KMade This
βœ‚οΈ

Intermediate Level

Ideal for those with basic crocheting experience, featuring slightly more advanced stitches and techniques to expand your skills.

⏱️

Quick Craft

Fits nicely into a free afternoon β€” 2 to 5 hours of focused, enjoyable crocheting.

🐰

Whimsical Buddy

Playful characters full of personality, designed to spark imagination and become cherished playtime favorites.

About This Mini Bulbasaur Amigurumi Pattern

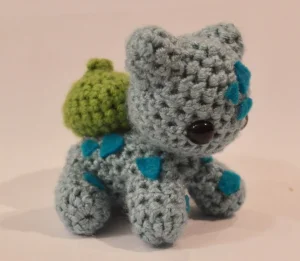
Mini Bulbasaur Amigurumi Pattern crochet pattern - detailed view

This little guy is the perfect size for a keychain or a pocket pal. He makes a fantastic gift for gamers of all ages and looks absolutely charming sitting nestled among your houseplants on a sunny windowsill.

Why You'll Love This Mini Bulbasaur Amigurumi Pattern

I love how the felt spots make him look so official! Usually, I'm a bit wary of gluing things onto my crochet, but it really gives him that crisp, anime-accurate look that embroidery just can't quite match. Plus, he's such a quick makeβ€”you can easily finish him in a single afternoon while re-watching your favorite episodes.

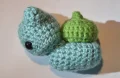
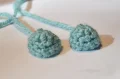
Mini Bulbasaur Amigurumi Pattern step 1 Mini Bulbasaur Amigurumi Pattern step 2 Mini Bulbasaur Amigurumi Pattern step 3 Mini Bulbasaur Amigurumi Pattern step 4

Switch Things Up

I remember the first time I picked up a Game Boy and chose Bulbasaur as my starter. There’s just something about that grumpy but cute little face that sticks with you! When I was writing up this pattern, I really wanted to make sure I captured that specific 'roundness' he has.

One thing I’ve found while making several of these is that the felt really is the secret sauce. I know some of us purists prefer to crochet every single detail, but the sharp edges of the felt triangles really mimic the anime style in a way that stitches just can't. If you're nervous about using glue, you can always whip stitch the felt pieces on with a matching thread, but a good quality fabric glue is a total lifesaver and holds up surprisingly well.

Another little tip: when you're working on the pod, don't be afraid to stuff it quite firmly. It needs that structure to keep its 'onion' shape once it's sewn onto the back. If it's too squishy, it might sag over time. I hope this little guy brings a bit of Kanto magic to your craft room!

Common Mistakes & How to Fix Them

βœ— When you're sewing the head on, it's easy to tilt it too far back because of the bulb β€” make sure to pin it well forward so he doesn't look like he's staring at the ceiling.βœ— The pod starts with a chain loop rather than a magic ring; if you don't join your chain carefully, you might end up with a twist that makes the bulb look lopsided.βœ— If you stuff the legs too firmly, they won't sit flush against the body, making him wobble β€” keep the stuffing light at the top of the legs where they meet the torso.βœ— For the felt markings, cutting them too large can overwhelm his small face β€” try snipping tiny triangles first and 'dry fitting' them before reaching for the glue.

Mini Bulbasaur Amigurumi Pattern

If you're a fan of the classics, this little sprout is going to steal your heart. He's the perfect size for a desk buddy or a gift for a fellow trainer. I've designed him to be chunky and sturdy, so he stands up on his own while looking absolutely precious. You'll love how the simple shapes come together to create such a recognizable character, and he’s just the right scale to sit comfortably in the palm of your hand.

Intermediate 3-5 Hours

Materials Needed for Mini Bulbasaur Amigurumi Pattern

β€” Main Fabric

  • 01
    Worsted weight yarn in a soft light teal or aqua for the main body
  • 02
    Worsted weight yarn in a vibrant green for the bulb on his back
  • 03
    A small sheet of dark teal felt for the signature body markings

β€” Tools Required

  • 01
    3.5mm (E) crochet hook
  • 02
    A pair of 10mm black safety eyes
  • 03
    Polyester fiberfill for stuffing
  • 04
    Strong fabric glue or a hot glue gun for the felt pieces
  • 05
    Tapestry needle for assembly
  • 06
    Sharp scissors

Progress Tracker

0% Complete

β€” 1. Head :

Round 1 :

Start by making a mr and working 8 sc into it, or ch 2 and work 8 sc into the first ch. (8)

Round 2 :

Work 1 inc into every stitch around. (16)

Round 3 :

Repeat a pattern of 1 sc followed by 1 inc 8 times. (24)

Round 4 :

Work 1 sc into every stitch. (24)

Round 5 :

Work 1 sc into every stitch. (24)

Round 6 :

Work 1 sc into every stitch. (24)

Round 7 :

Work 9 sc, then 1 inc, followed by 4 sc, another 1 inc, and finish with 9 sc. (26)

Info :

Insert the safety eyes between the increases from the previous round, leaving 5 stitches between them.

Round 8 :

Work 1 sc into every stitch around. (26)

Round 9 :

Work 2 sc, followed by 11 dec in a row, and finish with 2 sc. (15)

Info :

Stuff the head as firmly as you can at this stage.

Round 10 :

Work 4 sc, then 3 dec, and finish with 5 sc. (12)

Info :

Finish adding stuffing until firm, then fo with a sl st.

β€” 2. Body :

Round 1 :

Make a mr and work 6 sc into it, or ch 2 and work 6 sc into the first ch. (6)

Round 2 :

Work 1 inc into every stitch around. (12)

Round 3 :

Repeat a pattern of 1 sc then 1 inc 6 times. (18)

Round 4 :

Work 1 sc into every stitch. (18)

Round 5 :

Work 1 sc into every stitch. (18)

Round 6 :

Work 1 sc into every stitch. (18)

Round 7 :

Work 5 sc, then 1 inc, followed by 6 sc, another 1 inc, and finish with 5 sc. (20)

Round 8 :

Work 1 sc into every stitch around. (20)

Round 9 :

Work 1 sc into every stitch around. (20)

Round 10 :

Work 1 sc into every stitch around. (20)

Round 11 :

Work dec all the way around to close the opening, adding stuffing as you go. fo with a sl st.

β€” 3. Ears :

Round 1 :

Start with a mr and work 6 sc into it. (6)

Round 2 :

Repeat a pattern of 1 sc then 1 inc 3 times. (9)

Round 3 :

Repeat a pattern of 2 sc then 1 inc 3 times. (12)

Info :

fo with a sl st and leave a tail for sewing. Make two.

β€” 4. Pod :

Round 1 :

ch 12, then join with a sl st to form a ring. (12)

Round 2 :

Work 1 inc into every stitch around. (24)

Round 3 :

Work 1 sc into every stitch. (24)

Round 4 :

Work 1 sc into every stitch. (24)

Round 5 :

Repeat a pattern of 4 sc followed by 1 dec 4 times. (20)

Round 6 :

Work 10 dec around. (10)

Round 7 :

Work 5 dec around. (5)

Round 8 :

Work 4 sc, then sl st and fo. (4)

β€” 5. Arms & Legs :

Round 1 :

Make a mr and work 10 sc into it, or ch 2 and work 10 sc in the first ch. (10)

Round 2 :

Work 1 sc into every stitch. (10)

Round 3 :

Work 1 sc into every stitch. (10)

Round 4 :

Work 1 sc into every stitch. (10)

Round 5 :

Work 1 sc into every stitch. (10)

Info :

fo with a sl st and leave a tail. Repeat these steps to make 4 legs in total.

Assembly Instructions

  • Stuff the head firmly and sew it to the front of the body, ensuring the increases on the body are facing upwards for the right shape.
  • Position the ears on top of the head, using the photos as a guide for spacing, and secure them with your tapestry needle.
  • Fill the bulb pod with stuffing from the bottom opening and sew it onto the center of the back.
  • Lightly stuff the four legs and attach them to the lower sides of the body so Bulbasaur stands evenly on all fours.
  • Cut small triangles out of your dark teal felt in various sizes to act as the skin markings.
  • Use your fabric glue to carefully attach the felt triangles to the head and back to finish his iconic look.

Important Notes

  • πŸ’‘If you prefer, you can substitute the magic ring for a chain 2 and work your first round of stitches into the second chain from the hook.
  • πŸ’‘Keep your tension consistent throughout the project to ensure the safety eyes fit snugly and the stuffing doesn't peek through.
  • πŸ’‘When sewing the legs, try to align them so they all touch the ground at the same time for a stable finished toy.
  • πŸ’‘Wait for your fabric glue to dry completely before handling the plushie too much, as the felt pieces can shift while wet.

I honestly can't wait to see how your little Bulbasaur turns out! There’s something so rewarding about seeing those tiny felt spots go on and watching him finally look like the classic PokΓ©mon we all know and love. He's such a sturdy little guy, perfect for sitting on a shelf or joining you on your next adventure. Don't forget to take a photo of your finished sproutβ€”I'd love to see him in his new home! Happy crocheting, and I hope you enjoyed making this one as much as I did! πŸƒβœ¨

You ask,

we answer.

FAQs

What if I don't have dark teal felt for the markings?

No worries! You can easily use a darker shade of teal yarn and embroider small triangles directly onto the body using a satin stitch for a similar effect.

Can I use safety eyes smaller than 10mm?

You can, but 10mm gives him that signature wide-eyed look. If you go smaller, he might look a little more intense, so just keep that in mind for his personality!

How do I make sure the head stays upright?

The trick is in the sewing. Make sure you sew a wide circle around the neck area rather than just a few points; this creates a stable base so his heavy head doesn't flop.

Is this pattern suitable for a total beginner?

It's best if you've made at least one or two amigurumi before. The shaping on the head and the assembly of multiple parts makes it a great 'next step' project.