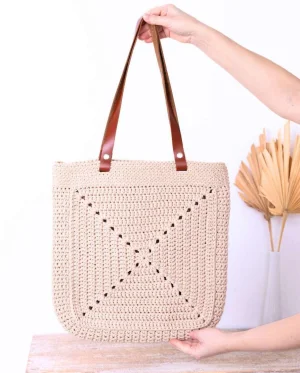
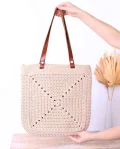
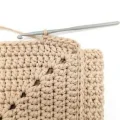
Get ready to create your new favorite everyday accessory! This pattern takes the classic granny square and gives it a sophisticated, structural makeover that is as fun to stitch as it is to wear. You will love how the sturdy cord provides a modern finish while the geometric design keeps things interesting. It is the perfect project for when you want something practical, stylish, and totally handmade.
Progress Tracker
0% Complete
— 1. The Main Squares (Make 2) :
Round 1 :
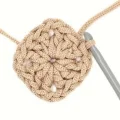
Inside your MR, start with ch3 (this counts as your first dc), then work 2dc. [ch2, 3dc] repeat 3 times. Finish with ch1, pull the ring tight, and sl st into the top of your starting ch3. (12)
Round 2 :
Start by working into the corner space immediately behind your hook: (1sc, ch1, 1dc). Note: the 1sc & ch1 count as your first dc here and throughout. [Work 1dc in each of the next 3 sts, then in the corner space work 2dc, ch2, 2dc] repeat 3 times. Finish with 3dc, then in the last corner space work 2dc, ch1, and sl st into the first ch1. (28)
Round 3 :
Work into the corner space behind your hook: (1sc, ch1, 1dc). [Work 1dc in each of the next 7 sts, then in the corner work 2dc, ch2, 2dc] repeat 3 times. Finish with 7dc, then in the corner work 2dc, ch1, and sl st. (44)
Round 4 :
Work into the corner space behind: (1sc, ch1, 1dc). [Work 1dc in each of the next 11 sts, then in the corner work 2dc, ch2, 2dc] repeat 3 times. Finish with 11dc, then in the corner work 2dc, ch1, and sl st. (60)
Round 5 :
Work into the corner space behind: (1sc, ch1, 1dc). [Work 1dc in each of the next 15 sts, then in the corner work 2dc, ch2, 2dc] repeat 3 times. Finish with 15dc, then in the corner work 2dc, ch1, and sl st. (76)
Round 6 :
Work into the corner space behind: (1sc, ch1, 1dc). [Work 1dc in each of the next 19 sts, then in the corner work 2dc, ch2, 2dc] repeat 3 times. Finish with 19dc, then in the corner work 2dc, ch1, and sl st. (92)
Round 7 :
Work into the corner space behind: (1sc, ch1, 1dc). [Work 1dc in each of the next 23 sts, then in the corner work 2dc, ch2, 2dc] repeat 3 times. Finish with 23dc, then in the corner work 2dc, ch1, and sl st. (108)
Round 8 :
Work into the corner space behind: (1sc, ch1, 1dc). [Work 1dc in each of the next 27 sts, then in the corner work 2dc, ch2, 2dc] repeat 3 times. Finish with 27dc, then in the corner work 2dc, ch1, and sl st. (124)
Round 9 :
Work into the corner space behind: (1sc, ch1, 1dc). [Work 1dc in each of the next 31 sts, then in the corner work 2dc, ch2, 2dc] repeat 3 times. Finish with 31dc, then in the corner work 2dc, ch1, and sl st. (140)
Info :
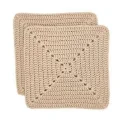
Fasten off leaving a 15cm tail. Use your needle to create a seamless join. Weave in all ends on the wrong side. Repeat all steps for the second square.
— 2. Side and Bottom Gusset :
Info :
Start by making a foundation ch11.
Row 1 :
Beginning in the second ch from your hook, work 1sc in each st across. ch1 and turn. (10)
Row 2 :
Skip the very first st, work 1sc into each of the next 8 sts, then work an inc in the last st. ch1 and turn. (10)
Row 3-109 :
Skip the first st, work 10sc across. Make sure that last 10th sc is worked slightly into the side of the previous row to keep the edge straight. ch1 and turn. (10)
— 3. Bag Assembly :
Info :
Before joining, steam your pieces to ensure they are flat and even.
Joining 1 :
Place one square with the front side facing you. Insert your hook into the corner ch and through the corresponding st on the gusset. Join the pieces by working sl st through both layers all the way around. (109 sl st)
Bottom Edge :
After the join, work 1 sl st in the corner. Flip the work to the wrong side and crochet 9sc across the bottom edge of the square part.
Joining 2 :
Take your second square and align it with the other side of the gusset. Join with sl st through both layers as before. (110 sl st)
— 4. Top Border & Crochet Handles (Variant 1) :
Round 1 :
Work 1sc into every st around the entire top opening of the bag.
Info :
For the following rounds, work in a continuous spiral. To make the fabric extra sturdy, work into both the back loop and the third loop behind it.
Round 2-7 :
Work 1sc in BLO for every st around.
Round 8 :
Place markers to define where your handles will go (24 sts apart). sc until the first marker, ch60, skip to the second marker and sc. sc until the third marker, ch60, skip to the fourth marker and sc. sc to the end of the round.
Round 9-11 :
Work 1sc in BLO for every st around, including the handle chains.
Info :
Finish the round at the fold of the bag. Work 4 sl st to even out the height, then fasten off and weave in your ends.
— 5. Top Border for Removable Handles (Variant 2) :
Round 1 :
Work 1sc into every st around the top opening.
Round 2-4 :
Work 1sc in BLO for every st around.
Round 5 :
Mark your handle positions. sc BLO to the marker, ch3, skip 3 sts, then sc BLO to the next marker. Repeat this for all 4 handle holes.
Round 6-7 :
Work 1sc in BLO for every st around. Fasten off and weave in ends.
— 6. Top Border for Sew-on Handles (Variant 3) :
Round 1 :
Work 1sc into every st around the top opening.
Round 2-7 :
Work 1sc in BLO for every st around. Fasten off and weave in ends.
Info :
Position your leather handles evenly on both sides and sew them securely to the bag border.
I am so incredibly proud of you for finishing this project! There is nothing quite like the feeling of stepping out with a bag you made with your own two hands. Whether you’re headed to the beach, the market, or just out for a coffee, this tote is going to be your new best friend. I hope you enjoyed the process as much as I did—from those first dc stitches in the magic ring to the final assembly. Wear it with pride, you’ve earned it! Sending you so much creative energy for your next project. 🧶✨