🧶 Beautiful ✨ Detailed 💝 Adorable

Plush Dragon Backpack Amigurumi Pattern

Plush Dragon Backpack Amigurumi Pattern
4.5★Rating
8-10 HoursTime Needed
1.3KMade This
✂️

Intermediate Level

Ideal for those with basic crocheting experience, featuring slightly more advanced stitches and techniques to expand your skills.

⏱️

All-Day Adventure

Requires 8-10 hours, ideal for a full day of immersive crocheting.

🐰

Whimsical Buddy

Playful characters full of personality, designed to spark imagination and become cherished playtime favorites.

About This Plush Dragon Backpack Amigurumi Pattern

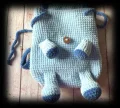
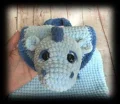
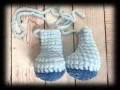
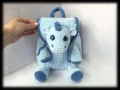
Plush Dragon Backpack Amigurumi Pattern crochet pattern - detailed view

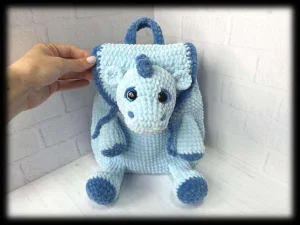
Perfect for gifting to the little explorer in your life, this dragon bag is as practical as it is adorable. It looks stunning on a nursery shelf and even better out on a playdate.

Why You'll Love This Plush Dragon Backpack Amigurumi Pattern

I absolutely adore how the texture of the chenille yarn makes every stitch look like a little cloud. Plus, the way the dragon's head is integrated into the flap is such a clever design choice—it makes the whole piece feel cohesive and sturdy without being overly complicated to assemble.

Plush Dragon Backpack Amigurumi Pattern step 1 Plush Dragon Backpack Amigurumi Pattern step 2 Plush Dragon Backpack Amigurumi Pattern step 3 Plush Dragon Backpack Amigurumi Pattern step 4

Switch Things Up

I have a confession: I am absolutely obsessed with velvet yarn. There is something so satisfying about how quickly a project grows when you’re using that chunky, plush goodness. When I first saw this dragon backpack design, I knew it was going to be a hit. It’s not just another stuffed animal sitting on a shelf; it’s something a child can actually use!

Working with chenille yarn can be a little tricky if you’re not used to it—the stitches can hide sometimes—but the result is so worth it. I found that using a slightly smaller hook than usual helps keep the stuffing from peeking through, especially on the head. If you find the yarn shedding while you’re sewing the pieces together, try using a matching cotton thread instead. It’s much stronger and won’t crumble as you pull it through the stitches. I can’t wait to see what colors you choose for your dragons! A deep forest green or even a bright purple would look amazing. Happy hooking, friends!

Common Mistakes & How to Fix Them

✗ When you reach Row 20 of the flap, be careful not to skip the chain stitches; this creates the buttonhole that keeps the backpack closed.✗ During Round 37 of the body, ensure your flap is perfectly centered before crocheting it into the main piece to avoid a lopsided dragon.✗ It is easy to over-stuff the legs, which can make it difficult to flatten the tops for the final 5 sc join—keep the stuffing mostly in the bottom paw area.✗ If you pull the drawstring cord too tightly through the velvet stitches, it can sometimes get stuck; try to weave it through every few stitches for a smoother glide.

Plush Dragon Backpack Amigurumi Pattern

There is something truly magical about a toy that you can actually take on adventures! This dragon backpack is crafted with the softest velvet yarn, making it feel like a giant, squishy hug for your little one. You will love watching the personality of this creature come to life as you add the tiny spikes and floppy ears. It is the perfect blend of a functional bag and a cuddly companion that kids will never want to leave behind.

Intermediate 8-10 Hours

Materials Needed for Plush Dragon Backpack Amigurumi Pattern

— Main Fabric

  • 01
    2 skeins of Himalaya Dolphin Baby velvet yarn in light blue for the main body
  • 02
    1/4 skein of the same velvet yarn in a dark blue accent color for the trim and legs

— Tools Required

  • 01
    3.75 mm crochet hook
  • 02
    One pair of 15 mm safety eyes
  • 03
    Large wooden button for the closure
  • 04
    Strong sewing needle for assembly
  • 05
    High-quality polyester toy stuffing
  • 06
    Stitch markers to track your rounds

Progress Tracker

0% Complete

— 1. The Backpack Flap :

Row 1 :

Start with 2 ch, then work 5 sc into the second ch from your hook. Do not close the ring. Turn your work (5)

Row 2 :

t-ch, 1 sc, then work 4 inc, turn (9)

Row 3 :

t-ch, repeat (1 sc, 1 inc) 4 times, then 1 sc, turn (13)

Row 4 :

t-ch, repeat (2 sc, 1 inc) 4 times, then 1 sc, turn (17)

Row 5 :

t-ch, repeat (3 sc, 1 inc) 4 times, then 1 sc, turn (21)

Row 6 :

t-ch, repeat (4 sc, 1 inc) 4 times, then 1 sc, turn (25)

Row 7 :

t-ch, repeat (5 sc, 1 inc) 4 times, then 1 sc, turn (29)

Row 8 :

t-ch, repeat (7 sc, 1 inc) 3 times, then 5 sc, turn (32)

Row 9 :

t-ch, repeat (8 sc, 1 inc) 3 times, then 5 sc, turn (35)

Row 10 :

t-ch, repeat (9 sc, 1 inc) 3 times, then 5 sc (38)

Info :

Do not turn. You will now work along the flat top edge of the piece you just made.

Row 11 :

t-ch, 21 sc across the straight edge, turn (21)

Row 12-18 :

t-ch, 21 sc, turn (21)

Row 19 :

t-ch, 21 sc. Do not turn (21)

Colour Change :

Switch to your dark blue accent yarn and cut the light blue. You will now work in rounds around the entire flap edge.

Round 20 :

t-ch, 26 sc, 3 ch, skip 3 stitches, 25 sc, turn (54)

Round 21 :

t-ch, 53 rev sc, sl st to finish (53)

— 2. Main Backpack Body :

Info :

Using light blue yarn, begin with a foundation chain of 20.

Round 1 :

Starting in the second ch: 18 sc, 3 sc in the final ch. Rotate to work on the bottom of the ch: 17 sc, then 2 inc into the t-ch (42)

Round 2 :

1 inc, 15 sc, repeat (1 inc, 1 sc) twice, 1 inc, 17 sc, repeat (1 inc, 1 sc) twice (48)

Round 3 :

1 inc, 1 sc, 1 inc, 15 sc, repeat (1 inc, 1 sc) 4 times, 1 inc, 15 sc, repeat (1 inc, 1 sc) 3 times (58)

Round 4 :

1 inc, 1 sc, 1 inc, 16 sc, repeat (1 inc, 3 sc) 3 times, 1 inc, 18 sc, repeat (1 inc, 3 sc) twice (66)

Round 5 :

1 inc, 3 sc, 1 inc, 18 sc, repeat (1 inc, 4 sc) 3 times, 1 inc, 17 sc, repeat (1 inc, 4 sc) twice (74)

Round 6 :

74 sc around (74)

Round 7 :

Work 74 sc into the BLO (74)

Round 8-16 :

74 sc around (74)

Round 17 :

32 sc, 1 dec, 35 sc, 1 dec, 3 sc (72)

Round 18-36 :

72 sc around (72)

Round 37 :

1 sc, work 23 sc while holding the flap against the body to join them, then 48 sc, sl st (72)

— 3. Backpack Straps (Make 2) :

Row 1 :

Using dark blue yarn, ch 71. Starting in second ch from hook: 70 sc, turn (70)

Row 2-4 :

t-ch, 70 sc, turn (70)

Info :

Fasten off and leave a long tail for sewing. You can adjust the length by adding or subtracting chains here.

— 4. Top Handle :

Row 1 :

Using dark blue, ch 21. Starting in second ch from hook: 20 sc, turn (20)

Row 2-3 :

t-ch, 20 sc, turn (20)

Info :

Fasten off and leave a tail for attaching to the bag.

— 5. Drawstring Cord :

Info :

Using dark blue yarn, create a chain of 150. Tie knots at both ends to secure.

— 6. Dragon Head :

Round 1 :

With light blue, ch 6. Starting in second ch: 1 inc, 3 sc, 3 sc in last ch. Work on other side: 3 sc, 1 inc (13)

Round 2 :

1 sc, 1 inc, 3 sc, 1 inc, 1 sc, 1 inc, 4 sc, 1 inc (17)

Round 3 :

2 inc, 5 sc, 3 inc, 6 sc, 1 inc (23)

Round 4-5 :

23 sc around (23)

Round 6 :

3 sc, 5 inc, 15 sc (28)

Round 7 :

3 sc, repeat (1 sc, 1 inc) 5 times, 15 sc (33)

Round 8 :

repeat (10 sc, 1 inc) 3 times (36)

Round 9 :

repeat (5 sc, 1 inc) 6 times (42)

Round 10-13 :

42 sc around (42)

Info :

Place 15mm safety eyes between Rounds 7 and 8, leaving a gap of 10 stitches between them.

Round 14 :

repeat (5 sc, 1 dec) 6 times (36)

Round 15 :

2 sc, 1 dec, repeat (4 sc, 1 dec) 5 times, 2 sc (30)

Round 16 :

repeat (3 sc, 1 dec) 6 times (24)

Info :

Stuff the head firmly and leave a long tail for sewing.

— 7. Dragon Spikes (Make 2) :

Round 1 :

With dark blue, work 4 sc into a MR or 2nd ch from hook (4)

Round 2 :

repeat (1 inc, 1 sc) twice (6)

Round 3 :

6 sc, sl st (6)

— 8. Ears (Make 2) :

Round 1 :

With light blue, work 6 sc into a MR or 2nd ch from hook (6)

Round 2 :

6 inc, sl st (12)

Info :

Fold the ear in half and sew across the bottom edge to create a curved shape.

— 9. Front Legs (Make 2) :

Round 1 :

With dark blue, work 6 sc into a MR or 2nd ch (6)

Round 2 :

6 inc (12)

Round 3 :

repeat (1 sc, 1 inc) 6 times (18)

Colour Change :

Switch to light blue yarn.

Round 4 :

18 sc into the BLO (18)

Round 5-7 :

18 sc around (18)

Round 8 :

repeat (4 sc, 1 dec) 3 times (15)

Round 9 :

15 sc (15)

Round 10 :

repeat (3 sc, 1 dec) 3 times (12)

Round 11-12 :

12 sc around (12)

Info :

Stuff the lower paw only. Flatten the top and crochet 5 sc through both layers to close.

— 10. Back Legs (Make 2) :

Round 1 :

With dark blue, work 6 sc into a MR or 2nd ch (6)

Round 2 :

6 inc (12)

Round 3 :

repeat (1 sc, 1 inc) 6 times (18)

Round 4 :

1 sc, 1 inc, repeat (2 sc, 1 inc) 5 times, 1 sc (24)

Colour Change :

Switch to light blue yarn.

Round 5 :

24 sc into the BLO (24)

Round 6-7 :

24 sc around (24)

Round 8 :

6 sc, 6 dec, 6 sc (18)

Round 9 :

6 sc, 3 dec, 6 sc (15)

Round 10 :

15 sc around (15)

Round 11 :

repeat (3 sc, 1 dec) 3 times (12)

Round 12-14 :

12 sc around (12)

Info :

Add 3 extra sc to reach the side. Stuff the paw, flatten the top, and work 5 sc through both layers to close.

Assembly Instructions

  • Position the spikes along the top center of the head and sew them securely into place.
  • Attach the folded ears to the head between rounds 12 and 15, keeping them about 13 stitches apart.
  • Using dark blue thread, embroider two small nostrils on the snout and delicate eyelashes around the safety eyes.
  • Sew the completed dragon head onto the center of the backpack's flap.
  • Attach the hind legs to the lower body between rounds 8 and 11, ensuring they are evenly spaced.
  • Sew the forelegs higher up on the body between rounds 22 and 27.
  • Thread the drawstring cord through the top of the backpack and sew the button to the front between rounds 23 and 27.

Important Notes

  • 💡Always use a stitch marker at the beginning of your rounds, as velvet yarn can make it difficult to see where one row ends and the next begins.
  • 💡If your yarn starts to shed or 'crumble' while sewing pieces together, try using a matching cotton thread for extra strength.
  • 💡Ensure your safety eyes are secured with their backings before you finish stuffing and closing the head.
  • 💡When weaving the drawstring, fold the backpack slightly to see where the natural 'corners' are for the best cinch.
  • 💡The straps are customizable; feel free to add more rows if you need them to be wider for a larger child.
  • 💡Check the alignment of the head on the flap frequently while sewing to keep the dragon looking straight ahead.

I hope you enjoy every second of making this adorable dragon backpack! There is nothing quite like the feeling of finishing a project that is both a toy and a useful accessory. Whether you're making it in classic blues or experimenting with fiery reds and oranges, your dragon is sure to be the star of the show. Don't forget to take a photo of your finished work—it’s such a rewarding piece to show off! Happy crafting, and may your new dragon friend bring lots of joy to whoever carries it. 🧶✨🐲
You ask,

we answer.

FAQs

Can I use a different type of yarn for this backpack?

You can, but I highly recommend a bulky velvet or chenille yarn to achieve the same size and plush texture. If you use a standard worsted weight yarn, the backpack will turn out much smaller and may not be functional for carrying items.

How do I stop the velvet yarn from shedding?

Velvet yarn tends to shed at the cut ends. To prevent this, you can briefly singe the very tip of the yarn with a lighter (be careful!) or tie a small knot at the end of the tail before you start sewing.

Is this backpack big enough for an adult?

As written, the straps and bag size are designed for children (roughly 21cm wide). However, you can easily make the straps longer by increasing the initial chain count in the strap section to fit an adult.

What should I do if my buttonhole is too small?

If your wooden button is larger than the 3-chain gap, you can increase the chain count in Row 20 of the flap to 4 or 5 chains. Just make sure to skip the same number of stitches below it!