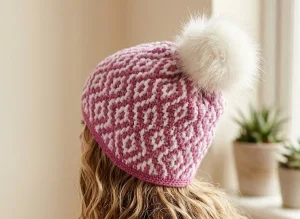
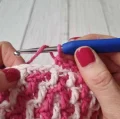
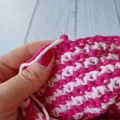
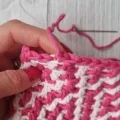
This geometric beauty is such a treat to work up! If you've been wanting to try mosaic crochet, this beanie is the perfect project to get your feet wet. It looks incredibly intricate but uses a simple repeat that you'll memorize in no time. Plus, the top-down construction means you can customize the fit as you go, ensuring it's the perfect snugness for anyone in the family.
Progress Tracker
0% Complete
— 1. Size 1-2 Years (76 stitches) :
Foundation :
Using color A, ch 76. Join with a sl st to the first ch to form a large circle, being careful not to twist the chain.
Round 1 :
sc in every ch around. On the very last st, complete your final yo and pull through using color B to prepare for the next round. (76)
Round 2 :
Using color B, sc blo in every st around. On the last st, change back to color A. (76)
Round 3 :
Color A: 2 sc blo, then repeat [5 sc blo, 1 dc flo, 6 sc blo] 6 times, then 2 sc blo. (76)
Round 4 :
Color B: 2 sc blo, then repeat [4 sc blo, 1 dc flo, 1 sc blo, 1 dc flo, 5 sc blo] 6 times, then 1 sc blo, 1 dc flo. (76)
Round 5 :
Color A: 1 dc flo, 1 sc blo, then repeat [3 sc blo, 1 dc flo, 1 sc blo, 1 dc flo, 1 sc blo, 1 dc flo, 4 sc blo] 6 times, then 2 sc blo. (76)
Round 6 :
Color B: 1 sc blo, 1 dc flo, 1 sc blo, then repeat [2 sc blo, 1 dc flo, 1 sc blo, 1 dc flo, 1 sc blo, 1 dc flo, 1 sc blo, 1 dc flo, 3 sc blo] 6 times, then 1 sc blo. (76)
Round 7 :
Color A: 1 sc blo, 1 dc flo, then repeat [1 sc blo, 1 dc flo, 1 sc blo, 1 dc flo, 1 sc blo, 1 dc flo, 1 sc blo, 1 dc flo, 1 sc blo, 1 dc flo, 2 sc blo] 6 times, then 2 sc blo. (76)
Round 8 :
Color B: 1 sc blo, 1 dc flo, then repeat [1 dc flo, 1 sc blo, 1 dc flo, 1 sc blo, 1 dc flo, 1 sc blo, 1 dc flo, 1 sc blo, 1 dc flo, 1 sc blo, 1 dc flo, 1 sc blo] 6 times, then 1 dc flo, 1 sc blo. (76)
Round 9 :
Color A: 1 sc blo, 1 dc flo, then repeat [1 sc blo, 1 dc flo, 1 sc blo, 1 dc flo, 1 sc blo, 1 dc flo, 1 sc blo, 1 dc flo, 1 sc blo, 1 dc flo, 2 sc blo] 6 times, then 2 sc blo. (76)
Round 10 :
Color B: 1 sc blo, 1 dc flo, 1 sc blo, then repeat [2 sc blo, 1 dc flo, 1 sc blo, 1 dc flo, 1 sc blo, 1 dc flo, 1 sc blo, 1 dc flo, 3 sc blo] 6 times, then 1 sc blo. (76)
Round 11 :
Color A: 1 dc flo, 1 sc blo, then repeat [3 sc blo, 1 dc flo, 1 sc blo, 1 dc flo, 1 sc blo, 1 dc flo, 4 sc blo] 6 times, then 2 sc blo. (76)
Round 12 :
Color B: 2 sc blo, then repeat [4 sc blo, 1 dc flo, 1 sc blo, 1 dc flo, 5 sc blo] 6 times, then 1 sc blo, 1 dc flo. (76)
Round 13 :
Color A: 2 sc blo, then repeat [5 sc blo, 1 dc flo, 6 sc blo] 6 times, then 2 sc blo. (76)
Round 14 :
Color B: sc blo in every st around. (76)
Info :
Repeat Rounds 3 through 14 until the hat measures 18 cm in total height. Ensure the final round is worked in Color A.
— 2. Size 3-4 Years (79 stitches) :
Foundation :
Using color A, ch 79. Join with a sl st to the first ch to form a circle.
Round 1 :
sc in every ch around, changing to color B on the last pull-through. (79)
Round 2 :
sc blo in every st around using color B. Change to color A on the last st. (79)
Round 3-14 :
Follow the mosaic pattern starting at Column 9 of the diagram. Repeat the 12-stitch sequence around until you reach the end of the round. (79)
Info :
Continue repeating the mosaic sequence (Rounds 3-14) until your work reaches a height of 19 cm. Finish with a round of Color A.
— 3. Size 5-8 Years (82 stitches) :
Foundation :
Using color A, ch 82. Join with a sl st to the first ch.
Round 1 :
sc in every ch around, switching to color B on the final st. (82)
Round 2 :
sc blo in every st around using color B. Switch to color A on the final st. (82)
Round 3-14 :
Follow the mosaic pattern starting at Column 2 of the diagram. Work the 12-stitch repeat all the way around. (82)
Info :
Keep working the pattern repeats until the beanie is 20 cm tall. Your very last round should be in Color A.
— 4. Size 9-12 Years (84 stitches) :
Foundation :
Using color A, ch 84. Join with a sl st to the first ch.
Round 1 :
sc in every ch around, switching to color B on the final st. (84)
Round 2 :
sc blo in every st around using color B. Switch to color A on the final st. (84)
Round 3 :
Color A: Repeat [5 sc blo, 1 dc flo, 6 sc blo] 7 times. (84)
Round 4 :
Color B: Repeat [4 sc blo, 1 dc flo, 1 sc blo, 1 dc flo, 5 sc blo] 7 times. (84)
Round 5 :
Color A: Repeat [3 sc blo, 1 dc flo, 1 sc blo, 1 dc flo, 1 sc blo, 1 dc flo, 4 sc blo] 7 times. (84)
Round 6 :
Color B: Repeat [2 sc blo, 1 dc flo, 1 sc blo, 1 dc flo, 1 sc blo, 1 dc flo, 1 sc blo, 1 dc flo, 3 sc blo] 7 times. (84)
Round 7 :
Color A: Repeat [1 sc blo, 1 dc flo, 1 sc blo, 1 dc flo, 1 sc blo, 1 dc flo, 1 sc blo, 1 dc flo, 1 sc blo, 1 dc flo, 2 sc blo] 7 times. (84)
Round 8 :
Color B: Repeat [1 dc flo, 1 sc blo, 1 dc flo, 1 sc blo, 1 dc flo, 1 sc blo, 1 dc flo, 1 sc blo, 1 dc flo, 1 sc blo, 1 dc flo, 1 sc blo] 7 times. (84)
Round 9 :
Color A: Repeat Round 7. (84)
Round 10 :
Color B: Repeat Round 6. (84)
Round 11 :
Color A: Repeat Round 5. (84)
Round 12 :
Color B: Repeat Round 4. (84)
Round 13 :
Color A: Repeat Round 3. (84)
Round 14 :
Color B: sc blo in every st around. (84)
Info :
Repeat the pattern sequence until the hat measures 21 cm. End with Color A.
— 5. Size Teen (86 stitches) :
Foundation :
Using color A, ch 86. Join with a sl st to the first ch.
Round 1 :
sc in every ch around, switching to color B on the final st. (86)
Round 2 :
sc blo in every st around using color B. Switch to color A on the final st. (86)
Round 3-14 :
Follow the mosaic pattern starting at Column 12 of the diagram. Work the 12-stitch repeat around. (86)
Info :
Repeat the pattern until the height reaches 22 cm. Finish with a Color A round.
— 6. Size Women (88 stitches) :
Foundation :
Using color A, ch 88. Join with a sl st to the first ch.
Round 1 :
sc in every ch around, switching to color B on the final st. (88)
Round 2 :
sc blo in every st around using color B. Switch to color A on the final st. (88)
Round 3-14 :
Follow the mosaic pattern starting at Column 11 of the diagram. Work the 12-stitch repeat around. (88)
Info :
Continue the pattern repeats until the hat is 23 cm tall. Ensure your last round is in Color A.
I hope you enjoy every single stitch of this Diamond Beanie! There’s nothing quite like the feeling of finishing a mosaic project and seeing those crisp, geometric lines come to life. Whether you’re making this for yourself or as a special gift for a loved one, it’s bound to be a winter favorite. Don't forget to play around with different color combinations — a high contrast really makes the diamonds shine! I can't wait to see your finished hats. Happy hooking! 🧶✨