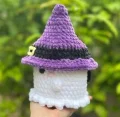
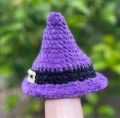
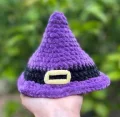
🧶 Beautiful ✨ Detailed 💝 Adorable

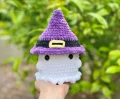
No Sew Ghost Wearing Hats Amigurumi Pattern

No Sew Ghost Wearing Hats Amigurumi Pattern
4.1★Rating
3-5 HoursTime Needed
1.4KMade This
✂️

Intermediate Level

Ideal for those with basic crocheting experience, featuring slightly more advanced stitches and techniques to expand your skills.

⏱️

Quick Craft

Fits nicely into a free afternoon — 2 to 5 hours of focused, enjoyable crocheting.

🎂

Sweet Surprise

A delightful, gift-ready creation perfect for birthdays and special occasions that will be treasured for years.

About This No Sew Ghost Wearing Hats Amigurumi Pattern

No Sew Ghost Wearing Hats Amigurumi Pattern crochet pattern - detailed view

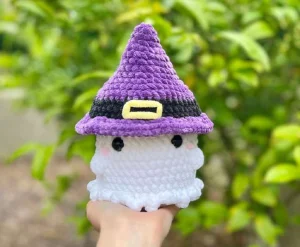
Finished at around 5 inches tall without a hat and 8 inches with one on, these ghosts make genuinely thoughtful handmade gifts — the kind people actually display on their desks or shelves year-round.

Why You'll Love This No Sew Ghost Wearing Hats Amigurumi Pattern

I'll be real with you — I made three of these in one sitting and I don't regret a single one. The no-sew construction is such a relief when you're used to patterns that have you stitching arms on at 11pm squinting at your work. Everything is built into the crocheting itself, which means less fiddling and more actually enjoying the process. The cowboy hat shaping is genuinely fun once you get the hang of the folds — it feels like a little magic trick. And switching the hats on and off? Endlessly satisfying.

No Sew Ghost Wearing Hats Amigurumi Pattern step 1 No Sew Ghost Wearing Hats Amigurumi Pattern step 2 No Sew Ghost Wearing Hats Amigurumi Pattern step 3 No Sew Ghost Wearing Hats Amigurumi Pattern step 4

Switch Things Up

I have a very soft spot for patterns that feel like they should be complicated but are actually totally manageable once you sit down with them. This ghost set is exactly that. On the surface you're looking at four separate crochet projects — a ghost body and three different hats — but they all share the same basic construction logic, and once you've done the witch hat you'll fly through the candy corn one.

The thing I kept coming back to while testing this pattern was how much personality you can give these little ghosts just by swapping the hat. The same ghost body reads completely differently with a pointed purple witch hat versus a rustic folded cowboy hat. It's such a small change but it totally shifts the vibe. I made three in a row and gave them different expressions — one with the felt smile, one with just the eyes and blush, one bare-faced — and they each felt like a different character.

If I had one tip to share about the construction, it's this: place your stitch marker in the back loops of Round 19 the moment you finish that round, before you even think about starting Round 20. That one little marker is the difference between a smooth ruffled hem and a very confusing five minutes of squinting at your chenille yarn trying to figure out which loops are which.

For color variations, there's so much room to play here. A pastel pink ghost with a white witch hat would be completely dreamy for a non-Halloween version. Or try a dark grey ghost with an orange candy corn hat for something a little more moody and autumnal. The hats work in any color combination — I'm already thinking about a holiday version with a tiny Santa hat.

Common Mistakes & How to Fix Them

✗ Placing the safety eyes on the wrong side of the ghost is a really easy slip — the first and last stitch of each round land at the back, so the eyes go on the opposite side, between the bobble stitches at Rounds 12–13.✗ Overstuffing the top of the ghost before trying on the hat will make the hat sit too high and look tilted — stuff gradually and test-fit the hat every few rounds from Round 22 onward.✗ On Round 20 of the ghost, it's tempting to crochet into both loops of Round 19 out of habit — but this round works into the front loops only, and using both loops will prevent the ruffle from forming correctly.✗ For the cowboy hat, starting Round 9 in both loops instead of back loops only will ruin the ridge that gives the hat its crown definition — that back-loop round is what lets the brim sit away from the body of the hat.✗ When embroidering the yellow buckle on the witch hat, stitching it onto Round 14 instead of spanning Rounds 13 and 15 will make the rectangle look too narrow and uneven — the horizontal lines need to land on the outermost black rounds.✗ On the candy corn hat's Round 16, the instruction calls for increases into front loops only — skipping the front-loop-only part and working a standard increase round into both loops will flatten the brim instead of creating that signature wavy ruffle.

No Sew Ghost Wearing Hats Amigurumi Pattern

These little ghost cuties have been living rent-free in my head since the moment I finished my first one. There's something so satisfying about crocheting a chubby little ghost body and then watching it completely transform the second you pop a hat on top. Your ghost can go from spooky witch to candy corn cutie to full-on cowboy in seconds — because all three hats are removable and interchangeable. This is the kind of project you start on a Tuesday evening and finish feeling genuinely proud of. No sewing required, no complicated joins — just you, your hook, and a seriously adorable little haunting waiting to happen.

Intermediate 3-5 Hours

Materials Needed for No Sew Ghost Wearing Hats Amigurumi Pattern

— Main Fabric

  • 01
    Super bulky weight chenille yarn in white for the ghost body and as a base color in the candy corn hat
  • 02
    Super bulky weight chenille yarn in purple (Meadow Violet) for the witch hat cone and brim
  • 03
    Super bulky weight chenille yarn in black for the witch hat band
  • 04
    Super bulky weight chenille yarn in yellow (Daffodil) for the witch hat brim and candy corn hat brim, plus embroidered buckle detail
  • 05
    Super bulky weight chenille yarn in light brown (Terracotta) for the cowboy hat main body
  • 06
    Super bulky weight chenille yarn in dark brown (Java) for the cowboy hat accent band
  • 07
    Super bulky weight chenille yarn in orange (Peach Pink) for the middle section of the candy corn hat
  • 08
    Small amount of pink bulky weight yarn (Bare Pink) — optional, used to embroider blush cheeks on the ghost

— Tools Required

  • 01
    5 mm crochet hook
  • 02
    14 mm safety eyes (2 per ghost)
  • 03
    Polyester fiberfill stuffing
  • 04
    Stitch markers — helpful for tracking round starts and marking back loops on Round 19
  • 05
    Embroidery needle for weaving in ends and adding yarn embroidery details
  • 06
    Scissors
  • 07
    Small piece of black felt (optional, for cutting a smile on the cowboy ghost variation)

Progress Tracker

0% Complete

— 1. Witch Hat :

Info :

Start with purple yarn. The witch hat is worked in continuous rounds from the tip downward.

Round 1 :

MR, work 4 SC into the ring. (4)

Round 2 :

INC in each stitch around. (8)

Round 3 :

8 SC around. (8)

Round 4 :

(1 SC, INC) repeat 4 times. (12)

Round 5 :

(1 SC, INC) repeat 6 times. (18)

Round 6 :

18 SC around. (18)

Round 7 :

(2 SC, INC) repeat 6 times. (24)

Round 8 :

24 SC around. (24)

Round 9 :

(3 SC, INC) repeat 6 times. (30)

Round 10 :

(4 SC, INC) repeat 6 times. (36)

Round 11 :

(5 SC, INC) repeat 6 times. (42)

Round 12 :

(6 SC, INC) repeat 6 times. (48)

Colour Change :

Switch to black yarn.

Round 13 :

48 SC around. (48)

Round 14 :

48 SC around. (48)

Round 15 :

48 SC around. (48)

Info :

You can trim the black yarn here. To hide the tail, consider crocheting over it during Round 16.

Colour Change :

Switch back to purple yarn.

Round 16 :

Working into front loops only: (1 SC, INC) repeat 24 times. (72)

Round 17 :

Working into both loops: 72 SC around. (72)

Info :

Finish off and weave in all ends. Using yellow yarn and an embroidery needle, stitch a rectangular buckle shape onto the black band. The top and bottom horizontal lines of the buckle should sit on Rounds 13 and 15, each spanning 4 horizontal stitches. The vertical sides should connect them across the 3-round height of the black stripe.

— 2. Candy Corn Hat :

Info :

Start with white yarn. The candy corn hat is worked in continuous rounds from the tip downward, changing colors to mimic a candy corn's classic stripe pattern.

Round 1 :

MR, work 4 SC into the ring. (4)

Round 2 :

INC in each stitch around. (8)

Round 3 :

8 SC around. (8)

Round 4 :

(1 SC, INC) repeat 4 times. (12)

Round 5 :

(1 SC, INC) repeat 6 times. (18)

Info :

You can trim the white yarn now. Working over the white tail in the next round will keep it hidden inside the hat.

Colour Change :

Switch to orange yarn.

Round 6 :

18 SC around. (18)

Round 7 :

(2 SC, INC) repeat 6 times. (24)

Round 8 :

24 SC around. (24)

Round 9 :

(3 SC, INC) repeat 6 times. (30)

Round 10 :

(4 SC, INC) repeat 6 times. (36)

Info :

You can trim the orange yarn now. Crocheting over the orange tail during the next round will tuck it neatly inside the hat.

Colour Change :

Switch to yellow yarn.

Round 11 :

(5 SC, INC) repeat 6 times. (42)

Round 12 :

(6 SC, INC) repeat 6 times. (48)

Round 13 :

48 SC around. (48)

Round 14 :

48 SC around. (48)

Round 15 :

48 SC around. (48)

Round 16 :

Working into front loops only: INC in every stitch around. (96)

Round 17 :

Working into both loops: 96 SC around. (96)

Info :

Finish off and weave in all ends. The brim of the hat will naturally develop a wavy, ruffled edge — this is intentional and gives the hat its playful candy corn look.

— 3. Cowboy Hat :

Info :

Start with light brown yarn. The cowboy hat is worked from the top of the crown downward. After crocheting, the hat requires hand-shaping and folding to achieve its cowboy silhouette — see the shaping steps at the end of this section.

Round 1 :

MR, work 6 SC into the ring. (6)

Round 2 :

INC in each stitch around. (12)

Round 3 :

(1 SC, INC) repeat 6 times. (18)

Round 4 :

(2 SC, INC) repeat 6 times. (24)

Round 5 :

(3 SC, INC) repeat 6 times. (30)

Round 6 :

(4 SC, INC) repeat 6 times. (36)

Round 7 :

(5 SC, INC) repeat 6 times. (42)

Round 8 :

(6 SC, INC) repeat 6 times. (48)

Round 9 :

Working into back loops only: 48 SC around. (48)

Round 10 :

48 SC around. (48)

Round 11 :

48 SC around. (48)

Round 12 :

48 SC around. (48)

Round 13 :

48 SC around. (48)

Round 14 :

48 SC around. (48)

Round 15 :

48 SC around. (48)

Round 16 :

48 SC around. (48)

Colour Change :

Switch to dark brown yarn.

Round 17 :

48 SC around. (48)

Info :

You can trim the dark brown yarn here. Crocheting over the tail during Round 18 will keep it tucked inside the hat.

Colour Change :

Switch back to light brown yarn.

Round 18 :

Working into front loops only: (7 SC, INC) repeat 6 times. (54)

Round 19 :

Working into both loops: (3 SC, INC) X 2, 3 HDC, 5 DC, 3 HDC, (3 SC, INC) X 4, 3 HDC, 5 DC, 3 HDC, (3 SC, INC) X 2. (62)

Round 20 :

(10 SC, 3 HDC, 5 DC, 3 HDC, 10 SC) repeat 2 times. (62)

Round 21 :

(5 SC, INC) X 2, 1 HDC, 5 DC, 1 HDC, (5 SC, INC) X 4, 1 HDC, 5 DC, 1 HDC, (5 SC, INC) X 2. (70)

Info :

Finish off and weave in all ends. Now shape the hat: (1) Fold both sides of the brim upward — the mixed stitch construction creates a natural curve at the sides. (2) At the front of the hat (the side directly opposite where you started and ended each round), press the center of the brim downward so it forms a gentle U-shape. (3) Press the very top of the hat inward along the front loops of Round 8 to create an indented crown, then push the front of the crown down slightly so it also forms a subtle U-shape at the front. The back of the hat is the side where you began and finished each round.

— 4. Ghost Body :

Info :

Start with white yarn. The ghost is worked in continuous rounds from the top of the head downward. The bobble stitches in Round 15 form the arms. Facial features and the ruffled hem are added mid-construction — read through the full section before starting so you know when to pause.

Round 1 :

MR, work 6 SC into the ring. (6)

Round 2 :

INC in each stitch around. (12)

Round 3 :

(1 SC, INC) repeat 6 times. (18)

Round 4 :

(2 SC, INC) repeat 6 times. (24)

Round 5 :

(3 SC, INC) repeat 6 times. (30)

Round 6 :

(4 SC, INC) repeat 6 times. (36)

Round 7 :

(5 SC, INC) repeat 6 times. (42)

Round 8 :

42 SC around. (42)

Round 9 :

42 SC around. (42)

Round 10 :

42 SC around. (42)

Round 11 :

42 SC around. (42)

Round 12 :

42 SC around. (42)

Round 13 :

42 SC around. (42)

Round 14 :

42 SC around. (42)

Round 15 :

13 SC, BO (5 DC bobble stitch), 14 SC, BO (5 DC bobble stitch), 13 SC. (42)

Info :

Now is the time to add the ghost's face. For the safety eyes: position them on the front of the ghost (the side opposite where you start and end each round) at Rounds 12–13, landing in between the two bobble stitches. Space the eyes approximately 6 stitches apart. For the blush: using pink bulky weight yarn, embroider a small oval of stitches just below and slightly outside each eye, sitting between Rounds 13–14. Each blush mark should span about 2 stitches wide.

Round 16 :

42 SC around. (42)

Round 17 :

42 SC around. (42)

Round 18 :

42 SC around. (42)

Round 19 :

42 SC around. (42)

Info :

Place a stitch marker in the back loops of Round 19 — you'll need them for Round 21.

Round 20 :

Working into the front loops of Round 19 only: ([1 SC, 1 DC, 1 SC] all in the same stitch, SLST in the next stitch) repeat 21 times. (84) — This creates the ghost's ruffled bottom hem.

Round 21 :

Working into the back loops of Round 19 (the ones you marked): (5 SC, DEC) repeat 6 times. (36)

Round 22 :

Working into both loops: (4 SC, DEC) repeat 6 times. (30)

Info :

Start stuffing the ghost now and continue adding filling as you close up the remaining rounds. Test-fit the ghost's hat as you stuff to avoid packing the top too tightly — the hat needs to sit on the head without being propped up.

Round 23 :

(3 SC, DEC) repeat 6 times. (24)

Round 24 :

(2 SC, DEC) repeat 6 times. (18)

Round 25 :

(1 SC, DEC) repeat 6 times. (12)

Round 26 :

DEC repeat 6 times. (6)

Info :

Finish stuffing. Fasten off with a long yarn tail. Thread the tail through the front loops of the final round, pull firmly to draw the opening closed, and weave in the end to secure.

— 5. Finishing Touches :

Info :

Place whichever hat(s) you made onto the ghost's head. All three hats are designed to sit on top without any sewing — they're fully interchangeable. If you'd prefer a hat to stay in place permanently, you can hand-stitch it down to the head.

Info :

Optional: add a smile or other expression to your ghost. A small piece of black felt cut into a curved mouth shape works well, or you can embroider a smile using black yarn. Position the mouth at Rounds 13–14, centered between the two eyes, roughly 3 stitches wide, and attach with fabric glue or embroidery stitches.

Assembly Instructions

  • Crochet whichever hat(s) you want before starting the ghost body — this lets you test the fit as you stuff the head and adjust before it's sealed.
  • Before completing Round 20 of the ghost, insert the 14 mm safety eyes at Rounds 12–13 on the front side of the ghost (opposite the side where you start and end each round), positioning them between the two bobble stitch arms and spacing them about 6 stitches apart.
  • Still before Round 20, embroider the optional blush marks with pink yarn just below and to the outer sides of each eye, spanning approximately 2 stitches wide between Rounds 13–14.
  • Work Round 20 into the front loops of Round 19 to form the ruffle hem, then continue into the back loops of Round 19 for Round 21 to begin closing the body — use your stitch marker to keep track of those back loops.
  • Begin stuffing the ghost from Round 22 onward, filling gradually as you decrease. Test the hat on top as you go — the head should fill the hat snugly without pushing it upward.
  • Once all 26 rounds are complete, close the top hole by threading the yarn tail through the front loops of Round 26 and pulling tight, then weave in the end securely.
  • Set each hat on top of the ghost — no stitching needed unless you prefer a permanent attachment. If adding a smile, position it centered between the eyes at Rounds 13–14, about 3 stitches wide, using either black felt glued in place or black yarn embroidered on.

Important Notes

  • 💡This pattern is worked entirely in continuous rounds using American crochet terminology — do not join rounds with a slip stitch unless the pattern specifically says to.
  • 💡The front of the ghost is the side directly opposite where your hook sits at the start and end of each round — this matters a lot for eye placement and smile positioning.
  • 💡For the cowboy hat, Rounds 10–16 are seven rounds of plain SC that form the walls of the crown. Keeping your tension even through these rounds will make the later shaping steps much cleaner.
  • 💡The back-loop-only round on the cowboy hat (Round 9) creates a visible ridge that defines where the crown meets the brim — don't skip it or work it in both loops.
  • 💡On the ghost, the front-loop round (Round 20) and the back-loop round (Round 21) both work off Round 19 — placing a stitch marker in the back loops of Round 19 before you start Round 20 will save you a headache.
  • 💡Super bulky chenille yarn can be tricky to count stitches in — use a contrasting stitch marker at the start of each round and count at the end of every single round rather than catching errors several rounds later.
  • 💡The candy corn hat's wavy brim is a natural result of the large increase round followed by a standard SC round — don't try to flatten or block it; the waves are the whole point.

There's something genuinely magical about a tiny crocheted ghost in a cowboy hat. Or a witch hat. Or a candy corn hat. Actually — why choose? That's the whole charm of this pattern: one squishy little ghost, three removable hats, endless combinations. 🧶 These make the sweetest Halloween gifts, desk companions, or seasonal shelf decor, and they work up quickly enough that you could easily make a whole crew before October hits. The no-sew construction keeps things stress-free, and the result looks so much more complex than it actually is. Grab your chenille yarn and have some fun with it — your little ghost crew is waiting. ✨
You ask,

we answer.

FAQs

Do I need to sew any pieces together for this pattern?

Nope — that's the whole point! The ghost's arms (bobble stitches), ruffled hem, and facial features are all worked directly into the crocheting itself. The hats sit on top without any attachment. If you want a hat to stay in place permanently, you can hand-stitch it down, but it's completely optional.

Can I use a different yarn than super bulky chenille?

You can substitute with any super bulky yarn, but keep in mind that the chenille texture is a big part of what makes these ghosts look so soft and squishy. A regular super bulky acrylic will still work but the finished ghost will look and feel noticeably different. Going down to bulky weight will produce a smaller ghost, so the hats may not fit properly.

How do I know which side of the ghost is the front?

The front of the ghost is the side directly opposite where you start and end each round. When you're working continuously, the first and last stitch of each round always end up at the back — so the face, eyes, and smile all go on the other side.

The cowboy hat shaping is confusing me — any tips?

Take it one step at a time using the photo references in the pattern. Step 1 folds the side rims up, Step 2 presses the front rim downward into a U-shape, and Step 3 indents the top of the crown. The chenille yarn is forgiving and holds its shape well once folded. If something looks off, just unfold and try again — there's no stitching involved in the shaping.

How far apart should the safety eyes be placed?

The eyes should be spaced roughly 6 stitches apart, positioned at Rounds 12–13 on the front side of the ghost, landing between the two bobble stitch arms. Insert them before completing Round 20 so you can still reach the backs to attach the washers.

Can I make the ghost without any hat?

Absolutely — the ghost pattern stands completely on its own as a plain little spooky friend. The finished ghost without a hat is about 5 inches tall and 4.5 inches wide. You can also leave the smile off for a more minimal, modern look.