🧶 Beautiful ✨ Detailed 💝 Adorable

Panda Bear Plushie Pillow Amigurumi Pattern

Panda Bear Plushie Pillow Amigurumi Pattern
4.3★Rating
5-7 HoursTime Needed
2.1KMade This
✂️

Intermediate Level

Ideal for those with basic crocheting experience, featuring slightly more advanced stitches and techniques to expand your skills.

⏱️

Weekend Treat

Takes 5-7 hours, making it an enjoyable project to finish over a couple of days.

🏡

Cozy Accent

A warm touch for your space that transforms ordinary corners into inviting nooks filled with handmade charm.

About This Panda Bear Plushie Pillow Amigurumi Pattern

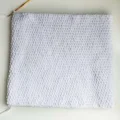
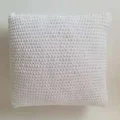
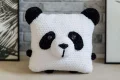
Panda Bear Plushie Pillow Amigurumi Pattern crochet pattern - detailed view

Whether you're making a thoughtful birthday gift for a little one or just want to add some whimsy to your own reading nook, this panda pillow is the ultimate comfort project.

Why You'll Love This Panda Bear Plushie Pillow Amigurumi Pattern

I’m a sucker for functional amigurumi, and this pillow hits that sweet spot perfectly. The spots use a mix of stitches to get that iconic oval shape, which is a fun little technique to master, and seeing the face come together at the end is so satisfying!

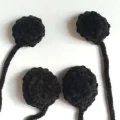
Panda Bear Plushie Pillow Amigurumi Pattern step 1 Panda Bear Plushie Pillow Amigurumi Pattern step 2 Panda Bear Plushie Pillow Amigurumi Pattern step 3 Panda Bear Plushie Pillow Amigurumi Pattern step 4

Switch Things Up

I remember the first time I worked with this kind of super-bulky plush yarn—it was a total game-changer for my amigurumi! There’s just something so satisfying about how fast the rows grow. This panda pillow was born from my love for things that are both cute and practical.

One thing I’ve learned with this specific pattern is that the eye patches are everything. They give the panda all its personality! If you want to customize yours, try playing with the placement of the eyes—tilting them slightly can change the expression from sleepy to curious in an instant. I also recommend using a slightly smaller hook than you might think; with plush yarn, it’s easy for the stitches to stretch, and you really want that fabric to be dense enough to hold all that stuffing in.

I usually finish the main body while catching up on my favorite podcasts, then save the assembly for a quiet afternoon when I can really focus on getting the face just right. It’s the perfect project to savor!

Common Mistakes & How to Fix Them

✗ When working the large pillow body, it’s easy to lose track of your rounds; always use a marker so you don't end up with a rectangular panda instead of a square.✗ The plush yarn can hide your stitches, making it hard to see where to place the increases on the ears—try feeling for the loops with your fingers if you can't see them.✗ If you sew the snout too low, the panda might look a bit grumpy; aim for the center between Rounds 13 and 21 to keep that friendly, balanced expression.✗ Stuffing the corners of the pillow too lightly will leave them floppy; make sure to push extra fiberfill right into the tips before you seam the top shut.

Panda Bear Plushie Pillow Amigurumi Pattern

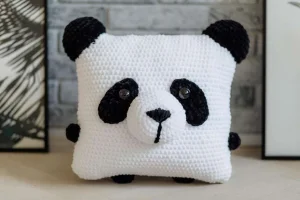
This cuddly panda pillow is about to become your new favorite couch companion. Using super soft chenille yarn, we’ll create a squishy, huggable friend that’s just as much a piece of home decor as it is a toy. You're going to love how quickly this works up, and the end result is purely magical for any nursery or bedroom.

Intermediate 5-7 Hours

Materials Needed for Panda Bear Plushie Pillow Amigurumi Pattern

— Main Fabric

  • 01
    Two 100g skeins of super bulky plush yarn in bright white for the main pillow body and snout
  • 02
    One 100g skein of super bulky plush yarn in deep black for the ears, limbs, and eye patches
  • 03
    A small length of black yarn for the embroidered nose details

— Tools Required

  • 01
    3.5mm crochet hook (or size needed to get a tight fabric with your chosen yarn)
  • 02
    Polyester fiberfill for a squishy, firm stuffing
  • 03
    Two large 22mm black safety eyes or buttons
  • 04
    Wide-eyed tapestry needle for assembly
  • 05
    Sharp scissors
  • 06
    Stitch markers to track the start of your rounds

Progress Tracker

0% Complete

— 1. Main Pillow Body :

Info :

Work using the white plush yarn.

Round 1 :

ch 90, then join with a sl st to the very first ch to create a large loop.

Round 2-37 :

1 sc in every st around (90).

Info :

Cut the yarn leaving a long tail. Sew the bottom edge of the tube closed. Stuff the pillow very firmly and evenly, paying special attention to the corners. Once full, sew the top edge closed and weave in your ends.

— 2. Ears (Make 2) :

Info :

Work using the black plush yarn.

Round 1 :

6 sc into a MR (6).

Round 2 :

inc in every st around (12).

Round 3 :

(1 sc, inc) repeat 6 times (18).

Round 4 :

(2 sc, inc) repeat 6 times (24).

Round 5 :

(3 sc, inc) repeat 6 times (30).

Round 6 :

(4 sc, inc) repeat 6 times (36).

Round 7 :

(5 sc, inc) repeat 6 times (42).

Round 8 :

1 sc in every st around (42).

Round 9 :

(19 sc, dec) repeat 2 times (40).

Info :

Fasten off and leave a long tail for attaching to the pillow.

— 3. Snout :

Info :

Work using the white plush yarn.

Round 1 :

6 sc into a MR (6).

Round 2 :

inc in every st around (12).

Round 3 :

(1 sc, inc) repeat 6 times (18).

Round 4 :

(2 sc, inc) repeat 6 times (24).

Round 5 :

(3 sc, inc) repeat 6 times (30).

Round 6 :

(4 sc, inc) repeat 6 times (36).

Round 7 :

(5 sc, inc) repeat 6 times (42).

Round 8-9 :

1 sc in every st around (42).

Info :

Fasten off and leave a long tail for sewing.

— 4. Legs (Make 2) :

Info :

Work using the black plush yarn.

Round 1 :

6 sc into a MR (6).

Round 2 :

inc in every st around (12).

Round 3 :

(1 sc, inc) repeat 6 times (18).

Round 4 :

1 sc in every st around (18).

Info :

Fasten off and leave a long tail for sewing.

— 5. Arms (Make 2) :

Info :

Work using the black plush yarn.

Round 1 :

6 sc into a MR (6).

Round 2 :

inc in every st around (12).

Round 3 :

1 sc in every st around (12).

Info :

Fasten off and leave a long tail for sewing.

— 6. Eye Spots (Make 2) :

Info :

Work using the black plush yarn.

Round 1 :

ch 12.

Round 2 :

Starting in the 2nd ch from your hook, work 10 sc. In the last ch, work 3 sc in the same st. Now rotate to work along the opposite side of the foundation chain: 10 sc, then sl st to join.

Round 3 :

ch 1, and starting in the 2nd loop from the hook: inc, 9 sc, inc, 1 sc, inc, 11 sc, sl st to join.

Round 4 :

ch 1, and starting in the 2nd loop from the hook: 1 sc, inc, 4 sc, 1 hdc, 5 dc, 1 hdc, 1 sc, sl st to join.

Info :

Secure the yarn and leave a long tail for attaching to the face.

Assembly Instructions

  • Position the ears over the top two corners of the pillow body, stuffing them lightly before sewing them securely in place.
  • Pin the snout to the center of the pillow face, covering the area between Rounds 13 and 21, and sew it on while leaving a small opening to add stuffing before finishing.
  • Using black yarn and a needle, embroider a 'T' shape or a small triangle onto the center of the snout to create the panda's nose and mouth.
  • Sew the black eye patches onto the pillow face, placing them between Rounds 10 and 14 on either side of the snout.
  • Attach the 22mm eyes or buttons directly onto the black eye patches to give the panda its friendly expression.
  • Finally, sew the small arms to the sides of the pillow and the legs to the bottom edge, ensuring they are evenly spaced and secure.

Important Notes

  • 💡When working with plush yarn, avoid frogging (ripping out) too often as the fibers can shed or thin out.
  • 💡If your pillow looks a bit limp, don't be afraid to overstuff slightly; plush yarn stretches over time, and you want it to keep its shape.
  • 💡Make sure your tension is consistent throughout the body so the pillow remains a perfect square rather than warping.
  • 💡When sewing the parts on, use a strong thread or a strand of the plush yarn itself, but pull gently to avoid breaking the yarn core.

I can't wait to see your finished panda! There’s something so special about making a project this size—it feels like such an accomplishment once that final stitch is tied off. Whether it’s destined for a kid’s bedroom or your own favorite armchair, I hope this panda brings a huge smile to your face every time you see it. Don't forget to give it a big squeeze once you're done! Happy hooking, and enjoy your new cuddly friend. 🧶 ✨
You ask,

we answer.

FAQs

Can I use a smaller hook than the pattern suggests?

Yes, you can use a smaller hook like a 3.5mm if your tension is naturally loose. This will help ensure the stuffing doesn't peek through the stitches.

Do I have to use chenille yarn for this?

While the pattern is designed for that 'plush' look, you can use any bulky weight yarn. Just keep in mind that the finished size and texture will change significantly.

Is this project suitable for someone who has never made amigurumi?

It's a great second or third project! The body is just a large tube, but the shaping on the eye patches and the assembly require a little bit of patience.

How do I keep the corners of the pillow from looking rounded?

The trick is in the stuffing! Use small clumps of fiberfill and really push them into the very tips of the corners before sewing the seams shut.