🧶 Beautiful ✨ Detailed 💝 Adorable

Paris Raffia Hexagon Handbag Pattern

Paris Raffia Hexagon Handbag Pattern
4.1★Rating
10-12 HoursTime Needed
1.2KMade This
✂️

Intermediate Level

Ideal for those with basic crocheting experience, featuring slightly more advanced stitches and techniques to expand your skills.

⏱️

Slow & Steady

A 10-12 hour project—great for savoring the process over several sessions.

Stylish Touch

An elegant detail to elevate any look, combining traditional techniques with contemporary design sensibilities.

About This Paris Raffia Hexagon Handbag Pattern

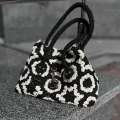
Paris Raffia Hexagon Handbag Pattern crochet pattern - detailed view

This chic tote is the ultimate summer accessory for beach days or city strolls. It makes a stunning gift for a fashion-forward friend who appreciates the effort that goes into a complex, handmade piece.

Why You'll Love This Paris Raffia Hexagon Handbag Pattern

I absolutely adore the way this pattern plays with negative space and color blocking. Working with raffia is such a refreshing change from standard yarn—it has a satisfying 'crunch' and creates a fabric that feels expensive and durable. Plus, the assembly is like solving a beautiful puzzle!

Paris Raffia Hexagon Handbag Pattern step 1 Paris Raffia Hexagon Handbag Pattern step 2 Paris Raffia Hexagon Handbag Pattern step 3 Paris Raffia Hexagon Handbag Pattern step 4

Switch Things Up

Let's talk about raffia for a second—it’s honestly one of my favorite materials to work with when the weather gets warm. There’s a certain 'crunch' and texture to it that you just don't get with cotton or acrylic, and it gives this bag such a high-end, structured look. When I was designing the Paris bag, I wanted something that felt architectural but still had that handmade soul.

The hexagons are the star of the show here. I recommend making all eleven of them first before you even think about joining. It’s like a little production line! And please, whatever you do, don't skip the steaming. Raffia can be a bit unruly right off the hook, but a little bit of steam turns those wavy edges into crisp, professional lines.

If you're feeling adventurous, try a high-contrast color combo like I did with the black and cream, or go for something more subtle like two shades of tan for a classic straw bag vibe. Either way, you're going to love how this feels in your hands as it comes together. It's a slow-made labor of love, but every stitch is worth it when you see that final shape take form!

Common Mistakes & How to Fix Them

✗ Pulling the raffia too tight can make the hexagons curl significantly; keep your tension relaxed to ensure they lie flat after steaming.✗ When changing colors in the middle of a round, ensure you twist the yarn on the wrong side to avoid messy strands showing on the front of your work.✗ If you skip the steaming process, the bag will look lumpy and unfinished; the heat is essential for setting the raffia into its final crisp shape.✗ Miscounting the 15 slip stitches during the canvas join will cause the hexagons to misalign, leading to a lopsided bag once you start the final assembly.

Paris Raffia Hexagon Handbag Pattern

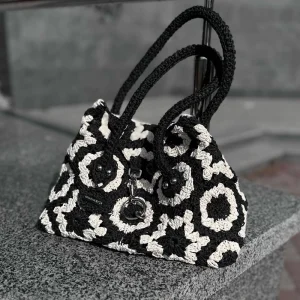
Ever dreamed of carrying a piece of Parisian chic that you actually made yourself? This gorgeous handbag is all about texture, geometry, and that effortless summer style. Using twisted raffia gives it a sturdy, boutique-quality structure that looks incredible in high-contrast colors. You'll love watching the intricate star-shaped hexagons come together to form this sophisticated, modern tote.

Intermediate 10-12 Hours

Materials Needed for Paris Raffia Hexagon Handbag Pattern

— Main Fabric

  • 01
    180-200g of twisted raffia yarn in a dark base color (approximately 440 yards)
  • 02
    180-200g of twisted raffia yarn in a light contrasting color (approximately 440 yards)
  • 03
    1 square meter of fabric for the interior lining

— Tools Required

  • 01
    3.0mm to 3.5mm crochet hook
  • 02
    Small metal lock or 60x20mm snap hook
  • 03
    35mm snap hook ring
  • 04
    Plastic yarn needle with a large eyelet
  • 05
    Standard sewing needle and thread matching your yarn color
  • 06
    Sharp scissors
  • 07
    Measuring tape
  • 08
    Straight pins for lining placement

Progress Tracker

0% Complete

— 1. The Granny Star Hexagon (Make 11) :

Info :

The bag consists of 11 identical hexagons. Use the dark yarn as your base and the light yarn as your additional color.

Round 1 :

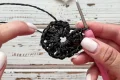
Using your base color, work 5 ch and join with a sl st to form a ring. Pull your active loop up to 20mm. Twist your hook clockwise and then over the loop, pull through another loop and work two loops together, then the remaining two (this is your mock st and first post). Work 2 dc and 1 ch. Repeat (3 dc, 1 ch) four times, then finish with 3 dc. (6 clusters total)

Round 2 :

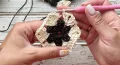
Switch to your additional color. Insert hook under the first loop of the previous round and pull a 20mm loop. Create a mock st, then work 2 dc, 1 ch, 3 dc, and 1 ch into the same space. Repeat (3 dc, 1 ch, 3 dc, 1 ch) in each remaining ch-space around. Join with a sl st.

Round 3 :

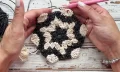
Pull a 20mm loop and make a mock st followed by 2 dc using the additional color. Change to the base color and work 1 ch. In the next space, work (3 dc, 1 ch, 3 dc) with the base color. Switch back to the additional color for the next 1 ch and 3 dc cluster. Continue this alternating pattern around, ensuring you twist the yarn on the wrong side during changes. Join with a sl st.

Round 4 :

Pull a 20mm loop for a mock st and work 2 dc in the additional color, followed by 1 ch and 3 dc. Switch to the base color for the next 1 ch and 3 dc cluster. Continue following the color pattern from the diagram, alternating colors to expand the star points. Join with a sl st.

Round 5 :

Repeat the expansion pattern for the final round. Start with a 20mm mock st and 2 dc in the additional color. Follow the established color changes to complete the star points as shown in the diagram. Cut yarn and weave in ends securely on the back.

Info :

Once all 11 hexagons are finished, steam them thoroughly on both sides with an iron. Each should measure roughly 6 inches (15 cm) across.

— 2. Joining the Canvas :

Info :

We will join the pieces using sl st blo on the wrong side to create a clean seam.

Step 1 :

Take two hexagons and place them wrong sides together. Using the base color, join at the corner and work 3 sl st blo.

Step 2 :

Switch to the additional color and work 4 sl st blo. Change back to the base color and work 4 sl st blo. Change once more to the additional color for 4 sl st blo.

Step 3 :

Finish the side with 1 sl st in the corner ch using the base color for a total of 15 stitches along the edge.

Step 4 :

Join 8 of your hexagons into 4 separate pairs using this method.

Step 5 :

Connect these pairs and the remaining hexagons into a single large flat canvas according to the assembly diagram provided in the PDF.

— 3. The Handles (Make 2) :

Row 1 :

Using the base color, work 76 ch loosely. Starting in the 2nd ch from the hook, work 75 sc. Work 1 ch and turn.

Row 2 :

Work 75 sc blo across the row. Work 1 ch and turn.

Row 3 :

Work 75 sc by inserting your hook into both the blo of the current row and the flo of the row before last. Work 1 ch and turn.

Rows 4-7 :

Repeat the Row 3 technique (sc through blo and flo of pre-previous row) to create a thick, ribbed texture. Do not ch at the end of Row 7.

Base Trim :

Rotate to work along the short end. Skip 4 sc, then work 3 sc. In the corner, work 3 sc in 1 st. Work 3 sc along the side, 3 sc in the next corner, and 3 sc to finish the end.

Joining :

Fold the handle in half lengthwise with the wrong side out. Starting 5 loops from the edge, work 66 sl st through both layers to seal the handle. Repeat the trim on the opposite end.

— 4. Final Assembly & Hardware :

Side Seams :

Fold your flat canvas and join the side seams using the same sl st blo method used for the main canvas. Steam the seams over a rolled-up towel.

Handle Attachment :

Position the ends of the handles where three hexagons meet at the top of the bag. Use a plastic needle to sew them on securely, making 2 stitches in every loop.

Snap Hook :

Find the center hexagon at the top edge. Count 5 loops in and work 4 sc through the eyelet of your snap hook to attach it directly to the bag fabric.

Snap Ring :

Place the snap hook ring on the opposite side, attaching it across 2 or 3 posts so it aligns perfectly with the hook.

— 5. Decorative Tag (Necklace) :

Round 1 :

Work 5 ch and join into a ring. Create a 20mm mock st, then work 14 dc into the ring. Join with a sl st.

Trim :

Work (1 ch, 1 sl st) 15 times around the edge. Pull the piece into an oval shape with your hands.

Chain :

Work 22 ch, then cut the yarn and use the tail to wrap the chain around a handle before securing the tag.

— 6. Lining :

Info :

Fold your lining fabric and trace the contour of your bag canvas, adding a 10-15mm seam allowance.

Assembly :

Sew the side seams of the lining to create a 3D trapezoid shape. Fold over the top edge and press.

Installation :

Place the lining inside the bag and pin it 15-20mm below the top edge. Use hidden stitches to sew the lining to the raffia fabric, adding extra reinforcement at the corners.

Assembly Instructions

  • Begin by joining your 11 hexagons into 4 pairs and then connecting them into a large flat canvas following the provided layout diagram.
  • Fold the canvas to align the side edges and join them using the slip stitch back loop only technique to form the main body of the bag.
  • Steam all seams thoroughly from the wrong side using a damp cloth and a hot iron to ensure the bag holds its geometric shape.
  • Sew the ends of the handles onto the bag at the junction points where three hexagons meet, ensuring the placement is symmetrical on both sides.
  • Install the snap hook and ring hardware by crocheting directly through the eyelets or securing them firmly to the raffia posts.
  • Insert the prepared fabric lining into the bag, pinning it carefully around the top perimeter before hand-sewing it in place with invisible stitches.
  • Attach the decorative crocheted tag to one of the handles to add a final personalized touch to your creation.

Important Notes

  • 💡Always steam your raffia pieces before assembly; it transforms the stiff fibers into a professional-looking fabric.
  • 💡When joining hexagons, maintain a consistent tension so the seams don't pull or pucker the edges of your stars.
  • 💡If your raffia is particularly dry or brittle, try working in a humid environment or lightly misting the strand to prevent snapping.
  • 💡Use a high-quality fabric for the lining to provide extra support, as raffia can stretch slightly over time with heavy use.
  • 💡Always hide your yarn tails as you go by crocheting over them or weaving them deeply into the clusters to prevent them from popping out.

I am so excited to see your version of the Paris bag! This project is such a rewarding journey, from the rhythmic repetition of the hexagons to the clever way it all zips together into a high-end fashion piece. Don't forget to take your time with the steaming—it really is the secret to getting that professional, boutique-quality finish. It's the kind of accessory that gets compliments every time you step out the door. Happy crocheting, and may your new bag take you on many wonderful adventures! 🧶 ✨
You ask,

we answer.

FAQs

Can I use cotton yarn instead of raffia for this bag?

You can, but the bag will be much softer and won't hold the 'Paris' trapezoid shape as well. If you use cotton, I recommend adding a very stiff interfacing to your lining to provide the necessary structure.

My hexagons aren't perfectly flat after finishing. Is that normal?

Yes, raffia often curls while being worked! This is why steaming is a mandatory step in this pattern. Once you apply steam, the fibers will relax and hold the flat, crisp shape of the star.

How do I clean this bag if it gets dirty?

Since raffia is a paper-based fiber, you should never submerge it in water. Spot clean only with a damp cloth and mild soap, then reshape and let it air dry completely.

Is the 'mock stitch' necessary or can I just use chains?

The mock stitch is used to create a seamless look that mimics the thickness of a double crochet. You can use a ch-3 instead, but the start of your rounds will be more visible.