🧶 Beautiful ✨ Detailed 💝 Adorable

Pearodactyl Amigurumi Pattern

Pearodactyl Amigurumi Pattern
4.6★Rating
3-5 HoursTime Needed
2.4KMade This
✂️

Intermediate Level

Ideal for those with basic crocheting experience, featuring slightly more advanced stitches and techniques to expand your skills.

⏱️

Quick Craft

Fits nicely into a free afternoon — 2 to 5 hours of focused, enjoyable crocheting.

🐰

Whimsical Buddy

Playful characters full of personality, designed to spark imagination and become cherished playtime favorites.

About This Pearodactyl Amigurumi Pattern

Pearodactyl Amigurumi Pattern crochet pattern - detailed view

This makes such a thoughtful handmade gift — quirky enough to stand out, small enough to finish in a weekend, and weird enough that whoever receives it will never forget it came from you.

Why You'll Love This Pearodactyl Amigurumi Pattern

I fell hard for this pattern the moment I saw that little beak. There's something so satisfying about watching a plain green oval slowly grow wings and a leaf stem — it comes together almost like a puzzle, and each new piece you attach makes the whole thing click into something magical. I love how the folded-and-stitched wing technique gives such a clean result without any complicated shaping. Honestly, by the time I attached the five little sunshine spots, I was already planning a whole flock.

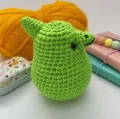
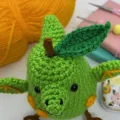
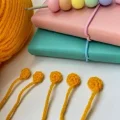
Pearodactyl Amigurumi Pattern step 1 Pearodactyl Amigurumi Pattern step 2 Pearodactyl Amigurumi Pattern step 3 Pearodactyl Amigurumi Pattern step 4

Switch Things Up

I genuinely did not expect to become this attached to a crocheted pear with wings, and yet here we are.

The first time I saw the Pearodactyl concept I laughed out loud — it's such a ridiculous, perfect idea. A pear that is also a pterodactyl. Of course. Why hasn't this always existed? I cast on immediately and by the time I hit round 16 on the body I was already mentally planning color variations. What if the body was a warm golden yellow, like a ripe Bosc pear, with rust-colored spots? Or a deep dusty purple for a plum-dactyl situation? The possibilities are honestly a little dangerous.

What I love most about making this pattern is that every piece is interesting in its own way. The body is satisfying in that reliable amigurumi rhythm — increase, work even, decrease, watch it become a plump little shape — but then the wings keep you on your toes with that fold-and-stitch finish, and the leaf is this tiny burst of a different technique entirely. Nothing overstays its welcome.

One tip I'd share: do the embroidery on the beak before you stuff and attach it. Working on a flat, unstuffed piece gives you so much more control over those little stitched nostrils and smile. Once it's stuffed and sewn on, it's much harder to get the needle in at the right angle without distorting the surrounding stitches.

And those sunshine spots — don't rush them. Five tiny magic rings sounds like nothing, but they're honestly what pulls the whole character together. Once they're clustered along the sides, the Pearodactyl goes from cute to completely iconic.

Common Mistakes & How to Fix Them

✗ When placing the safety eyes between rounds 24 and 25, it's easy to set them too close together — count five visible stitches between them carefully before pushing the backs on, because once they're locked in, they're staying there.✗ The invisible decrease on the body works best when you consistently pick up only the front loops — if you accidentally grab both loops on even one stitch, you'll see a little bump that breaks the smooth surface of the decrease section.✗ When folding and stitching the wings closed, make sure your long sts in sunshine yellow only show on the front face of the wing — if you pull the yarn through to the back side at all, those vein lines will be hidden once the wing is attached to the body.✗ Stuffing the beak and crest only lightly is crucial — overstuffing either piece makes them stick out at a stiff, unnatural angle instead of sitting softly against the body where they belong.✗ The legs are made entirely from chain and slip stitch with no stuffing, so the tension matters a lot — crocheting them too tightly makes the little toe branches stiff and hard to position, while too loose and they'll look limp and uneven.✗ When sewing the spots to the body, the asymmetrical placement of three on one side and two on the other is intentional — double-check which side gets three before stitching them down so you don't have to unpick and reposition them after the wings are already attached.

Pearodactyl Amigurumi Pattern

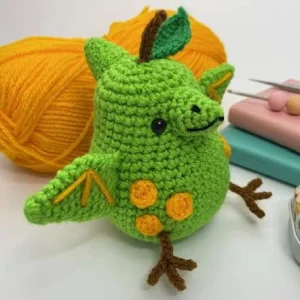
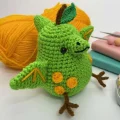
Meet your next favorite crochet project — a pear-shaped prehistoric creature with bat-like wings, a jaunty leaf on top, and the most endearing little beak you've ever stitched. This pattern walks you through every piece clearly, so you can enjoy the process without second-guessing yourself. Your finished Pearodactyl will stand about 11cm tall, making it a perfectly portable size for a desk companion or a handmade gift that'll genuinely make someone's day. Get your green yarn ready — this one is as fun to make as it is to show off.

Intermediate 3-5 Hours

Materials Needed for Pearodactyl Amigurumi Pattern

— Main Fabric

  • 01
    Grass Green DK weight yarn (Stylecraft Special DK) — main color used for the body, wings, crest, and beak; this is by far the largest quantity needed in the project
  • 02
    Kelly Green DK weight yarn (Stylecraft Special DK) — used for the leaf only; just a small amount needed
  • 03
    Sunshine DK weight yarn (Stylecraft Special DK) — used for the decorative wing veins and the five round spots; a small quantity
  • 04
    Gingerbread DK weight yarn (Stylecraft Special DK) — used for both legs and the stem; a small amount in this warm brown shade

— Tools Required

  • 01
    2.5mm crochet hook
  • 02
    Two 6mm black safety eyes
  • 03
    Stitch markers
  • 04
    Yarn needle for sewing and weaving in ends
  • 05
    Fibrefill stuffing
  • 06
    Black embroidery floss for stitching the nostrils and mouth on the beak
  • 07
    Scissors

Progress Tracker

0% Complete

— 1. Body :

Info :

Work with Grass Green throughout the entire body.

Round 1 :

Start with a MR, work 6 sc into it. (6)

Round 2 :

Work 1 inc in every st around. (12)

Round 3 :

*1sc, inc* rep 6 times. (18)

Round 4 :

*2sc, inc* rep 6 times. (24)

Round 5 :

*3sc, inc* rep 6 times. (30)

Round 6 :

*4sc, inc* rep 6 times. (36)

Round 7 :

*5sc, inc* rep 6 times. (42)

Round 8 :

*6sc, inc* rep 6 times. (48)

Round 9 :

sc in every st around. (48)

Round 10 :

sc in every st around. (48)

Round 11 :

sc in every st around. (48)

Round 12 :

sc in every st around. (48)

Round 13 :

sc in every st around. (48)

Round 14 :

sc in every st around. (48)

Round 15 :

sc in every st around. (48)

Round 16 :

sc in every st around. (48)

Round 17 :

*6sc, dec* rep 6 times. (42)

Round 18 :

sc in every st around. (42)

Round 19 :

*5sc, dec* rep 6 times. (36)

Round 20 :

sc in every st around. (36)

Round 21 :

*4sc, dec* rep 6 times. (30)

Round 22 :

sc in every st around. (30)

Round 23 :

sc in every st around. (30)

Round 24 :

sc in every st around. (30)

Round 25 :

sc in every st around. (30)

Round 26 :

sc in every st around. (30)

Round 27 :

sc in every st around. (30)

Info :

Fit the safety eyes between rounds 24 and 25, placing them 5 visible stitches apart. Begin adding fibrefill stuffing now and keep adding it gradually as you work through the remaining decrease rounds.

Round 28 :

*3sc, dec* rep 6 times. (24)

Round 29 :

*2sc, dec* rep 6 times. (18)

Round 30 :

*1sc, dec* rep 6 times. (12)

Round 31 :

dec 6 times. (6)

Info :

Fasten off with a long tail. Use the invisible close technique: thread your needle through the FLO of each remaining stitch, pull snug to shut the opening, then run the needle down through the centre and out a few rounds below before weaving in the end.

— 2. Wings (make two) :

Info :

Work with Grass Green. Make two identical wings.

Round 1 :

Work 6 sc into a MR. (6)

Round 2 :

sc in every st around. (6)

Round 3 :

*sc, inc* rep 3 times. (9)

Round 4 :

sc in every st around. (9)

Round 5 :

*2sc, inc* rep 3 times. (12)

Round 6 :

sc in every st around. (12)

Round 7 :

*3sc, inc* rep 3 times. (15)

Round 8 :

sc in every st around. (15)

Round 9 :

dec, 5sc, inc, 5sc, dec. (14)

Round 10 :

dec, 4sc, 2inc, 4sc, dec. (14)

Info :

Fold the piece in half and use the sc fold-and-stitch technique to close the edge together. Fasten off leaving a long tail for sewing. With Sunshine yarn, make three long decorative stitches across the front face of each wing to resemble wing veins — take care that these sts do not show through to the back side.

— 3. Crest :

Info :

Work with Grass Green.

Round 1 :

Work 6 sc into a MR. (6)

Round 2 :

*sc, inc* rep 3 times. (9)

Round 3 :

sc in every st around. (9)

Round 4 :

*2sc, inc* rep 3 times. (12)

Round 5 :

sc in every st around. (12)

Round 6 :

5sc, 2inc, 5sc. (14)

Round 7 :

sc in every st around. (14)

Info :

Fasten off leaving a long tail for attaching to the body later.

— 4. Beak :

Info :

Work with Grass Green.

Round 1 :

Work 6 sc into a MR. (6)

Round 2 :

*sc, inc* rep 3 times. (9)

Round 3 :

sc in every st around. (9)

Round 4 :

3sc, 3inc, 3sc. (12)

Round 5 :

5sc, 2inc, 5sc. (14)

Info :

Fasten off with a long tail. Using black embroidery floss, stitch two small nostrils and a smile onto the beak before assembly.

— 5. Legs (make two) :

Info :

Work with Gingerbread yarn.

Round 1 :

Ch8, then work as follows: *slst in the 2nd ch from hook, 2slst, ch4* rep 2 times. Slst in the 2nd ch from hook, 2slst. Now turn and work 4slst back along the original chain toward the starting end. Fasten off leaving a long tail for sewing. This creates the leg with three toe branches at the base.

— 6. Stem :

Info :

Work with Gingerbread yarn.

Round 1 :

Ch7, slst in the 2nd ch from hook, then 5slst back along the chain. (6 sts total) Fasten off leaving a long tail.

— 7. Leaf :

Info :

Work with Kelly Green yarn.

Round 1 :

Ch10, then sc in the 2nd ch from hook, 2hdc, dc, dcinc, dc, 2hdc. In the very last ch work the following cluster: sc, ch2, slst in the 2nd ch from hook, sc. Now rotate and work back down the opposite side of the foundation chain: 2hdc, dc, dcinc, dc, 2hdc, sc, slst to join. (20) Fasten off leaving a long tail.

— 8. Spots (make five) :

Info :

Work with Sunshine yarn.

Round 1 :

Work 6 sc into a MR, then slst to join the round. Fasten off leaving a long tail for sewing. Make five of these in total.

Assembly Instructions

  • Add a small amount of fibrefill to the beak to give it a soft shape, then sew it onto the front of the body centered between rounds 23 and 27, sitting just below and between the two safety eyes.
  • Lightly stuff the crest as well, then position it on the back of the head directly opposite the beak and stitch it in place spanning rounds 26 through 30.
  • Attach the gingerbread stem to the very top centre of the head, then sew the kelly green leaf directly beside it so the pair sit together like a pear's stalk and leaf.
  • Pin one wing to each side of the body and stitch them securely along rounds 15 through 21, making sure they face outward with the sunshine vein stitches visible from the front.
  • Sew the two legs to the underside-front of the body between rounds 11 and 12, spacing them approximately 10 stitches apart from each other.
  • Finish by sewing the five sunshine spots along the lower sides of the body near the wings — place three spots along one side and two on the other for that slightly asymmetrical, characterful look.

Important Notes

  • 💡This pattern uses invisible decreases throughout — work into the FLO only when decreasing to keep the fabric surface smooth and free of gaps.
  • 💡The finished size is approximately 11cm tall when made with Stylecraft Special DK and a 2.5mm hook — going up in hook size or yarn weight will noticeably change the proportions.
  • 💡When making the legs, keep your tension relaxed so the chain base stays flexible and the toe branches splay out naturally rather than curling in stiffly.
  • 💡The leaf is worked in rows across a foundation chain rather than in rounds — take care when working the turning cluster at the tip to keep the ch2 picot neat and secure.
  • 💡Stuff both the beak and the crest only lightly before sewing — too much filling causes them to protrude awkwardly rather than sitting softly and naturally against the body.
  • 💡Always leave long tails on every piece as you fasten off — this pattern uses those tails for all the sewing rather than adding new yarn, so trimming them short early will leave you without enough to work with.

The Pearodactyl is genuinely one of those projects that makes people stop and do a double-take — half pear, half pterodactyl, completely irresistible. 🍐 Whether you're stitching one up for yourself or as a gift for someone who deserves something wonderfully unexpected, this little creature brings a whole lot of personality in a compact 11cm package. I hope you enjoy every round of it and that your finished Pearodactyl brings a smile to everyone who sees it sitting on a shelf. Happy hooking! 🧶✨
You ask,

we answer.

FAQs

What yarn weight works best for the Pearodactyl?

The pattern is written for DK weight yarn with a 2.5mm hook, which produces a finished height of about 11cm. If you substitute a lighter yarn like fingering weight, your Pearodactyl will come out noticeably smaller and you may want to drop down to a 2mm hook to keep the fabric tight enough that the stuffing doesn't show through.

Can I use a larger hook to make a bigger version?

Yes, scaling up is straightforward — try a 3.5mm hook with worsted weight yarn and the finished piece will be roughly 40–50% larger. Just keep in mind that the beak and crest assembly notes reference specific round numbers, so the proportions of those pieces will need to scale up too.

The legs seem really simple — is it normal that there's no shaping?

Completely normal. The legs are made purely from chains and slip stitches with no stuffing, which gives them that slightly spindly, wiry look that actually suits the character perfectly. The key is keeping your tension even so all three toe branches sit at similar lengths.

How do I stop the magic ring from leaving a gap in the body after stuffing?

Pull the magic ring tail as firmly as you can before the piece gets too stuffed to maneuver. Then after closing the top invisibly, thread the tail on a needle and weave it through the surrounding stitches twice in different directions before trimming — that double weave keeps it locked shut under the pressure of the stuffing.

I've never done the fold-and-stitch technique before — is it difficult?

It looks trickier than it is. Once the wing is off the hook, flatten it so the edges line up and simply crochet through both layers at once — grab one stitch from the front layer and the corresponding stitch from the back layer and work a sc through both. The result is a neatly sealed flat wing with no seam showing on the outside.

Is this pattern suitable for a gift for a young child?

The safety eyes are 6mm which is fine for children over three, but for babies or very young toddlers you'd want to embroider the eyes in black yarn instead of using the safety eyes entirely, just to be safe. The finished piece is well-stuffed and sturdy, so aside from that one swap it makes a lovely handmade toy.