About This Squid Coraline Amigurumi Pattern
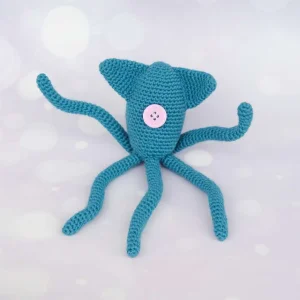
This little guy makes a fantastic gift for movie buffs or anyone who loves quirky, handmade decor. He looks brilliant sitting on a bookshelf or as part of a themed collection.
Ideal for those with basic crocheting experience, featuring slightly more advanced stitches and techniques to expand your skills.
Fits nicely into a free afternoon — 2 to 5 hours of focused, enjoyable crocheting.
Playful characters full of personality, designed to spark imagination and become cherished playtime favorites.
This little guy makes a fantastic gift for movie buffs or anyone who loves quirky, handmade decor. He looks brilliant sitting on a bookshelf or as part of a themed collection.
I honestly had the best time making this squid, mostly because of those bendy arms! There's something so satisfying about using pipe cleaners to make a piece interactive. As a fellow crafter, I think you'll appreciate how the cotton yarn gives such clean stitch definition, making the final toy look really professional and polished without being overly complicated.
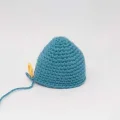
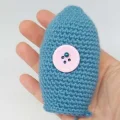
I remember the first time I saw the squid in the film; it had such a unique, slightly eerie but totally charming vibe. Making this amigurumi felt like a little trip down memory lane. One thing I really learned while working on this piece is how much of a difference the choice of cotton makes. I used a nice, sturdy cotton yarn which gives the body a clean, defined look that really makes the stitches pop.
If you find the pipe cleaners a bit fiddly, don't worry! I've found that folding the ends over and maybe even adding a tiny bit of tape helps prevent them from poking through the stitches later on. It's those little details that make the finished toy safe and durable. I honestly had the best time posing the six arms once he was all finished—it’s amazing how much character you can give him just by curling a tentacle or two. I hope you enjoy the process as much as I did, and I can't wait to see how yours turns out. It's the perfect project for a rainy afternoon when you just want to get lost in your stitches and create something truly special for your collection.
If you're a fan of the whimsical and slightly spooky world of Coraline, you're going to love making this little guy! This project brings the iconic blue squid to life with poseable arms that make him so much fun to play with or display. You'll enjoy the rhythmic flow of the stitches, and seeing his personality emerge as you add that signature pink button eye is such a rewarding moment.
Start with 6 sc into a mr (6)
Work 6 inc around (12)
sc in each st (12)
Repeat [1 sc, 1 inc] 6 times (18)
Repeat [2 sc, 1 inc] 6 times (24)
sc in each st (24)
Repeat [3 sc, 1 inc] 6 times (30)
Repeat [4 sc, 1 inc] 6 times (36)
sc in each st (36)
Repeat [4 sc, 1 dec] 6 times (30)
sc in each st (30)
Repeat [3 sc, 1 dec] 6 times (24)
sc in each st (24)
Sew the pink button eye onto the front between Rounds 14 and 19, then stuff the body firmly.
Repeat [2 sc, 1 dec] 6 times (18)
Repeat [1 sc, 1 dec] 6 times (12)
Work 6 dec around (6)
Fasten off with a slst, cut your yarn, and weave in the tail to hide it.
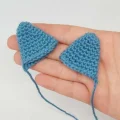
Start with 6 sc into a mr (6)
Repeat [1 sc, 1 inc] 3 times (9)
sc in each st (9)
Repeat [2 sc, 1 inc] 3 times (12)
sc in each st (12)
Repeat [3 sc, 1 inc] 3 times (15)
sc in each st (15)
Repeat [4 sc, 1 inc] 3 times (18)
sc in each st (18)
Repeat [5 sc, 1 inc] 3 times (21)
sc in each st (21)
Fasten off with a slst and leave a long tail for sewing. Do not stuff these pieces.
Start with 4 sc into a mr (4)
Work 4 inc around (8)
sc in each st (8)
The source pattern mentions 24 turns for this section, but the numbering R3-R31 implies 29 rounds; maintain 8 stitches throughout.
Fold a pipe cleaner in half and slide it into the arm, trimming away any excess wire. Finish with a slst and leave a long yarn tail for assembly.
I’m so happy you decided to give this little squid a try! There’s something so satisfying about seeing those six poseable arms come to life. Whether you’re making this for a die-hard movie fan or just because you love quirky sea creatures, I hope he brings a bit of whimsy to your space. Don't forget to take a photo of your finished friend—I'd love to see how you've posed him! Happy stitching, and I hope this project was a bright spot in your day. 🧶✨
Standard craft pipe cleaners work best! They are flexible enough to pose but soft enough that they won't damage the yarn from the inside.
Absolutely! A 12mm or 15mm safety eye would look great, though the pink button is what gives it that specific movie-inspired look.
The best way is to count your rounds carefully for each of the six arms. Even a difference of two rounds can be quite noticeable.
It's a great second or third project. The shaping is straightforward, but managing the six small arms and the wire inserts requires a bit of patience.
