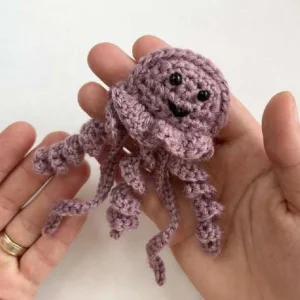
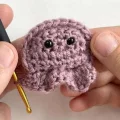
If you are looking for a super quick, adorable stash-buster, this little jellyfish is about to become your new favorite project. It has that wonderful flat ragdoll style, making it incredibly squishy and fast to whip up. You can easily finish one during a single movie night, and they make the absolute sweetest little pocket companions or keychains. Let's grab some leftover yarn and make a whole colorful colony together!
Progress Tracker
0% Complete
— 1. Body Panel (Make 2) :
Setup :
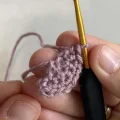
Make a slipknot, ch 2, work 3 sc into the second ch from your hook. (3)
Row 1 :
work 2 sc in each st across, ch 1, turn. (6)
Row 2 :
work [1 inc, 1 sc] repeat across the row, ch 1, turn. (9)
Row 3 :
work [1 inc, 2 sc] repeat across the row, ch 1. (13)
Info :
Note on Row 3 Stitch Count: The original pattern indicates 13 stitches here, though standard math for this repeat on 9 stitches yields 12. Follow the original count or adjust as preferred for your tension.
Row 4 :
Beginning from where you finished the last row, work 1 sc into 8 st spaces along the flat bottom edge to form a straight base row. (8)
Row 5 :
work 1 sc in each st across, ch 1, turn. (8)
Row 6 :
work 1 sc in each st across. (8)
Info :
For your first body panel, fasten off and cut the yarn. For your second body panel, do not cut the yarn! Keep it attached to continue joining.
— 2. Assembly & Joining :
Info :
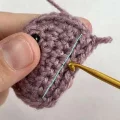
On the second body panel, insert your safety eyes on either side of the starting center point (the row directly above the flat bottom row).
Info :
Place both finished panels together, aligning the edges. Using the yarn still attached to the second panel, begin working 1 sc through both layers along the curved outer edges to join them.
Info :
Add a small amount of stuffing as you go, keeping the toy relatively flat.
Info :
When you reach the straight bottom edge, work 1 sc through only the inside loops of both panels until the opening is completely closed.
Info :
Once the bottom is closed, ch 1 and prepare to work into the remaining exterior loops.
— 3. Ruffles & Tentacles :
Ruffle Row :
work 3 dc in each of the outer loops across the bottom edge to create a wavy ruffle, then slst into the starting ch. (39)
Info :
Now we will work the tentacles into the middle row (located directly between the dc stitches).
Tentacle 1 :
slst in the first st.
Tentacle 2 :
slst in the next st, ch 21, starting in the second ch from your hook work 2 sc in each ch back up, then slst back into the same st.
Tentacle 3 :
slst in the next st, ch 28, starting in the second ch from your hook slst in each ch back up, then slst back into the same st.
Tentacle 4 :
slst in the next st.
Tentacle 5 :
slst in the next st, ch 21, starting in the second ch from your hook work 2 sc in each ch back up, then slst back into the same st.
Tentacle 6 :
slst in the next st, ch 28, starting in the second ch from your hook slst in each ch back up, then slst back into the same st.
Tentacle 7 :
slst in the next st.
Tentacle 8 :
slst in the next st, ch 21, starting in the second ch from your hook work 2 sc in each ch back up, then slst back into the same st, fasten off, cut the yarn, and weave in your tail.
Mouth :
Using your black embroidery thread, stitch a small V-shaped mouth on the front face, secure with a knot on the inside, and tuck the ends away.
I hope you had an absolute blast making this sweet little pocket jellyfish! 🌊 There is something so incredibly satisfying about watching those curly-cue tentacles spring to life with just a few simple stitches. They are so fast and addictive to make, you might find yourself with a whole rainbow of them before you know it. Hang them on your keys, gift them to friends, or keep one in your pocket for a little daily smile. Happy crocheting, friend! 🧶✨