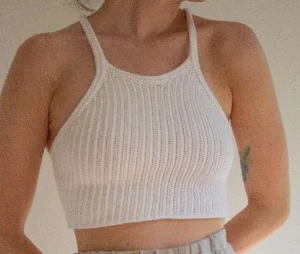
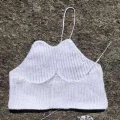
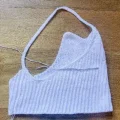
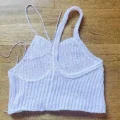
You're going to love how this top hugs your curves! The Roza Version B features a super trendy racerback that's just perfect for those sun-drenched summer days or for layering under your favorite cardigan. It uses a gorgeous ribbed texture that looks exactly like high-end knitwear but is 100% crochet. I've made sure the instructions are warm and clear so you can really get into the rhythm of the stitches without any stress.
Progress Tracker
0% Complete
— 1. The Body :
Info :
The number of chains determines the total length. Follow the count for your size: XS(41), S(45), M(49), L(53), XL(57), 2XL(61), 3XL(65), 4XL(69), 5XL(73).
Row 1 :
Beginning in the 2nd and 3rd ch from your hook, work 1 hdc decrease. In the following two ch, work another 1 hdc decrease. Place 1 hdc in each ch left in the row. ch 1 and turn.
Row 2 :
Work yoslst into the flo of every st until you have 4 sts remaining. Work 1 yoslst decrease over the next two sts, then another 1 yoslst decrease over the final two sts. ch 1 and turn.
Row 3 :
Work 1 hdc decrease in the blo of the first two sts, then another 1 hdc decrease in the blo of the next two. Place 1 hdc into the blo of every remaining st. ch 1 and turn.
Row 4 - Range :
For sizes S through 5XL, repeat the actions from Row 2 and 3 until you reach the row count for your specific size: S(4), M(5), L(6), XL(7), 2XL(8), 3XL(9), 4XL(10), 5XL(11). ch 1 and turn after every row.
Row 4/12 - Range :
Continue the pattern by alternating hdc in blo and yoslst in flo, but now decrease by only one st on every row. Apply this to rows (4,5,6,7,8,9,10,11,12) through (6,8,10,12,14,16,18,20,22) depending on size. ch 1 and turn.
Row 7/23 - Range :
Maintain the alternating stitch pattern across rows (7,9,11,13,15,17,19,21,23) through (11,14,17,20,23,26,29,32,35) without any increases or decreases. ch 1 and turn.
Row 12/36 - Range :
Continue alternating stitches across rows (12,15,18,21,24,27,30,33,36) through (26,30,35,42,46,51,56,61,66), but add one increase on every row. ch 1 and turn.
Row 27/67 - Range :
Across rows (27,31,36,43,47,52,57,62,67) through (40,48,56,64,72,80,88,96,104), increase by two sts on every row while keeping the stitch pattern. ch 1 and turn.
Row 41/105 - Range :
For rows (41,49,57,65,73,81,89,97,105) through (42,50,58,66,74,82,90,98,106), work one row of hdc and one row of yoslst with no shaping. ch 1 and turn.
Row 43/107 - Range :
For rows (43,51,59,67,75,83,91,99,107) through (48,58,68,76,87,97,106,116,126), decrease by one st on every single row. ch 1 and turn.
Row 49/127 - Range :
Work rows (49,59,69,77,88,98,107,117,127) through (52,62,72,82,93,103,114,124,134) without any shaping. This marks the halfway point of your top. ch 1 and turn.
Row 53/135 - Range :
For rows (53,63,73,83,94,104,115,125,135) through (58,70,82,92,106,118,130,142,154), increase by one st on every row. ch 1 and turn.
Row 59/155 - Range :
Work rows (59,71,83,93,107,119,131,143,155) through (60,72,84,94,108,120,132,144,156) with no increases or decreases. ch 1 and turn.
Row 61/157 - Range :
For rows (61,73,85,95,109,121,133,145,157) through (74,90,105,116,134,149,164,179,194), decrease by two sts on every row. ch 1 and turn.
Row 75/195 - Range :
Across rows (75,91,106,117,135,150,165,180,195) through (89,106,123,138,157,174,191,208,225), decrease by one st on every row. ch 1 and turn.
Row 90/226 - Range :
Work rows (90,107,124,139,158,175,192,209,226) through (94,112,130,146,166,184,202,220,238) without any shaping. ch 1 and turn.
Row 95/239 - Range :
For rows (95,113,131,147,167,185,203,221,239) through (97,116,135,152,173,192,211,230,249), increase by one st on every row. ch 1 and turn.
Row 98/250 - Range :
Across rows (98,117,136,153,174,193,212,231,250) through (99,119,139,159,179,199,219,239,259), increase by two sts on every row. ch 1 and turn.
Row 100/260 :
Work rows (100,120,140,160,180,200,220,240,260) with no increases or decreases. Do not fasten off yet.
— 2. Blocking :
Info :
Keep your last loop secure and soak the top in lukewarm water for about 20 minutes. Gently press out the water, then pin it to the size chart measurements on a blocking board until fully dry.
— 3. Seaming :
Info :
Fold the piece in half with the 'ribbed' right sides touching. Insert your hook through the first loop of both edges and slst them together. Continue this all the way down to the bottom edge.
— 4. Bottom Edge :
Info :
Turn the top right-side out. For a simple edge, work 1 sc into every row around the bottom, then slst to join and fasten off.
Elastic Option :
Work 1 sc for every yoslst row and 2 sc for every hdc row. slst to join. Crochet several more rounds of sc until the band is twice the width of your elastic. Sew the elastic ends together, fold the crochet edge over the band, and use a tapestry needle to hem it shut.
— 5. Edges and Straps :
Step 1 :
With the back facing you, join yarn at the right side of the center. Work sc along the edge, placing 2 sc for hdc rows and 1 sc for yoslst rows, until you reach the middle seam.
Step 2 :
ch to create your first strap (around 80 ch is a good start for size S). Connect to the front marker with a sc and check the fit.
Step 3 :
Continue working toward the armpit until you return to your starting point. slst to the first sc.
Step 4 :
ch 2 (does not count as st). Work 1 hdc into every st around, including the strap chains. slst to join.
Step 5 :
ch 1 and turn. Work 1 yoslst into the flo of every st. slst to join.
Step 6 :
ch 2 and turn. Work 1 hdc into the blo of every st. slst to join.
Step 7 :
Repeat the yoslst round from Step 5, then fasten off.
Step 8 :
Repeat the process for the second armhole, but connect the final 15 ch of the new strap to the first strap using slst to create the racerback connection.
Step 9 :
Continue sc around the remaining edge back to the armpit and slst to join.
Step 10 :
Repeat the finishing rounds (Steps 4-7) for this second side.
— 6. Front Edge :
Step 1 :
Join yarn at the top right corner near the strap. ch 1, pull the loop through the first st of the strap to anchor it.
Step 2 :
sc across the front neckline. At the end, slst to the strap on the opposite side, ch 1, and turn.
Step 3 :
slst into the next strap st, then work yoslst across the previous row. slst to the strap, ch 2, and turn.
Step 4 :
slst into the next strap st, work hdc in the blo across, slst to the strap, ch 1, and turn.
Step 5 :
Work a final row of yoslst across, anchoring to the straps at each end. Fasten off and weave in all ends.
I truly can't wait to see your version of the Roza top! Whether you choose a classic creamy white or a vibrant summer hue, this piece is going to look absolutely stunning. Take your time with the shaping rows, and don't be afraid to try it on as you go to get that custom-tailored feel. There’s nothing quite like the pride of wearing a garment you crafted with your own two hands. Happy making, and I hope you enjoy your new favorite summer staple! 🧶✨