๐Ÿงถ Beautiful โœจ Detailed ๐Ÿ’ Adorable

Stanley the Strawberry Amigurumi Pattern

Stanley the Strawberry Amigurumi Pattern
4.5โ˜…Rating
2-3 HoursTime Needed
1.6KMade This
โœ‚๏ธ

Beginner Friendly Level

Perfect for those just starting their crocheting journey, with clear instructions and simple techniques

โฑ๏ธ

Quick Craft

Fits nicely into a free afternoon โ€” 2 to 5 hours of focused, enjoyable crocheting.

๐ŸŽ

Tiny Treasure

Small, sweet, and gift-worthy creations that fit perfectly in the palm of your hand with detailed charm.

About This Stanley the Strawberry Amigurumi Pattern
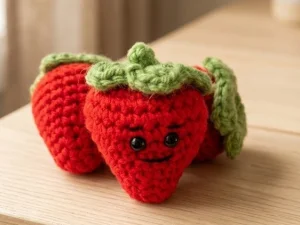
Stanley the Strawberry Amigurumi Pattern crochet pattern - detailed view

This sweet little berry makes a wonderful addition to a play food set for kids or a charming handmade gift for a teacher's desk. He's so quick to finish, you'll want to make a whole basketful of them!

Why You'll Love This Stanley the Strawberry Amigurumi Pattern

I honestly love how satisfying it is to see this little guy take shape so quickly. Thereโ€™s something so rewarding about finishing a project in one sitting, and the way the leaves are worked directly onto the body means less sewing for usโ€”which is always a huge win in my book!

Stanley the Strawberry Amigurumi Pattern step 1 Stanley the Strawberry Amigurumi Pattern step 2 Stanley the Strawberry Amigurumi Pattern step 3 Stanley the Strawberry Amigurumi Pattern step 4

Switch Things Up

I remember the first time I tried making play food for my nieceโ€”it was a total disaster because I chose a pattern that was way too complicated for a quick gift. That's why I love Stanley so much. He's straightforward, adorable, and actually looks like a strawberry!

One tip I've picked up over the years is to use a slightly smaller hook than the yarn label suggests. For this worsted weight yarn, the G hook is perfect because it keeps the stitches tight enough that the white stuffing stays hidden. If you find your stitches are still a bit loose, try 'yarning under' instead of 'yarning over' for your single crochets; it creates a tighter, more 'X' shaped stitch that is perfect for toys.

You can also get creative with the 'seeds.' While this pattern is cute and clean, sometimes I like to take a bit of yellow or white yarn and add tiny straight stitches all over the red body to look like real strawberry seeds. It adds such a nice texture! Whether you keep him simple or add extra details, Stanley is bound to be a hit.

Common Mistakes & How to Fix Them

โœ— If you forget to stuff the berry before finishing Round 13, it will be very difficult to get a smooth, rounded shape through the tiny remaining hole.โœ— Placing the safety eyes too high or too low can change Stanley's expression; make sure they are exactly between Rounds 8 and 9 to keep him looking cute.โœ— When working the leaf round, forgetting to turn your work after the chain 1 will result in the leaves facing the wrong direction and curling inward.โœ— If you pull the closing tail too tightly without weaving it through the back loops first, the top of the strawberry might bunch up unevenly instead of closing flat.
Stanley the Strawberry Amigurumi Pattern

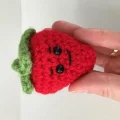
Meet your new favorite pocket-sized pal! This little strawberry is such a joy to whip up, whether you're looking for a quick gift or some cute kitchen decor. You'll love how the shaping comes together to create that classic berry look. Itโ€™s the perfect project for using up those colorful yarn scraps youโ€™ve been saving, and he's small enough to take your crafting on the go.

Beginner Friendly 2-3 Hours

Materials Needed for Stanley the Strawberry Amigurumi Pattern

โ€” Main Fabric

  • 01
    Worsted weight yarn in a vibrant red for the main berry body
  • 02
    A small amount of green worsted weight yarn for the leafy top and stem
  • 03
    A bit of black embroidery thread or thin yarn for the facial details

โ€” Tools Required

  • 01
    4.0mm or 4.25mm (G) crochet hook
  • 02
    A pair of 6mm safety eyes for a classic amigurumi look
  • 03
    Tapestry needle for weaving in ends and assembly
  • 04
    Stitch marker to keep track of your continuous rounds
  • 05
    Measuring tape to check your berry's size
  • 06
    Polyester fiberfill or your preferred stuffing material
  • 07
    Sharp scissors for trimming yarn

Progress Tracker

0% Complete

โ€” 1. The Berry Body :

Round 1 :

Start with your red yarn and make a magic ring, then work 6 sc into the center. (6)

Round 2 :

Work 2 sc followed by a sc inc, then repeat this sequence all the way around. (8)

Round 3 :

Crochet 3 sc then work a sc inc in the next stitch; repeat this pattern around. (10)

Round 4 :

Work 4 sc and then a sc inc in the next stitch, repeating this for the whole round. (12)

Round 5 :

Make 3 sc then a sc inc in the following stitch; repeat this sequence around. (15)

Round 6 :

Crochet 4 sc followed by a sc inc, repeating this pattern all the way around. (18)

Round 7 :

Work 5 sc then a sc inc in the next stitch; repeat this for the entire round. (21)

Round 8 :

Make 6 sc followed by a sc inc, then repeat this sequence around. (24)

Info :

Position your 6mm safety eyes between Rounds 8 and 9, making sure they sit about 1 stitch apart. If you prefer, you can embroider the eyes later instead.

Round 9 :

Crochet 7 sc then a sc inc in the next stitch; repeat this pattern around. (27)

Round 10 :

Work 8 sc followed by a sc inc, repeating this all the way around the berry. (30)

Round 11 :

Simply work 1 sc into every stitch around the round. (30)

Round 12 :

Work 15 inv dec around the circle. Cut your red yarn, leaving a long tail, and switch to your green yarn. (15)

Round 13 :

Work a sequence of 1 sc followed by an inv dec all the way around, then sl st to the first stitch to join. (10)

Round 14 :

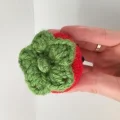
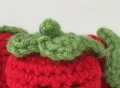
Ch 1 and turn your work. Working only in the flo, work 1 sc, then in the next stitch work [2 dc, ch 2, 2 dc]. Repeat this sequence around to create 5 leaves. (5 sc, 5 leaves)

Info :

Fasten off and weave in your ends. Use a tapestry needle to thread the yarn tail through the blo of Round 14, pulling tight to close the top of the strawberry.

โ€” 2. Facial Details :

Info :

Using black embroidery thread or thin yarn, stitch a small mouth just below the eyes to give your strawberry a friendly face.

โ€” 3. The Green Stem :

Row 1 :

Using your green yarn, ch 7 (or more if you'd like a longer stem). Fasten off and sew it as a loop to the center top of the berry.

Assembly Instructions

  • Before closing the top, secure the 6mm safety eyes between Rounds 8 and 9, leaving about one stitch of space between them.
  • Using your black thread, embroider a small, happy smile centered just underneath the eyes.
  • Once the body is stuffed and the leaves are finished, use a tapestry needle to weave the green tail through the back loops of Round 14 to pull the opening shut.
  • Create the stem by chaining 7 in green, then fasten it off and sew both ends to the very center of the leafy top to form a small loop.
  • Hide any remaining yarn tails by weaving them deeply into the center of the strawberry and clipping the excess.

Important Notes

  • ๐Ÿ’กThis pattern is worked in a continuous spiral, so don't join your rounds unless the instructions specifically tell you to.
  • ๐Ÿ’กKeep your stitches fairly tight to ensure the stuffing doesn't peek through the red yarn.
  • ๐Ÿ’กI recommend stuffing the berry firmly as you go to maintain that plump, juicy strawberry silhouette.
  • ๐Ÿ’กIf you're making this for a small child, consider embroidering the eyes with black yarn instead of using plastic safety eyes.
  • ๐Ÿ’กThe leaf round is worked in the front loops only, which leaves the back loops available for a clean closure at the end.

I hope you have as much fun making Stanley as I did! He's such a cheerful little project that brings a pop of color to any space. Don't be afraid to experiment with different shades of red or even pink for a variety of berries. Once you finish your first one, you'll see how addictive they are to make. Happy hooking, and I can't wait to see your finished berries scattered around your craft room! ๐Ÿงถ๐Ÿ“โœจ

You ask,

we answer.

FAQs

Can I use a different yarn weight for this strawberry?

Absolutely! Using a bulkier yarn with a larger hook will give you a giant plushie berry, while crochet thread will make a tiny charm. Just remember to adjust your eye size accordingly.

How do I make the leaves look more pointed?

When working the leaf round, make sure your chain 2 between the double crochets is snug; this helps create that sharp 'point' at the tip of each leaf.

My strawberry looks a bit lumpy, what happened?

Amigurumi often looks lumpy if the stuffing isn't distributed evenly. Use the back of your crochet hook to push the fiberfill into the edges as you work.

What if I don't have 6mm eyes?

No problem at all! You can easily embroider two small French knots or simple vertical bars with black yarn to give Stanley a sweet, sleepy expression instead.