🧶 Beautiful ✨ Detailed 💝 Adorable

Succulent Potted Plant Car Amigurumi Pattern

Succulent Potted Plant Car Amigurumi Pattern
4.4★Rating
3-5 HoursTime Needed
3.8KMade This
✂️

Intermediate Level

Ideal for those with basic crocheting experience, featuring slightly more advanced stitches and techniques to expand your skills.

⏱️

Quick Craft

Fits nicely into a free afternoon — 2 to 5 hours of focused, enjoyable crocheting.

🏡

Cozy Accent

A warm touch for your space that transforms ordinary corners into inviting nooks filled with handmade charm.

About This Succulent Potted Plant Car Amigurumi Pattern
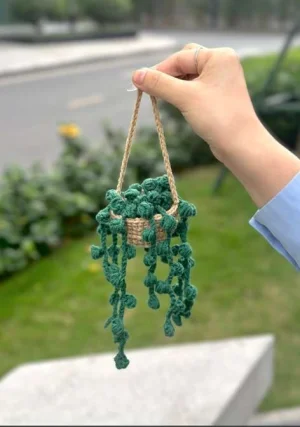
Succulent Potted Plant Car Amigurumi Pattern crochet pattern - detailed view

Makes a genuinely thoughtful handmade gift — it's small enough to finish in one sitting yet detailed enough to impress anyone who receives it. Perfect for plant lovers and crochet friends alike.

Why You'll Love This Succulent Potted Plant Car Amigurumi Pattern

I fell hard for this one the moment I tried the puff stitch succulent strands — they're so tactile and fun to work up, and watching those little bumpy vines grow is genuinely addictive. I also love how the two-color construction means you can swap in any green you have sitting in your stash and it'll still look gorgeous. It's the kind of small project I come back to whenever I need a win.

Succulent Potted Plant Car Amigurumi Pattern step 1 Succulent Potted Plant Car Amigurumi Pattern step 2 Succulent Potted Plant Car Amigurumi Pattern step 3 Succulent Potted Plant Car Amigurumi Pattern step 4

Switch Things Up

I have a real weakness for crochet projects that look like they belong in an aesthetic little shop but are secretly fast and fun to make — and this succulent planter hits that spot perfectly.

The first time I worked the puff stitch succulent strands I was genuinely surprised by how quickly they grew. Chain, puff, slip stitch, repeat — there's a meditative quality to it once your hands know the rhythm. I made my first batch of seven strands while watching a film and barely noticed the time passing. That's my kind of project.

One thing I'd tell anyone making this for the first time: don't underestimate how much cotton filling you need in the pot. I stuffed mine, thought it looked okay, sewed the base in — and then it went a bit soft and sad-looking after a day. The second time around I packed it firmly, almost more than felt comfortable, and the finished basket held its shape beautifully. Trust the stuffing.

I've also played around with color on this one. The original pine green and beige combination is lovely and very true-to-life, but I made a version in dusty sage green with a terracotta-orange pot yarn and honestly? It looked incredible. A pale lavender yarn for the strands with a cream pot gives off serious boho vibes too. Because you're only using small amounts of each color, this is a brilliant stash-buster — dig out whatever greens are lurking in your yarn basket and go wild.

As a car charm it's particularly charming (pun fully intended) because the puff stitch leaves catch the light as they sway. If you're making it as a gift, it's one of those things people pick up and immediately start examining — the texture is just irresistible.

Common Mistakes & How to Fix Them

✗ When crocheting the pot, it's easy to forget the ch-1 at the start of each row and the sl st at the end — skipping either one causes the sides to curl inward instead of forming a clean upright basket shape.✗ The magic ring on the Circle Base tends to loosen after you've worked a few rounds of hdc — pull the tail firmly before joining and weave it in securely so the center doesn't open up after stuffing.✗ With the succulent strands, placing the puff stitch into the wrong chain position shifts the leaf spacing and makes the strand look uneven — count carefully to land the ps exactly in the 3rd chain from the hook every time.✗ It's tempting to rush assembly and sew the circle base onto the outside bottom of the pot, but it needs to go inside — if placed on the exterior, the stuffing won't sit properly and the pot loses its shape.✗ When attaching the succulent ropes at the center of the pot, bunching them all at one point instead of spreading them slightly across the middle opening means they'll splay unevenly and some strands will flip to one side.✗ The hanging rope chain of 60 is easy to attach to just one side if you're not paying attention — it needs to be anchored at two opposite sides of the pot rim so the planter hangs level and doesn't tilt.
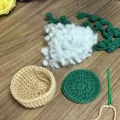
Succulent Potted Plant Car Amigurumi Pattern

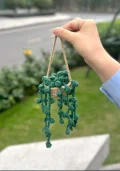
This little hanging succulent planter is honestly one of those projects that looks way more impressive than the time it takes. You're working with super fine yarn and a small hook to build a teeny beige basket, a green circle base, and a bunch of trailing succulent strands — and when it all comes together, it's the most charming car charm or desk decoration you've ever made. The puff stitch succulents are surprisingly satisfying once you get into a rhythm. If you've been wanting a crochet project that feels fresh and a little different, this is your moment.

Intermediate 3-5 Hours

Materials Needed for Succulent Potted Plant Car Amigurumi Pattern

— Main Fabric

  • 01
    Super fine weight yarn (approximately 50g / 1.8 oz) in beige-brown for crocheting the pot
  • 02
    Super fine weight yarn in pine green for the circle base and all succulent strands

— Tools Required

  • 01
    Crochet hook sized 2.5mm to 3.0mm
  • 02
    Stitch marker to track round beginnings
  • 03
    Sewing needle for assembly and weaving in ends
  • 04
    Scissors
  • 05
    Cotton stuffing / fiberfill for filling the pot

Progress Tracker

0% Complete

— 1. Pot (Beige-Brown) :

Info :

At the beginning of every row, ch 1. At the end of every row, join with a sl st. Use beige-brown yarn throughout this section.

Row 1 :

Start with a MR, ch 1, work 10 sc into the ring. (10 sts)

Row 2 :

Ch 1, *1 sc, 1 inc* — repeat 5 times. (15 sts)

Row 3 :

Ch 1, *2 sc, 1 inc* — repeat 5 times. (20 sts)

Row 4 :

Ch 1, *3 sc, 1 inc* — repeat 5 times. (25 sts)

Row 5 :

Ch 1, *4 sc, 1 inc* — repeat 5 times. (30 sts)

Row 6 :

Ch 1, *5 sc, 1 inc* — repeat 5 times. (35 sts)

Row 7 :

Ch 1, 35 sc around. (35 sts)

Row 8 :

Ch 1, 35 sc around. (35 sts)

Row 9 :

Ch 1, 35 sc around. (35 sts)

Row 10 :

Ch 1, 35 sc around. (35 sts)

— 2. Circle Base (Pine Green) :

Info :

Work in pine green yarn. Ch 1 at the start of each row and join with sl st at the end of each row, same as the pot.

Row 1 :

Start with a MR, ch 1, work 10 hdc into the ring. (10 sts)

Row 2 :

Work 1 inc (hdc) into each st around — 10 hdc inc total. (20 sts)

Row 3 :

Ch 1, *1 hdc, 1 inc* — repeat 10 times. (30 sts)

Row 4 :

Ch 1, *5 sc, 1 inc* — repeat 5 times. (35 sts)

— 3. Succulent Strands (Pine Green) — Make 7 to 9 :

Info :

Each succulent strand is worked the same way. Make between 7 and 9 total. Use pine green yarn. The strands are not joined in rounds — they are worked as free chains with puff stitch leaves attached.

Strand Start :

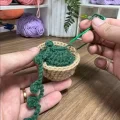
Ch 4, work 1 ps into the 3rd ch from the hook, then 1 sl st into the next ch. This creates the first leaf at the base of the strand.

Strand Continue :

Ch 8, work 1 ps into the 3rd ch from the hook, then 1 sl st into the next ch. Repeat this step — ch 8, 1 ps in 3rd ch, 1 sl st — continuing up the strand until you reach your desired length.

— 4. Hanging Rope :

Info :

Use beige-brown yarn to match the pot. The rope is attached directly to the sides of the finished pot.

Hanging Rope :

Attach yarn to one side of the pot rim and ch 60, then secure the end to the opposite side of the pot rim to form the hanging loop.

Assembly Instructions

  • With your sewing needle and matching yarn, place the green Circle Base inside the pot so it sits flush against the interior bottom — don't attach it to the outside.
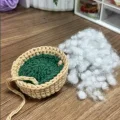
  • Before closing the base fully, stuff the pot with a good amount of cotton filling so the walls hold their shape and the basket looks full and rounded.
  • Sew the Circle Base securely to the inner bottom of the pot, stitching all the way around the edge so it stays in place under the stuffing.
  • Gather all 7–9 completed succulent strands and arrange them evenly. Sew each strand onto the center of the pot's open top, spreading their bases slightly so they fan out naturally rather than all clumping in one spot.
  • Once all succulent strands are attached and the arrangement looks balanced, attach the hanging rope: secure one end of the 60-ch rope to one side of the pot rim, then anchor the other end directly opposite so the planter hangs level.

Important Notes

  • 💡The pattern labels rows as 'rounds' interchangeably — just know that each row is joined at the end with a sl st and started with a ch 1, so you're working in flat joined rounds rather than a continuous spiral.
  • 💡Your puff stitches are the star of the succulent strands — make sure you're pulling each loop up to a consistent height before finishing the stitch, otherwise some leaves will look flat compared to others.
  • 💡Super fine yarn at a 2.5–3.0mm hook will give you a firm, tight fabric that holds its basket shape well. If your tension is loose, go down to a 2.5mm hook so the pot doesn't go floppy.
  • 💡For Row 2 of the Circle Base, no ch 1 or sl st join is mentioned in the source — this row appears to be worked without a turning chain. Verify your stitch count of 20 after completing it before moving on.
  • 💡The number of succulent strands is flexible — 7 gives a lighter, airier look while 9 fills the pot more densely. Make a few extras before assembly so you can choose what looks best.
  • 💡Weave in your yarn tails on the succulent strands very securely — these little puff-stitch pieces get handled a lot as car charms and loose ends will unravel quickly with movement.

There's something genuinely joyful about finishing this tiny hanging planter — you've got this perfect miniature world, a beige basket overflowing with bouncy green puff-stitch vines, all ready to hang wherever makes you smile. 🌿 Whether it ends up swaying in your car, decorating a shelf, or gifted to someone who'd never expect a handmade succulent, it's the kind of small project that carries a lot of heart. You made something beautiful — enjoy every moment of it! 🧶✨

You ask,

we answer.

FAQs

Can I use a heavier yarn weight for this pattern?

You can, but the pattern was designed for super fine yarn with a 2.5–3.0mm hook. Using DK or worsted will roughly double the finished size, so the pot will look more like a decorative bowl than a tiny planter. The puff stitches on the succulent strands will also be much chunkier and may lose their leaf-like definition.

How long should each succulent strand be?

That's totally up to you — the pattern says to repeat the ch-8 puff stitch step 'until the length you want.' For a car charm, shorter strands around 3–5 leaf repeats look tidy. For a hanging wall piece, longer strands with 6–8 repeats create a more dramatic trailing effect.

Do I need to stuff the succulent strands too?

No — only the pot gets stuffed with cotton filling. The succulent strands are left unstuffed and hang freely. Their structure comes entirely from the puff stitches worked into the chains.

The stitch count at the end of Circle Base Row 2 seems off — is there a ch 1 or not?

The source pattern doesn't explicitly mention a ch 1 or sl st join for Row 2 of the Circle Base, unlike every other row. Work 1 hdc increase into each of the 10 sts from Row 1 to reach 20 sts, then check your count. If it's 20, you're good — add the sl st join to close before moving to Row 3.

What's the best way to attach the hanging rope so the pot doesn't tilt?

The key is securing both ends of the 60-chain rope at directly opposite points on the pot rim — measure across to find the true opposite side rather than eyeballing it. Sew each end through several stitches of the rim and knot it firmly. Lopsided attachment is the main reason the finished piece hangs crooked.