🧶 Beautiful ✨ Detailed 💝 Adorable

Teardrop Bunny Amigurumi Pattern

Teardrop Bunny Amigurumi Pattern
4.6★Rating
3-5 HoursTime Needed
3.8KMade This
✂️

Intermediate Level

Ideal for those with basic crocheting experience, featuring slightly more advanced stitches and techniques to expand your skills.

⏱️

Quick Craft

Fits nicely into a free afternoon — 2 to 5 hours of focused, enjoyable crocheting.

🐰

Whimsical Buddy

Playful characters full of personality, designed to spark imagination and become cherished playtime favorites.

About This Teardrop Bunny Amigurumi Pattern

Teardrop Bunny Amigurumi Pattern crochet pattern - detailed view

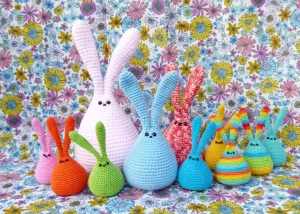
These bunnies look wonderful perched on a nursery shelf or tucked into an Easter basket. Because they stand up on their own, they make excellent decor pieces for any craft room or bedroom.

Why You'll Love This Teardrop Bunny Amigurumi Pattern

I honestly can't get enough of the no-sew aspect of the head and body connection. Joining the ears and working straight down feels like magic! Plus, adding the wire makes the ears so expressive—you can bend one down for a curious look or keep them both straight up. It's just a fun, tactile project that finishes faster than you'd expect.

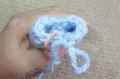
Teardrop Bunny Amigurumi Pattern step 1 Teardrop Bunny Amigurumi Pattern step 2 Teardrop Bunny Amigurumi Pattern step 3 Teardrop Bunny Amigurumi Pattern step 4

Switch Things Up

I remember the first time I tried a pattern that started from the ears down—it felt so counter-intuitive! But honestly, once you get the hang of joining those two small circles to start the body, it’s one of the most satisfying techniques in amigurumi. There’s no fiddly neck sewing, which is always a win in my book.

I’ve made a few of these in different textures. My favorite so far was a fuzzy mohair-blend version that looked like a little cloud. If you’re feeling adventurous, try changing colors every few rounds on the body to create a striped 'sweater' look. It’s a great way to use up those scrap ends of chunky yarn we all have hiding in our stash.

One little tip from my craft room: when you’re embroidering the 'X' for the mouth, try not to pull the yarn too tight. You want it to sit right on top of the stitches so it stays visible against the chunky texture. It’s that tiny detail that really brings the whole character to life and gives it that inquisitive look!

Common Mistakes & How to Fix Them

✗ When joining the ears in Body Round 1, make sure both ears are facing the same direction; otherwise, your bunny might look a bit twisted.✗ If you don't fold the ends of the wire over before inserting them, they might poke through the stitches over time, which can be a safety hazard.✗ The eye placement in the original instructions is a bit confusing—aim to place them about 3 or 4 rounds below where the ears join for the best look.✗ Don't forget to stuff the body very firmly before sewing the bottom plate on, or the bunny will lose its iconic teardrop shape and sag.

Teardrop Bunny Amigurumi Pattern

You're going to love how quickly these little bunnies come together! Their unique teardrop shape makes them so squishy and perfect for little hands to hold. I've designed this to be a relaxing project where you can play with different yarn weights to get a whole family of bunnies. Whether you're making a soft blue one like mine or a rainbow version, they always turn out so charming and full of personality.

Intermediate 3-5 Hours

Materials Needed for Teardrop Bunny Amigurumi Pattern

— Main Fabric

  • 01
    Approximately 65g of Stylecraft Special Chunky yarn in Cloud Blue
  • 02
    Small amount of Black DK weight yarn for facial details

— Tools Required

  • 01
    4.00 mm (G/6) crochet hook
  • 02
    Pair of 9 mm safety eyes
  • 03
    12-inch piece of 18-gauge iron wire
  • 04
    Tapestry needle for assembly
  • 05
    About 60g of polyester fiberfill
  • 06
    Stitch markers

Progress Tracker

0% Complete

— 1. Ears (Make 2) :

Round 1 :

Start with a MR and work 6 sc into it (6)

Round 2 :

(1 sc, inc) repeat 3 times around (9)

Round 3 :

(inc, 2 sc) repeat 3 times around (12)

Round 4-10 :

Work 1 sc in every stitch around (12)

Round 11 :

sc2tog, then sc in the remaining 10 stitches (11)

Round 12 :

Work 1 sc in every stitch around (11)

Round 13 :

sc in next 5 stitches, sc2tog, sc in next 4 stitches (10)

Round 14 :

Work 1 sc in every stitch around (10)

Round 15 :

sc2tog, then sc in the remaining 8 stitches (9)

Round 16 :

Work 1 sc in every stitch around (9)

Round 17 :

sc in next 4 stitches, sc2tog, sc in next 3 stitches (8)

Round 18 :

Work 1 sc in every stitch around (8)

Round 19 :

sc2tog, then sc in the remaining 6 stitches (7)

Round 20 :

Work 1 sc in every stitch around (7)

Round 21 :

sc in next 3 stitches, sc2tog, sc in next 2 stitches (6)

Round 22-23 :

Work 1 sc in every stitch around (6)

Round 24 :

Work 1 sc in every stitch around (6)

Info :

For the first ear: sl st into the first stitch and fasten off. For the second ear: do not fasten off or slip stitch; you will continue directly into the body.

— 2. Body :

Info :

We will now join the ears. The working yarn should still be attached to the second ear.

Round 1 :

Insert hook into a stitch on Round 24 of the first ear and sc. Work 5 more sc around the first ear, then work 6 sc around the second ear (12)

Round 2 :

(1 sc, inc) repeat around (18)

Round 3 :

Work 1 sc in every stitch around (18)

Round 4 :

(inc, 2 sc) repeat around (24)

Round 5 :

Work 1 sc in every stitch around (24)

Round 6 :

(3 sc, inc) repeat around (30)

Round 7 :

Work 1 sc in every stitch around (30)

Round 8 :

2 sc, inc, (4 sc, inc) repeat 5 times, then 2 sc (36)

Round 9 :

Work 1 sc in every stitch around (36)

Round 10 :

(5 sc, inc) repeat around (42)

Round 11 :

Work 1 sc in every stitch around (42)

Round 12 :

3 sc, inc, (6 sc, inc) repeat 5 times, then 3 sc (48)

Round 13 :

Work 1 sc in every stitch around (48)

Round 14 :

(7 sc, inc) repeat around (54)

Round 15 :

Work 1 sc in every stitch around (54)

Round 16 :

4 sc, inc, (8 sc, inc) repeat 5 times, then 4 sc (60)

Round 17-22 :

Work 1 sc in every stitch around (60)

Round 23 :

4 sc, sc2tog, (8 sc, sc2tog) repeat 5 times, then 4 sc (54)

Round 24 :

(7 sc, sc2tog) repeat around (48)

Round 25 :

3 sc, sc2tog, (6 sc, sc2tog) repeat 5 times, then 3 sc (42)

Round 26 :

(5 sc, sc2tog) repeat around (36)

Round 27 :

2 sc, sc2tog, (4 sc, sc2tog) repeat 5 times, then 2 sc. sl st into the first stitch and fasten off (30)

— 3. Bottom Base :

Round 1 :

Start with a MR and work 6 sc into it (6)

Round 2 :

Work 2 sc in every stitch around (12)

Round 3 :

(1 sc, inc) repeat around (18)

Round 4 :

(inc, 2 sc) repeat around (24)

Round 5 :

(3 sc, inc) repeat around, sl st to first st and fasten off, leaving a long tail for sewing (30)

Assembly Instructions

  • Bend your iron wire in half and fold the sharp ends inward to match the height of the ears.
  • Slide the folded wire into the ears to give them structure and allow for posing later.
  • Fix the 9mm safety eyes into place, positioning them roughly between Rounds 3 and 4 of the body with a 3-stitch gap between them.
  • Pack the body with polyester fiberfill, making sure it's firm enough to hold the teardrop shape without stretching the stitches.
  • Line up the 30 stitches of the bottom circle with the 30 stitches of the body's final round.
  • Using the long yarn tail, whipstitch the bottom piece to the body to seal the bunny.
  • Take your black DK yarn and stitch a small 'X' shape right between the eyes to create the mouth.

Important Notes

  • 💡Always use a stitch marker at the start of your rounds since we are working in a continuous spiral.
  • 💡When using wire, ensure the ends are tucked safely inside the stuffing so they don't poke through.
  • 💡If you want a larger or smaller bunny, you can easily swap the yarn weight and hook size; just keep your tension consistent.
  • 💡Stuff the very top of the body (near the ear join) carefully to ensure the neck area stays stable.
  • 💡The eye placement in the original pattern counts from the very first round of the ears; if counting from the body start, place them between Rounds 3 and 4.

There’s something so peaceful about watching this little bunny take shape as you work your way down from those long ears. It’s the perfect project for a rainy afternoon or a long car ride. Once you finish one, you’ll probably find yourself wanting to make a whole rainbow of them! I hope this pattern brings a bit of handmade joy to your day and that your new bunny finds a very happy home. Don't forget to give those ears a little jaunty bend once you're done! Happy stitching! 🧶✨

You ask,

we answer.

FAQs

What's the best way to make the ears stand up straight?

The 18-gauge wire is key! Make sure you fold it into a 'U' shape and push it all the way to the tips of the ears. If you're making this for a very small child, you might want to skip the wire and just stuff the ears lightly instead.

Can I use safety eyes if I'm giving this to a baby?

For babies, it's much safer to embroider the eyes using black yarn. Safety eyes can eventually work loose, so a few French knots or small satin-stitched circles are a better choice for the little ones.

My bunny won't stand up straight, what did I do wrong?

It usually comes down to stuffing! Make sure the bottom area is packed very firmly and that the bottom crochet circle is flat. If the base is rounded like a ball, it will tip over.

Do I have to use Chunky yarn?

Not at all! You can use DK yarn with a 3mm hook for a tiny version, or even hold multiple strands together for a giant plushie. Just make sure your hook size matches your yarn so the stuffing doesn't peek through.