About This Timothy the Snowman Amigurumi Pattern
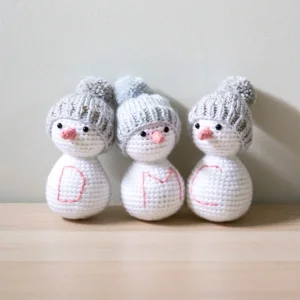
This snowman makes a beautiful handmade gift — thoughtful enough for someone special, especially when you customize it with their initial for a truly personal holiday keepsake.
Ideal for those with basic crocheting experience, featuring slightly more advanced stitches and techniques to expand your skills.
Fits nicely into a free afternoon — 2 to 5 hours of focused, enjoyable crocheting.
Playful characters full of personality, designed to spark imagination and become cherished playtime favorites.
This snowman makes a beautiful handmade gift — thoughtful enough for someone special, especially when you customize it with their initial for a truly personal holiday keepsake.
I honestly adore the mixed-media feel of this project! Combining crochet with a bit of knitting for the hat gives it such a high-end look that you just don't get with single-technique toys. Plus, the addition of metallic thread makes the whole piece twinkle under the Christmas lights.
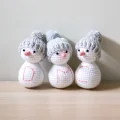
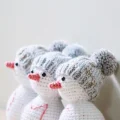
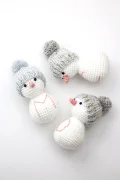
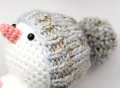
There’s something so nostalgic about making a snowman, isn't there? I remember being a kid and rushing outside at the first sign of a snowflake, but these little guys are much better because they won't melt all over the entryway! I really wanted to create something that felt a bit more 'high-end' than your average amigurumi, which is why I decided to mix in a bit of knitting for the hats. The texture of the ribbed knit against the clean crochet stitches of the body just looks so cozy.
If you aren't much of a knitter, don't sweat it—you can always sub in a simple crochet beanie, but I promise the DPNs aren't as scary as they look! My favorite part is the metallic thread. Adding that tiny bit of sparkle makes these feel like something you’d find in a boutique. I ended up making a whole 'family' of them with different initials for my nieces and nephews. They make the sweetest personalized stocking stuffers or even just a cute addition to your tiered tray decor this season. Just be sure to stuff the neck area really well so the head stays upright under the weight of that pom-pom!
Get ready to bring a little winter magic into your home with this darling snowman friend. You'll love how the clean crochet lines of the body contrast with the cozy, textured knit of the hat. It's the perfect project for a chilly evening when you want to create something truly special and personalized. Whether he's sitting on your mantle or tucked into a stocking, Timothy is sure to melt hearts without ever melting away!
Using your white yarn and the 3.5mm hook, we will work in continuous rounds. Don't join or turn; just keep spiraling and use a marker to find your start.
Start off with 6 sc inside a MR (6)
Work 2 sc into every st around (12)
Repeat (1 sc, then 1 inc) a total of 6 times (18)
Repeat (2 sc, then 1 inc) a total of 6 times (24)
Repeat (3 sc, then 1 inc) a total of 6 times (30)
Repeat (4 sc, then 1 inc) a total of 6 times (36)
Work 1 sc into every st around (36)
Repeat (4 sc, then 1 dec) a total of 6 times (30)
Repeat (3 sc, then 1 dec) a total of 6 times (24)
Set your 6mm safety eyes between rounds 8 and 9, leaving a space of 4 stitches between them.
Repeat (2 sc, then 1 dec) a total of 6 times (18)
Repeat (1 sc, then 1 dec) a total of 6 times (12)
Work 2 sc into every st around to begin the body (24)
Work 1 sc into every st around (24)
Repeat (3 sc, then 1 inc) a total of 6 times (30)
Pause here to stuff the head firmly before the opening gets too small.
Work 1 sc into every st around (30)
Repeat (4 sc, then 1 inc) a total of 6 times (36)
Work 1 sc into every st around (36)
Repeat (5 sc, then 1 inc) a total of 6 times (42)
Work 1 sc into every st around (42)
Repeat (5 sc, then 1 dec) a total of 6 times (36)
Repeat (4 sc, then 1 dec) a total of 6 times (30)
Begin stuffing the body section now, making sure it's nice and round.
Repeat (3 sc, then 1 dec) a total of 6 times (24)
Repeat (2 sc, then 1 dec) a total of 6 times (18)
Repeat (1 sc, then 1 dec) a total of 6 times (12)
Work 6 dec around (6)
F/O and leave a tail. Use your needle to weave through the final 6 stitches, pull tight to close the gap, and hide the end inside.
Using peach or pink yarn, create 4 sc into a MR (4)
Work 1 inc, then 1 sc in the next 3 st (5)
Work 1 inc, then 1 sc in the next 4 st (6)
Work 1 sc into every st around (6)
Finish with a sl st in the next st. F/O and leave a long tail for sewing.
Use the 3.75mm DPNs and hold your grey yarn together with the metallic thread for a sparkly effect.
Cast on 36 st and divide them evenly across your needles. Join to work in the round, being careful not to twist.
Work (k1, p1) ribbing for a total of 5 rounds.
Work 7 rounds of plain k st.
Repeat (k4, k2tog) all the way around (30)
Work a full round of k st (30)
Repeat (k3, k2tog) all the way around (24)
Work a full round of k st (24)
Repeat (k2, k2tog) all the way around (18)
Repeat (k1, k2tog) all the way around (12)
Work k2tog all the way around (6)
Cut the yarn and thread the tail through the remaining stitches. Pull tight to close. Make a small pom-pom and attach it firmly to the peak.
I hope you had as much fun making Timothy as I did! There’s just something so rewarding about seeing that little face come together, especially when you add the finishing touch of the sparkly hat. If you made a whole family of snowmen, I’d love to see them grouped together! They look so sweet as a centerpiece or hanging out on a bookshelf. Thank you for crafting along with me today, and I can't wait to see your personalized creations. Happy crocheting and stay cozy! 🧶 ✨
Absolutely! You can use sport or worsted weight, just remember to adjust your hook size to match so the stitches stay tight enough to hold the stuffing.
The pattern includes a knitted hat for that lovely texture, but you could easily swap it for a basic crochet beanie if you aren't comfortable with knitting needles.
I held a strand of metallic embroidery thread together with the grey yarn while knitting to give it that subtle, high-end boutique twinkle.
After your last round of decreases, thread your yarn tail through the front loops only of the remaining six stitches and pull tight like a drawstring for a clean finish.
