About This Toby the Turtle Amigurumi Pattern
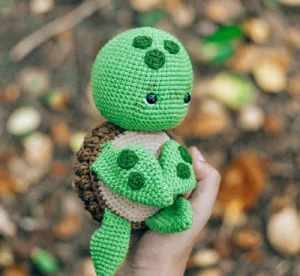
This sweet little sea creature makes a stunning addition to any nursery shelf, or a comforting companion for tiny hands to hold and cherish for years.
Ideal for those with basic crocheting experience, featuring slightly more advanced stitches and techniques to expand your skills.
Fits nicely into a free afternoon — 2 to 5 hours of focused, enjoyable crocheting.
Delightful animal designs with sweet details that capture the essence of your favorite woodland and farmyard friends.
This sweet little sea creature makes a stunning addition to any nursery shelf, or a comforting companion for tiny hands to hold and cherish for years.
I am completely obsessed with how the textured shell is worked in one piece with the flat underbelly—it is such a clever design that minimizes sewing! Plus, adding those tiny green spots to his forehead and flippers gives you total creative freedom to make his expression uniquely your own.

I still remember the first time I tried making a textured shell for an amigurumi. I was so nervous about the bobble stitches looking uneven, but once I got into the rhythm, it was pure magic! This little turtle has quickly become one of my absolute favorite designs to make when I need a relaxing weekend project. The way the tiny spots gather on the head and flippers gives him so much character, and that sweet, gentle expression gets me every single time.
If you want to customize your new friend, try playing with the color palette! While I love the classic forest greens and warm browns, a soft pastel version using mint and lavender looks absolutely dreamy for a modern nursery. You can also skip the felt-pen freckles and embroider tiny French knots instead if you prefer an all-yarn finish. Whatever colors you choose, just take your time with the eye-shaping step—it is the secret key to unlocking that signature sweet, soulful look.
Meet your next favorite crochet project! This sweet little turtle is packed with gorgeous textures, from his bumpy, bobbled shell to the darling spots scattered across his head and flippers. You will absolutely love watching his gentle personality come together stitch by stitch as you create a handmade companion that is truly heirloom-quality.
Using green yarn and a 2.0 mm hook, make 6 sc in mr (6)
Work 1 inc in each of the next 6 stitches (12)
Repeat (1 sc, 1 inc) 6 times (18)
Repeat (2 sc, 1 inc) 6 times (24)
Repeat (3 sc, 1 inc) 6 times (30)
Repeat (4 sc, 1 inc) 6 times (36)
Repeat (5 sc, 1 inc) 6 times (42)
Repeat (6 sc, 1 inc) 6 times (48)
Repeat (7 sc, 1 inc) 6 times (54)
Work 54 sc around (54)
Work 54 sc around (54)
Repeat (8 sc, 1 inc) 6 times (60)
Work 60 sc around (60)
Work 60 sc around (60)
Work 60 sc around (60)
Work 60 sc around (60)
Work 60 sc around (60)
Work 60 sc around (60)
Work 60 sc around (60)
Work 60 sc around (60)
Work 10 sc, inc 3 times, 7 sc, inc 3 times, then finish with 37 sc (66)
Work 66 sc around (66)
Work 66 sc around (66)
Repeat (9 sc, 1 dec) 6 times (60)
Repeat (8 sc, 1 dec) 6 times (54)
Repeat (7 sc, 1 dec) 6 times (48)
Repeat (6 sc, 1 dec) 6 times (42)
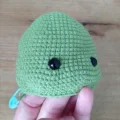
Position the safety eyes between Rounds 19 and 20, leaving a space of 8 stitches between them. Align the first eye directly over the second increase from Round 21, and the second eye directly over the fifth increase from Round 21.
Repeat (5 sc, 1 dec) 6 times (36)
Begin adding fiberfill stuffing to the head, shaping it firmly as you fill.
Repeat (4 sc, 1 dec) 6 times (30)
Repeat (3 sc, 1 dec) 6 times (24)
Repeat (2 sc, 1 dec) 6 times (18)
Finish stuffing the lower section of the head lightly so it retains a slightly soft base.
Repeat (1 sc, 1 dec) 6 times (12)
Cut your yarn, leaving a long tail for closing the opening after the face details are completed.
Using dark forest green yarn and a 2.0 mm hook, work 7 HDC into a mr, join with a sl st to the first stitch. Fasten off and leave a long tail for sewing. Make 3.
Using dark forest green yarn and a 2.0 mm hook, work 7 sc into a mr, join with a sl st to the first stitch. Fasten off and leave a long tail for sewing. Make 4.
Insert your green yarn through the bottom opening of the head to sculpt the eye sockets. Bring the needle out at the bottom inner corner of the right eye, insert it at the top inner corner, pull through to the left eye inner corner, insert at the top left corner, and bring it back out the neck opening. Pull both tails firmly to indent the eyes, knot securely, and hide the ends inside.
Using cream yarn, embroider a delicate white highlight curve along the outer lower edge of each safety eye.
Using a thin strand of brown yarn, embroider sweet, simple diagonal eyebrows two rounds above the eyes.
With your brown fabric pen, gently dab tiny freckles on the cheeks and between the eyes.
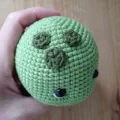
Sew one large spot to the center of the forehead between Rounds 8 and 12. Sew two small spots flanking it: one between Rounds 5 and 8, and the other between Rounds 6 and 9.
Thread your remaining head yarn tail onto a needle. Work dec 6 times through the front loops only of Round 32 to pull the neck opening closed. Weave in and secure the tail.
Using green yarn and a 2.0 mm hook, make 6 sc in mr (6)
Repeat (1 sc, 1 inc) 3 times (9)
Work 9 sc around (9)
Repeat (2 sc, 1 inc) 3 times (12)
Repeat (3 sc, 1 inc) 3 times (15)
Work 15 sc around (15)
Repeat (4 sc, 1 inc) 3 times (18)
Work 18 sc around (18)
Work 18 sc around (18)
Work 18 sc around (18)
Work 6 sc, decrease 3 times, then finish with 6 sc (15)
Work 4 sc, decrease 3 times, then finish with 5 sc (12)
Work 12 sc around (12)
Work 12 sc around (12)
Do not stuff. Fold the top opening flat and work 6 sc through both layers to close. Fasten off. Make 2.
Using green yarn and a 2.0 mm hook, make 6 sc in mr (6)
Repeat (1 sc, 1 inc) 3 times (9)
Work 9 sc around (9)
Repeat (2 sc, 1 inc) 3 times (12)
Work 12 sc around (12)
Work 3 sc, repeat (1 sc, 1 inc) 3 times, then finish with 3 sc (15)
Work 3 sc, repeat (2 sc, 1 inc) 3 times, then finish with 3 sc (18)
Work 3 sc, repeat (3 sc, 1 inc) 3 times, then finish with 3 sc (21)
Work 21 sc around (21)
Work 21 sc around (21)
Work 3 sc, repeat (4 sc, 1 inc) 3 times, then finish with 3 sc (24)
Work 24 sc around (24)
Work 24 sc around (24)
Work 24 sc around (24)
Work 6 sc, decrease 6 times, then finish with 6 sc (18)
Work 6 sc, decrease 3 times, then finish with 6 sc (15)
Sew one large spot near the top of each leg, and one small spot directly underneath it. Ensure the spots face outwards when positioned on the body.
Repeat (3 sc, 1 dec) 3 times (12)
Work 12 sc around (12)
Work 12 sc around (12)
Work 1 sc, then fold the top flat and work 6 sc through both layers to seal. Fasten off. Make 2.
Using brown yarn and a 3.0 mm hook, make 6 sc in mr (6)
Repeat (1 bo, 1 sc) 6 times (12)
Repeat (1 sc, 1 inc) 6 times (18)
Repeat (1 bo, 1 sc, work [1 bo, 1 sc] in the next stitch) 6 times (24)
Repeat (3 sc, 1 inc) 6 times (30)
Repeat (1 bo, 1 sc, 1 bo, 1 sc, work [1 bo, 1 sc] in the next stitch) 6 times (36)
Repeat (5 sc, 1 inc) 6 times (42)
Repeat (1 bo, 1 sc, 1 bo, 1 sc, 1 bo, 1 sc, work [1 bo, 1 sc] in the next stitch) 6 times (48)
Repeat (7 sc, 1 inc) 6 times (54)
Repeat (1 bo, 1 sc) 23 times, ch 7, skip 7 stitches, and starting in the 8th stitch, work 1 sc (54)
Switch to a 2.0 mm hook and join beige yarn. Do not cut the brown thread; simply leave it hanging at the front of your work for later.
Working in BLO, crochet 54 sc around with beige (54)
Work 54 sc around (54)
Work 54 sc around (54)
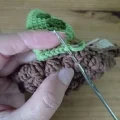
Pick back up the brown yarn at the front of the shell, using your 2.0 mm hook. We will now join all four legs directly to the shell edge.
Ch 1, work 3 sc along the shell. Place the first upper leg against the shell and work 6 sc through both the leg and shell layers. Work 6 sc along the shell. Place the first lower leg and work 6 sc through both layers. Work 3 sc along the shell. Place the second lower leg and work 6 sc through both layers. Work 6 sc along the shell. Place the second upper leg and work 6 sc through both layers. Finish with 3 sc, then sl st. Cut yarn and leave a long tail.
Return to the beige yarn on the inner lower shell to finish closing the underbelly.
Repeat (7 sc, 1 dec) 6 times (48)
Repeat (6 sc, 1 dec) 6 times (42)
Repeat (5 sc, 1 dec) 6 times (36)
Repeat (4 sc, 1 dec) 6 times (30)
Stuff the shell firmly with polyester fiberfill.
Repeat (3 sc, 1 dec) 6 times (24)
Repeat (2 sc, 1 dec) 6 times (18)
Repeat (1 sc, 1 dec) 6 times (12)
Work 6 decreases (6)
Cut the yarn, leaving a tail. Use a needle to thread through the front loops of the remaining 6 stitches to close the opening. Weave in the tail. If needed, add a small extra bit of stuffing through the neck opening on top to perfect the shell's shape.
And just like that, your beautiful little turtle is ready to explore the world! I hope you thoroughly enjoyed every loop, bobble, and stitch of this pattern. There is nothing quite like the feeling of creating a sweet, textured friend with your own two hands. Make sure to share your beautiful creations with our crafting family—I absolutely adore seeing your unique yarn choices and those sweet, hand-drawn freckles. Until our next creative adventure, happy crocheting, my lovely friends! 🧶🐢✨
Absolutely! Just keep in mind that using a heavier yarn like worsted or chunky weight will make your finished turtle significantly larger, and you will need to scale up your safety eye size and hook sizes accordingly.
When working the bobbles, use your finger to physically push the cluster of stitches toward the outside (the right side) of the shell before working the next single crochet. This locks them in place on the exterior.
This refers to yarn-under crochet stitches rather than yarn-over. Yarn-under creates slightly tighter, more compact 'X' shaped stitches which help keep the stuffing completely hidden and prevent the toy from stretching.
If you plan to wash the toy, make sure to use a permanent fabric marker or textile pen and heat-set it according to the manufacturer's instructions, or simply embroider the freckles with a few small French knots instead.
