🧶 Beautiful ✨ Detailed 💝 Adorable

Twinkletoes Tiny Gecko Amigurumi Pattern

Twinkletoes Tiny Gecko Amigurumi Pattern
4.5★Rating
2-3 HoursTime Needed
2.5KMade This
✂️

Beginner Friendly Level

Perfect for those just starting their crocheting journey, with clear instructions and simple techniques

⏱️

Quick Craft

Fits nicely into a free afternoon — 2 to 5 hours of focused, enjoyable crocheting.

🐥

Charming Critter

Delightful animal designs with sweet details that capture the essence of your favorite woodland and farmyard friends.

About This Twinkletoes Tiny Gecko Amigurumi Pattern

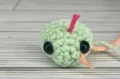
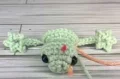
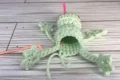
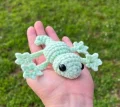
Twinkletoes Tiny Gecko Amigurumi Pattern crochet pattern - detailed view

This pattern is a fantastic choice for market makers since it's so fast to finish. It looks adorable as a backpack keychain or just sitting on a shelf as a handmade gift for nature lovers.

Why You'll Love This Twinkletoes Tiny Gecko Amigurumi Pattern

I’m a huge fan of 'one and done' projects. There’s something so satisfying about finishing a round and realizing your amigurumi is already fully assembled. Plus, those tiny toes are just the cutest thing ever—they give the gecko so much character without any extra sewing effort!

Twinkletoes Tiny Gecko Amigurumi Pattern step 1 Twinkletoes Tiny Gecko Amigurumi Pattern step 2 Twinkletoes Tiny Gecko Amigurumi Pattern step 3 Twinkletoes Tiny Gecko Amigurumi Pattern step 4

Switch Things Up

I’ve always had a soft spot for little garden visitors, and there’s something so charming about the way a gecko just clings to a wall with those wide, sticky-looking toes. When I first sat down to design Twinkletoes, I knew I wanted to capture that specific silhouette without making the assembly a total nightmare. Let’s be real—nobody actually enjoys sewing four tiny legs onto a miniature body! That’s why I went the no-sew route, building the limbs right into the rounds as you go.

It might feel a little fiddly the first time you work that special leg stitch, but once you see that first little foot pop out, it’s pure magic. I’ve made quite a few of these now, and I’ve found that they look just as good in a sleek, solid cotton as they do in a wild, variegated yarn. If you’re feeling adventurous, try using a glow-in-the-dark yarn for a fun night-time gecko friend! My biggest tip is to just take your time with the tail curving at the end. That little bend really gives the gecko its personality and makes it look like it’s ready to scurry off your palm.

Common Mistakes & How to Fix Them

✗ When working the legs in Rounds 11 and 15, make sure you don't accidentally work a single crochet into the base chain of the leg itself, or your stitch count for the body will be off.✗ If you're using bulky chenille yarn, the decreases on the tail can get a bit chunky; keep your tension tight to avoid any stuffing showing through the gaps.✗ Placing the safety eyes too high or too low can change the gecko's expression completely—use the stitch marker guide from Round 6 to keep them perfectly symmetrical.✗ Forgetting to stuff the tail as you go can make it impossible to fill later since it tapers down to just four stitches at the very tip.

Twinkletoes Tiny Gecko Amigurumi Pattern

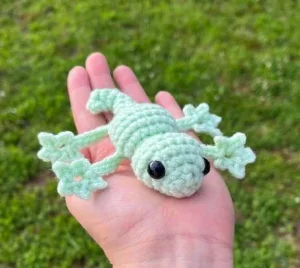
This little gecko is such a joy to whip up! I've always loved how quickly no-sew designs come together, and this tiny lizard is no exception. Whether you're making a pocket-sized buddy in smooth cotton or a squishy companion in chunky chenille, you're going to love watching those little splayed toes take shape right before your eyes. It's an absolutely perfect scrap-buster for those odd ends of green or sandy yarn you've been saving in your stash.

Beginner Friendly 2-3 Hours

Materials Needed for Twinkletoes Tiny Gecko Amigurumi Pattern

— Main Fabric

  • 01
    Medium weight yarn in your choice of color for a tiny gecko
  • 02
    Super bulky plush yarn like Premier Parfait Chunky for a larger version
  • 03
    Small amount of fiber fill for stuffing the head and body

— Tools Required

  • 01
    4.0mm crochet hook for medium weight yarn
  • 02
    5.0mm crochet hook for bulky yarn
  • 03
    10mm safety eyes for the smaller size
  • 04
    14mm safety eyes for the chunky size
  • 05
    Yarn needle for weaving and shaping the tail
  • 06
    Stitch markers to track the start of rounds
  • 07
    Sharp scissors

Progress Tracker

0% Complete

— 1. Head and Neck :

Round 1 :

Start by making 4 sc into a mc (4)

Round 2 :

Work 4 inc around the circle (8)

Round 3 :

Repeat the sequence of (1 inc, 3 sc) 2 times (10)

Round 4 :

Work 5 inc, then 5 sc (15)

Round 5 :

Work 3 sc into the first st, 8 sc, then 3 sc into the next st, and finish with 5 sc (19)

Round 6 :

sc in every st around (19)

Info :

Place a sm between the 6th and 7th stitches of Round 6. This will serve as your center guide for eye placement.

Round 7 :

sc in every st around (19)

Info :

Insert your safety eyes between Rounds 3 and 4. Use the sm from Round 6 to ensure they are evenly spaced, with about 4 or 5 stitches visible between them.

Round 8 :

Work 6 dec, then 7 sc (13)

Info :

Stuff the head firmly now before the neck narrows.

Round 9 :

Work 4 dec, then 5 sc (9)

— 2. The Body and Limbs :

Info :

To make a Leg: ch 10, sl st in the 2nd and 3rd ch from the hook (the 3rd ch is your base st). *ch 2, sl st in 2nd ch, sl st in base st* Repeat from * to * 3 more times for a total of 5 toes. Finish by working a sl st into each of the remaining 7 ch.

Round 10 :

Work 3 sc into the first st, then 1 inc in each of the next 3 sts. Put 3 sc into the next st, and finish with 4 sc (16)

Round 11 :

Work 1 Leg, 1 sc, 1 inc, repeat (2 sc, 1 inc) 2 times, then work 1 sc, 1 inc, another Leg, and 6 sc (20)

Round 12 :

sc in every st around, making sure to push the legs outward and avoiding the chain stitches of the limbs (20)

Round 13 :

sc in every st around (20)

Round 14 :

sc in every st around (20)

Round 15 :

Work 1 Leg, 1 sc, then repeat (dec, sc) 4 times. Follow this with 1 sc, another Leg, and 6 sc (16)

Round 16 :

Repeat the sequence of (2 sc, 1 dec) 3 times, then finish with 4 sc (13)

Info :

Stuff the body firmly.

Round 17 :

Repeat the sequence of (1 sc, 1 dec) 4 times, then finish with 1 sc (9)

— 3. The Tail :

Round 18 :

sc in every st around (9)

Round 19 :

Repeat (1 dec, 1 sc) 2 times, then finish with 3 sc (7)

Round 20 :

sc in every st around (7)

Round 21 :

Work 1 dec, then 5 sc (6)

Round 22 :

sc in every st around (6)

Round 23 :

Work 1 dec, then 4 sc (5)

Round 24 :

sc in every st around (5)

Round 25 :

Work 1 dec, then 3 sc (4)

Round 26 :

sc in every st around (4)

Info :

Fasten off, leaving a long tail for finishing.

Assembly Instructions

  • Use your yarn needle to sew the small hole at the tip of the tail closed.
  • Keep the remaining yarn on your needle to help shape the tail curve.
  • Gently bend the tip of the tail toward the side, positioning it near Round 23 or 24.
  • Insert your needle through the body rounds to pull the tail tip into that curved position.
  • Weave the yarn through the stitches several times to lock the curl in place.
  • Be careful not to pull the yarn through to the opposite side of the body, as this can create an unwanted indentation.

Important Notes

  • 💡This pattern is worked in a continuous spiral, so keep that stitch marker moving to avoid losing your place.
  • 💡The stitch counts provided at the end of each round do not include the stitches used to create the legs.
  • 💡If you're making this for a small child, consider embroidering the eyes instead of using plastic safety eyes.
  • 💡Tension is key for the legs—if you crochet the chains too loosely, the toes might look a bit floppy.
  • 💡Stuff the tail lightly as you go, as it becomes too narrow to fill once you reach the final rounds.

I can't wait to see your versions of Twinkletoes! Whether you go for realistic lizard colors or something bright and whimsical, this little guy is sure to bring a smile to your face. It’s such a rewarding project to finish in just one sitting. Don't forget to give the tail that signature little curl at the end—it really brings the whole character to life. Happy hooking, and enjoy your new tiny companion! 🧶🦎✨
You ask,

we answer.

FAQs

Can I use a different yarn weight for this pattern?

Absolutely! Just remember that using a lighter yarn will result in a smaller gecko, while a heavier yarn will make it much larger. Just be sure to match your hook size to the yarn you choose.

Is the leg stitch difficult for a beginner?

It looks complex, but it's really just a series of chains and slip stitches. Once you get the rhythm of the first toe, the rest are easy-peasy!

How do I make sure the eyes are level?

Use the stitch marker I recommend placing in Round 6 as a center point. Count outward from that marker to ensure each eye is the same distance from the middle.

Do I need to wire the tail to make it curl?

Nope! The instructions include a simple sewing technique at the end that uses the yarn tail to pull and secure the curve permanently without any extra materials.