About This Zen Yogi Girl Amigurumi Pattern
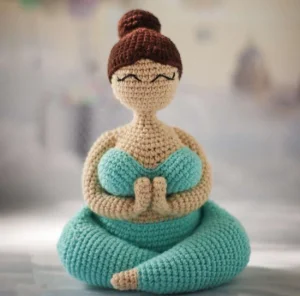
This poseable doll is a wonderful addition to any home office or yoga studio. She makes a deeply personal gift for anyone who values mindfulness and the beauty of handmade treasures.
Ideal for those with basic crocheting experience, featuring slightly more advanced stitches and techniques to expand your skills.
Takes 5-7 hours, making it an enjoyable project to finish over a couple of days.
Playful characters full of personality, designed to spark imagination and become cherished playtime favorites.
This poseable doll is a wonderful addition to any home office or yoga studio. She makes a deeply personal gift for anyone who values mindfulness and the beauty of handmade treasures.
I love how the wire frame makes her actually poseable—she really feels like she's in the middle of a meditation session! The shaping of the outfit is so clever, and the 'X-stitch' technique gives her such a professional, clean finish.
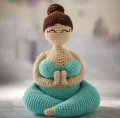
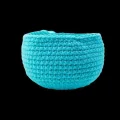
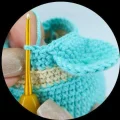
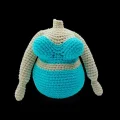
I have always found that crochet is my version of meditation. There is something about the rhythmic motion of the hook and the way the yarn slides through my fingers that just settles my mind after a long day. When I first saw this Yogi Girl design, I knew I had to share it with you all because she perfectly captures that feeling of 'zen' we all strive for. One thing that really surprised me while making her was the X-shape stitch technique. If you haven't tried it yet, it’s a total game-changer for amigurumi! By simply yarning under instead of over for that first loop, your stitches become much tighter and more defined, which is exactly what you want for a doll with this much shaping.
Another little tip from my workbench: when you are working with the wire frame, don't be afraid to use a pair of pliers to get those end loops really secure. It makes a world of difference in how sturdy she feels once she is all stuffed and assembled. I chose a soft turquoise for her outfit, but I can imagine her looking stunning in a deep lavender or even a sunny yellow. She sits so perfectly on a shelf, and every time I glance at her, I’m reminded to take a second for a deep breath. I can't wait to see the colors you choose for your own mindful maker journey!
You're going to love bringing this peaceful little lady to life. She is the perfect companion for your workspace or a thoughtful gift for the yoga lover in your life. With her calm expression and mindful pose, she reminds us all to take a deep breath and enjoy the present moment. I've designed this to be a relaxing project that results in a truly unique, poseable piece of art.
Using beige yarn, create a mr and work 6 sc into it (6)
Repeat a sequence of 1 sc followed by 1 inc three times (9)
Work 1 sc in each of the 9 sts for four rounds (9)
Repeat a sequence of 1 sc followed by 1 dec three times (6)
Repeat a sequence of 1 sc followed by 1 inc three times (9)
Repeat a sequence of 2 sc followed by 1 inc three times (12)
Work 1 sc in each of the 12 sts for twenty rounds (12)
Fasten off using the invisible method. Make a second arm exactly the same way. Do not add stuffing to the arms.
Using blue yarn, work 6 sc into a mr (6)
Perform 6 inc around the ring (12)
Repeat a sequence of 1 sc and 1 inc six times (18)
Repeat a sequence of 1 sc, 1 inc, and 1 sc six times (24)
Work 1 sc in each of the 24 sts (24)
Fasten off invisibly and repeat for the second breast piece.
Using blue yarn, work 6 sc into a mr (6)
Perform 6 inc around (12)
Repeat a sequence of 1 sc and 1 inc six times (18)
Repeat a sequence of 1 sc, 1 inc, and 1 sc six times (24)
Repeat a sequence of 3 sc and 1 inc six times (30)
Repeat a sequence of 2 sc, 1 inc, and 2 sc six times (36)
Repeat a sequence of 5 sc and 1 inc six times (42)
Repeat a sequence of 3 sc, 1 inc, and 3 sc six times (48)
Repeat a sequence of 7 sc and 1 inc six times (54)
Repeat a sequence of 4 sc, 1 inc, and 4 sc six times (60)
Work 1 sc in each of the 60 sts for seven rounds (60)
Repeat a sequence of 9 sc, 1 dec, and 9 sc three times (57)
Repeat a sequence of 17 sc and 1 dec three times (54)
Repeat a sequence of 8 sc, 1 dec, and 8 sc three times (51)
Switch to beige yarn for the skin section.
In blo, repeat a sequence of 15 sc and 1 dec three times (48)
Repeat a sequence of 7 sc, 1 dec, and 7 sc three times (45)
Repeat a sequence of 13 sc and 1 dec three times (42)
Switch back to blue yarn for the top of the outfit.
In blo, repeat a sequence of 6 sc, 1 dec, and 6 sc three times (39)
Repeat a sequence of 11 sc and 1 dec three times (36)
Work 10 sc. Join the first breast by crocheting through both the breast st and the 11th st of the body for 8 sc. Work 2 sc on the body. Join the second breast for 8 sc. Work 8 sc on the body (36)
Work 10 sc. Continue around the outer edge of the first breast for 16 sc (skipping the 8 joined sts). Work 2 sc on the body. Work 16 sc around the second breast. Work 8 sc on the body (52)
Work 1 sc in each of the 52 sts for two rounds (52)
Work 14 sc, then (1 dec, 2 sc) twice, 1 dec, 8 sc, (1 dec, 2 sc) twice, 1 dec, 10 sc (46)
Switch to beige yarn.
In blo, work 11 sc, 2 dec, (1 dec, 1 sc) three times, 2 sc, (1 dec, 1 sc) three times, 2 dec, 7 sc (36)
Work 6 sc. Join the first arm for 8 sc (skipping 4 body sts). Work 19 sc on the body. Join the second arm for 8 sc (skipping 4 body sts). Work 3 sc on the body (44)
Work 1 sc in each of the 44 sts for two rounds (44)
Stuff the body firmly, but do not stuff the arms yet.
Work 6 sc, 4 dec, 19 sc, 4 dec, 3 sc (36)
Measure and insert the wire frame through the arms and body as shown in the guide. Finish stuffing the body and arms around the wire.
Repeat a sequence of 2 sc, 1 dec, and 2 sc six times (30)
Repeat a sequence of 3 sc and 1 dec six times (24)
Repeat a sequence of 1 sc, 1 dec, and 1 sc six times (18)
Repeat a sequence of 1 sc and 1 dec six times (12)
In blo, work 12 sc (12)
Work 12 sc (12)
Fasten off and leave a long tail for sewing. Stuff the neck area.
Using blue yarn, work 6 sc into a mr (6)
Perform 6 inc (12)
Repeat a sequence of 1 sc and 1 inc six times (18)
Repeat a sequence of 1 sc, 1 inc, and 1 sc six times (24)
Repeat a sequence of 3 sc and 1 inc six times (30)
Fasten off invisibly. Make two knee pieces.
Using beige yarn, work 6 sc into a mr (6)
Work 1 sc in each of the 6 sts for three rounds (6)
Repeat a sequence of 1 sc and 1 inc three times (9)
Switch to blue yarn.
In blo, repeat a sequence of 1 sc, 1 inc, and 1 sc three times (12)
Work 1 sc in each of the 12 sts for two rounds (12)
Repeat a sequence of 3 sc and 1 inc three times (15)
Work 1 sc in each of the 15 sts for two rounds (15)
Repeat a sequence of 2 sc, 1 inc, and 2 sc three times (18)
Work 1 sc in each of the 18 sts for two rounds (18)
Repeat a sequence of 5 sc and 1 inc three times (21)
Work 1 sc in each of the 21 sts for two rounds (21)
Repeat a sequence of 3 sc, 1 inc, and 3 sc three times (24)
Work 1 sc in each of the 24 sts for two rounds (24)
Repeat a sequence of 7 sc and 1 inc three times (27)
Work 1 sc in each of the 27 sts for two rounds (27)
Repeat a sequence of 4 sc, 1 inc, and 4 sc three times (30)
Work 1 sc in each of the 30 sts for two rounds (30)
Work 7 sc. Join the knee piece by crocheting through both the knee st and the 8th st of the leg for 15 sc. Work 8 sc on the leg (30)
Work 7 sc. Continue around the outer edge of the knee for 15 sc (skipping the joined sts). Work 8 sc on the leg (30)
Work 1 sc in each of the 30 sts for five rounds (30)
Work 10 sc (10)
Stuff the leg. Flatten the top and crochet 14 sc through both layers to close. Leave a tail for sewing.
Using beige yarn, work 6 sc into a mr (6)
Perform 6 inc (12)
In blo, repeat a sequence of 1 sc and 1 inc six times (18)
Repeat a sequence of 1 sc, 1 inc, and 1 sc six times (24)
Repeat a sequence of 3 sc and 1 inc six times (30)
Repeat a sequence of 2 sc, 1 inc, and 2 sc six times (36)
Work 1 sc in each of the 36 sts for seven rounds (36)
Repeat a sequence of 4 sc and 1 dec six times (30)
Repeat a sequence of 3 sc and 1 dec six times (24)
Start stuffing the head firmly.
Repeat a sequence of 2 sc and 1 dec six times (18)
Repeat a sequence of 1 sc and 1 dec six times (12)
Perform 6 dec (6)
Fasten off and pull the hole closed.
Using brown yarn, work 6 sc into a mr (6)
Perform 6 inc (12)
Repeat a sequence of 1 sc and 1 inc six times (18)
In blo, repeat a sequence of 1 sc, 1 inc, and 1 sc six times (24)
Repeat a sequence of 3 sc and 1 inc six times (30)
Repeat a sequence of 2 sc, 1 inc, and 2 sc six times (36)
Work 1 sc in each of the 36 sts for five rounds (36)
Work 10 sc, 2 hdc, 2 consecutive dc increases, 1 hdc, 1 ss, 1 hdc, 2 consecutive dc increases, 2 hdc, 16 sc (40)
Fasten off invisibly, leaving a long tail for sewing.
Using brown yarn, work 6 sc into a mr (6)
Perform 6 inc (12)
Repeat a sequence of 1 sc and 1 inc six times (18)
Repeat a sequence of 1 sc, 1 inc, and 1 sc six times (24)
Work 1 sc in each of the 24 sts for two rounds (24)
Repeat a sequence of 1 sc, 1 dec, and 1 sc six times (18)
Fasten off invisibly, leaving a tail for sewing. Stuff the topknot lightly.
I hope you enjoyed every single stitch of this mindful project. There is something so rewarding about finishing a piece that carries such a peaceful energy. Whether she is sitting on your nightstand or joining you in your actual yoga practice, she is a beautiful testament to your skill and patience. Don't forget to share your finished photos with our community—I absolutely love seeing your color choices! Keep that hook moving and stay inspired. Happy crafting, my friend! 🧶✨
Yes, you can substitute the cotton yarn for a different weight, but remember that using a heavier yarn (like worsted) will result in a much larger doll and will require a larger hook and thicker wire frame.
This pattern uses the 'X-stitch' (yarn under) method. If you use the standard 'V-stitch' (yarn over), your doll might be slightly taller and the stitches won't look as compact.
While she will still be cute without it, the wire is what allows her to hold the meditation pose and sit upright. Without it, her arms and legs will be floppy.
I suggest using pins to mark the start and end points of the eye embroidery first. Look at the doll from the front and the side to make sure they are level before you start stitching.
